
Welcome back to the kitchen. Today, I want to share a recipe that changed my dinner plans forever.
I recently asked my family what they wanted for Sunday dinner. The answer? Enchiladas. Always enchiladas.
I pictured a plate of traditional enchiladas we had at a restaurant last week. They looked amazing. But I knew exactly how I’d feel after eating them. Heavy. Tired. Ready for a long nap.
The good news? You don’t need corn tortillas to enjoy those rich Mexican flavors.
Let’s go back in time for a second. Long ago, the Mayans made the very first enchiladas. They wrapped simple corn tortillas around small pieces of fish or meat. Then, they covered them in a rich chili sauce. It was a perfect meal.
We all love a good, authentic corn tortilla. There is nothing quite like it. But sometimes? We just want the warm, cozy flavors without the heavy, carb-loaded aftermath. We want the taste without the food coma.
That is exactly why I made this no-tortilla version.
I swapped out the traditional tortillas. What did I use instead? Riced cauliflower. It is packed with nutrients. It acts like a sponge for all the good juices in the pan.
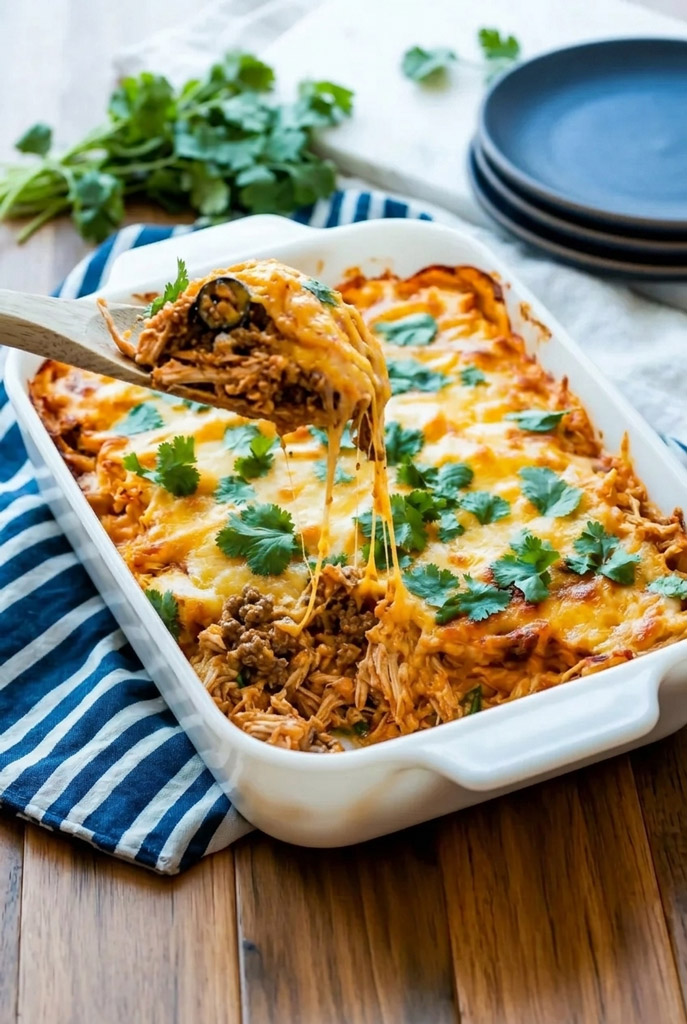
The result? A bubbly, cheesy Chicken Enchilada Casserole. It hits every single craving you have.
It is rich. It is creamy. And scooping it onto a plate is easier than pie.
Let’s tie on our aprons. Time to cook.
Recipe Overview
Before we grab our pans, let’s talk about what to expect.
This dish is made for busy nights. It takes very little prep. It gives you lots of hands-off baking time.
The difficulty level? Very beginner-friendly.
If you can stir things in a pan and grate some cheese, you can make this dish. It is easier than riding a bike.
You only need a few basic tools:
- A large sauté pan. A wide skillet works great. It gives the cauliflower plenty of room to cook.
- A standard 13×9-inch baking dish.
Don’t have a 13×9 pan? No worries. Two 8×8 square pans work just fine.
Need to plan ahead? This is a great make-ahead meal. You can put the whole thing together on Sunday. Cover it tight. Leave it in the fridge for up to two days. Then, bake it on a busy Tuesday night when you have no time to prep.
Scaling & Time Breakdown
| Metric | Details |
| Prep Time | 10 minutes |
| Cook Time | 25 minutes |
| Total Time | 35 minutes |
| Standard Yield | 9 generous portions |
| Difficulty Level | Beginner |
Ingredient Scaling Guide
| Ingredient | 1x Batch (9 Portions) | 2x Batch (18 Portions) | Half Batch (4-5 Portions) |
| Olive Oil | 1 tbsp | 2 tbsp | 1.5 tsp |
| Diced Onion | 1 small | 2 small (or 1 large) | 1/2 small |
| Minced Garlic | 2 cloves | 4 cloves | 1 clove |
| Riced Cauliflower | 1 lb | 2 lbs | 8 oz |
| Salt & Pepper | 1½ tsp salt, 1 tsp pepper | 3 tsp salt, 2 tsp pepper | 3/4 tsp salt, 1/2 tsp pepper |
| Diced Green Chiles | 4 oz can | 8 oz can | 2 oz (half can) |
| Sliced Olives | 4 oz can | 8 oz can | 2 oz (half can) |
| Cream Cheese | 8 oz | 16 oz | 4 oz |
| Enchilada Sauce | 2 cups | 4 cups | 1 cup |
| Pre-cooked Chicken | 2 lbs | 4 lbs | 1 lb |
| Cheddar Cheese | 2 cups | 4 cups | 1 cup |
Ingredients
Gathering your ingredients is half the fun. I always get everything ready before turning on the stove. It makes cooking feel like a breeze. You won’t be running around looking for garlic while your onions burn!
Here is your flavor foundation:
- Olive oil: 1 tablespoon. Get a good quality brand.
- Onion: 1 small, diced. This adds natural sweetness.
- Garlic: 2 cloves, freshly minced.
For your low-carb base:
- Riced cauliflower: 1 pound. That is about the size of one large head of cauliflower.
A quick tip about frozen cauliflower. If you use frozen riced cauliflower to save time, let it thaw first. Then, gently squeeze the extra water out with a clean kitchen towel. Why? So your casserole doesn’t turn out watery.
- Salt: 1½ teaspoons.
- Black pepper: 1 teaspoon.
To build that bold enchilada flavor:
- Green chiles: 4-ounce can, diced and drained. This gives a mild, earthy heat.
- Black olives: 4-ounce can, sliced. For a nice salty kick.
- Cream cheese: 8 ounces, diced. This makes the texture super luxurious.
Let it sit out for 20 minutes first. Soft cream cheese melts much smoother.
- Enchilada sauce: 2 cups. You can use smoky red sauce or bright green sauce. Just pick a high-quality brand. It is the star of the show.
For the protein and topping:
- Pre-cooked chicken: 2 pounds, shredded or diced. A store-bought rotisserie chicken is a lifesaver here. It adds a deep, roasted flavor.
- Cheddar cheese: 2 cups, freshly shredded.
- Fresh cilantro: A handful, chopped for a garnish.
Want a spicy kick? Swap the mild green chiles for jalapeños.
Want it extra melty? Use Monterey Jack or a Mexican blend instead of cheddar.
Step-by-Step Method
Step 1: Prepare the Base
Let’s get cooking.
First, preheat your oven. Set it to a reliable 350°F (175°C).
Grab your largest sauté pan. Put it over medium-high heat. Swirl in your olive oil.
When the oil looks shiny and moves easily? Toss in your diced onions. You should hear a gentle sizzle.
Cook them for about three minutes. They will get soft and clear. They will lose their sharp bite.
Next, stir in the minced garlic. Wait one minute. Once your kitchen smells amazing, add the cauliflower.
Fold in the riced cauliflower, salt, and pepper.
You only want to cook this for two minutes. Just enough to take the raw edge off. It should still be a little firm when you bite it.
A common mistake? Cooking the cauliflower into a pile of mush. Remember, it will keep cooking in the oven. Keep it firm.
Step 2: Build the Flavor
Turn your stove down to a gentle medium. Why? We don’t want to burn the dairy. Scorched milk ruins a dish fast.
Time to make that velvety sauce.
Stir in your green chiles, sliced olives, soft cream cheese, and enchilada sauce. Grab a sturdy wooden spoon. Mix everything gently.
Watch the white cubes of cream cheese slowly melt. They will bleed right into the vibrant enchilada sauce. It turns into a thick, creamy sauce. It will look pale-orange or light-green.
Make sure the sauce is totally smooth. No white streaks allowed.
Then, fold in your shredded chicken. Toss it thoroughly. Every single piece of chicken needs a big hug from that rich sauce.
Step 3: Assemble the Casserole
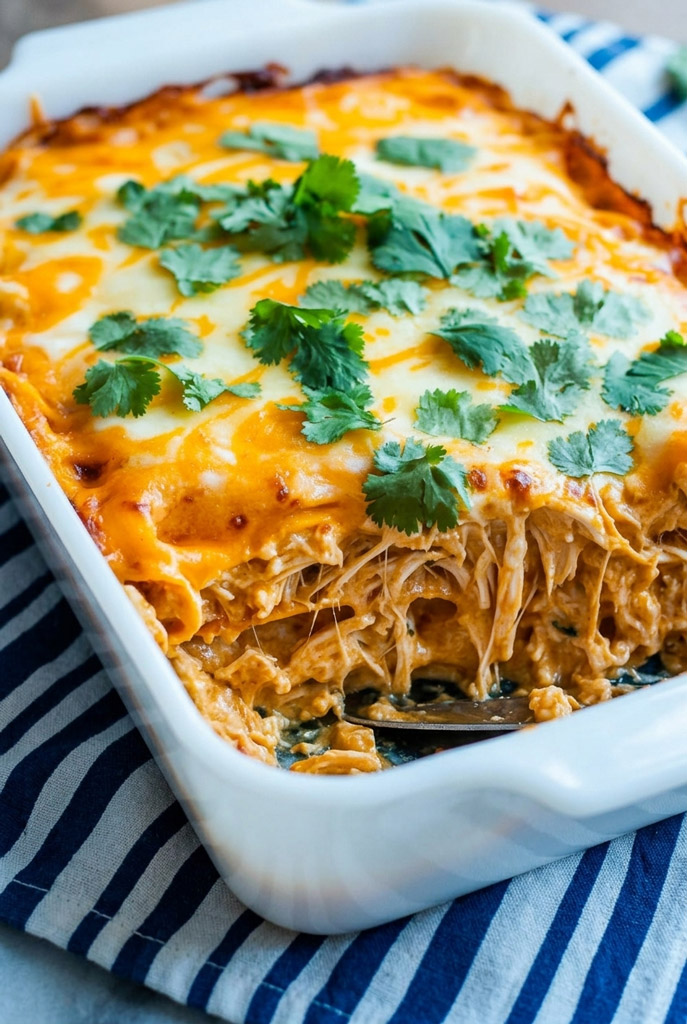
Your filling should look thick and bubble slightly in the pan. Time to build.
Take your 13×9-inch baking dish. Give it a light spray of cooking oil. This stops stubborn sticking.
Pour your warm, heavy chicken and cauliflower mix right into the middle of the dish.
Use a spatula to push the mix into the corners. Make one beautiful, flat layer.
Now for the best part.
Grab your two cups of shredded cheddar. Sprinkle it all over the top. Cover it generously from edge to edge. Every slice needs a golden, cheesy crown.
Step 4: Bake to Perfection
Put your dish in the center rack of the oven.
Bake it for 15 to 20 minutes.
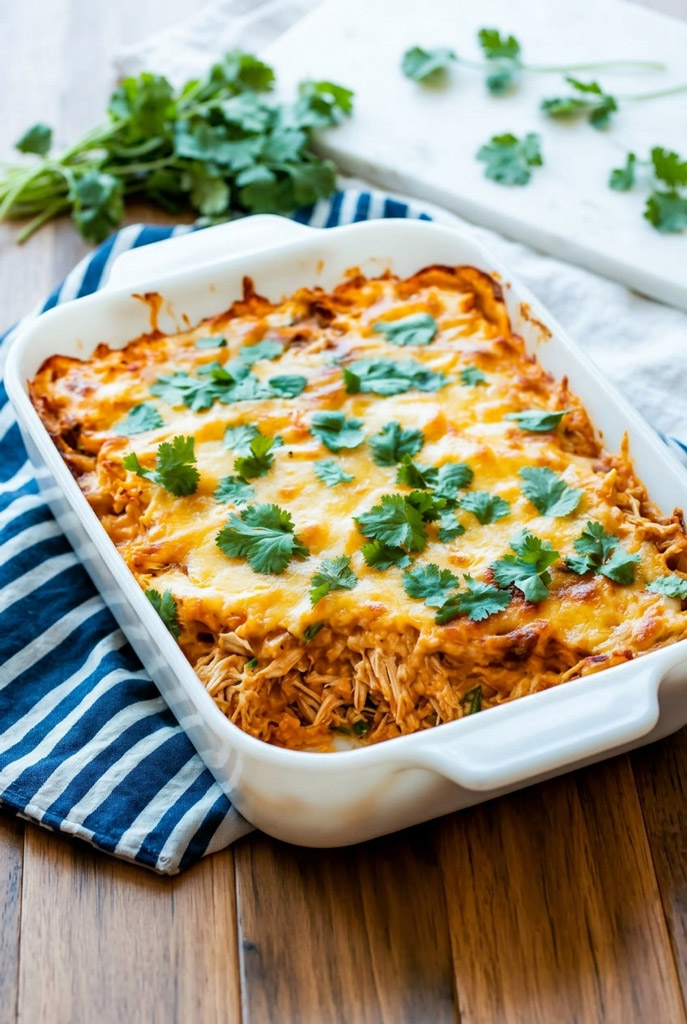
How do you know it is done? The kitchen will smell deeply savory. The cheddar cheese will look like a glossy, smooth blanket. The edges of the casserole will be happily bubbling against the glass dish.
Take it out.
Now comes the hard part. Waiting.
Let it sit for five to ten minutes. Why? Resting helps the molten cheese set up. It lets the juices settle. This makes scooping much easier.
Right before serving, sprinkle your freshly chopped cilantro on top for a pop of bright color.
Variations & Customization
I love how forgiving this recipe is. Customizing it is easier than picking a movie on a Friday night.
If you have special diets, you are in luck. This dish is naturally gluten-free and keto-friendly right out of the gate.
Need to go dairy-free?
- Swap the cream cheese for an almond or cashew version.
- Use your favorite plant-based cheese for the topping.
Want to adjust the heat? You are the boss.
- For a spicy dinner, add a pinch of cayenne pepper to the sauce.
- Use a hot enchilada sauce with fresh diced jalapeños.
- For a fancy dinner party, make a roasted red chili sauce from scratch.
- Swap the chicken for slow-braised pulled pork or chicken thighs.
You can even change it for the seasons.
- In the bright summer, add fresh sweet corn and diced zucchini to the skillet.
- In the cozy winter, mix in smoked paprika and warm black beans to make it feel hearty.
Serving & Storage
I like to serve this scooped into wide, shallow bowls.
It looks beautiful with a cold scoop of sour cream or Greek yogurt on top. Add some creamy avocado slices. Squeeze fresh lime juice over it to cut through the rich cheese.
This meal is very heavy in protein and savory flavors. So, it pairs wonderfully with something crisp.
Think of a simple cabbage slaw tossed in vinaigrette. Or blistered green beans with lime. They balance the meal perfectly.
Have leftovers? That is rare in my house. But they store easily.
Let the casserole cool completely to room temperature. Put the portions into tight containers. Keep them in the fridge for up to four days.
To reheat, just microwave a piece for 90 seconds. For a better texture, cover it with foil and bake at 350°F for 15 minutes.
Want to freeze it for later? No problem.
Make the casserole, but do not bake it yet. Cover the dish tight with plastic wrap. Press the wrap right against the cheese. Then add a tight layer of aluminum foil.
It stays good in the freezer for up to three months.
One quick note. Cauliflower releases a little water when it thaws. So, bake it straight from frozen to keep the texture perfect. Just add 20 to 30 extra minutes to your baking time.
PrintChicken Enchilada Casserole (No Tortilla)

Need those deep, rich Mexican flavors without the heavy carb crash? This casserole is your perfect answer. I swap heavy tortillas for a clever base of riced cauliflower. It acts like a sponge for all the savory pan juices. The result? A bubbly, cheesy bake that hits every craving. Plus, making it is easier than riding a bike.
- Prep Time: 10 minutes
- Cook Time: 25 minutes
- Total Time: 35 minutes
- Yield: 9 generous portions 1x
- Category: Main Course / Casserole
- Cuisine: Mexican-Inspired / Low-Carb
Ingredients
The Base:
- 1 tbsp Olive oil (Use a good quality brand)
- 1 small Onion (Diced for natural sweetness)
- 2 cloves Garlic (Freshly minced)
- 1 lb Riced cauliflower (Equal to one large head of cauliflower)
- 1½ tsp Salt
- 1 tsp Black pepper
The Filling:
- 4 oz can Diced green chiles (Drained)
- 4 oz can Sliced black olives (Drained)
- 8 oz Cream cheese (Diced and softened at room temperature)
- 2 cups Enchilada sauce (Pick your favorite high-quality red or green sauce)
- 2 lbs Pre-cooked chicken (A shredded rotisserie chicken works beautifully)
The Topping:
- 2 cups Cheddar cheese (Freshly shredded)
- 1 handful Fresh cilantro (Chopped)
Instructions
1. Prep the base.
Preheat your oven to 350°F (175°C). Grab your widest skillet. Put it over medium-high heat. Swirl in the olive oil. Toss in the diced onions. Cook for three minutes until they soften. Stir in the minced garlic for one minute.
2. Cook the cauliflower.
Fold in the riced cauliflower, salt, and pepper. Cook for exactly two minutes. You only want to take the raw edge off. Do not cook it into mush. It will finish cooking in the oven.
3. Build the velvety sauce.
Lower the stove heat to medium. We do not want to scorch the dairy. Stir in your green chiles, sliced olives, soft cream cheese, and enchilada sauce. Mix gently with a wooden spoon. Watch the white cubes of cheese melt into the vibrant sauce.
4. Combine the filling.
Make sure your sauce is perfectly smooth. Fold in your shredded chicken. Toss everything thoroughly. Every piece of chicken needs a heavy coat of sauce.
5. Assemble the bake.
Lightly grease a 13×9-inch baking dish. Pour the warm chicken mixture right into the center. Push it into the corners to make a flat, even layer. Shower the top completely with the shredded cheddar cheese.
6. Bake and rest.
Bake on the center rack for 15 to 20 minutes. You will know it is done when the edges bubble. The cheese will look like a glossy blanket. Take it out. Let it rest for five to ten minutes. This helps the cheese set up for easy scooping. Garnish with fresh cilantro right before serving.
Notes
Serving Suggestions:
- Scoop portions into wide, shallow bowls.
- Top it with cold sour cream or Greek yogurt.
- Add creamy avocado slices and a squeeze of fresh lime juice.
- Need a side dish? Pair it with a crisp cabbage slaw or blistered green beans.
Tips & Tricks:
- Using frozen cauliflower? I always let it thaw completely first. Then, I squeeze the extra water out using a clean kitchen towel. This stops the casserole from turning watery.
- Want more heat? Swap the mild chiles for fresh jalapeños.
- Dairy-free? Use cashew cream cheese and a plant-based melting cheese.
Storage & Reheating:
- Fridge: Let the bake cool completely. Store in tight containers for up to four days.
- Microwave: Reheat a portion for 90 seconds.
- Oven Reheat: Cover the dish with foil. Bake at 350°F for 15 minutes.
- Freezer: Build the dish, but do not bake it. Cover tightly with plastic wrap right against the cheese. Add a layer of foil. Freeze for up to three months.
- Baking from frozen? Bake it straight from the freezer. Just add 20 to 30 extra minutes to your baking time.
Leave a Reply