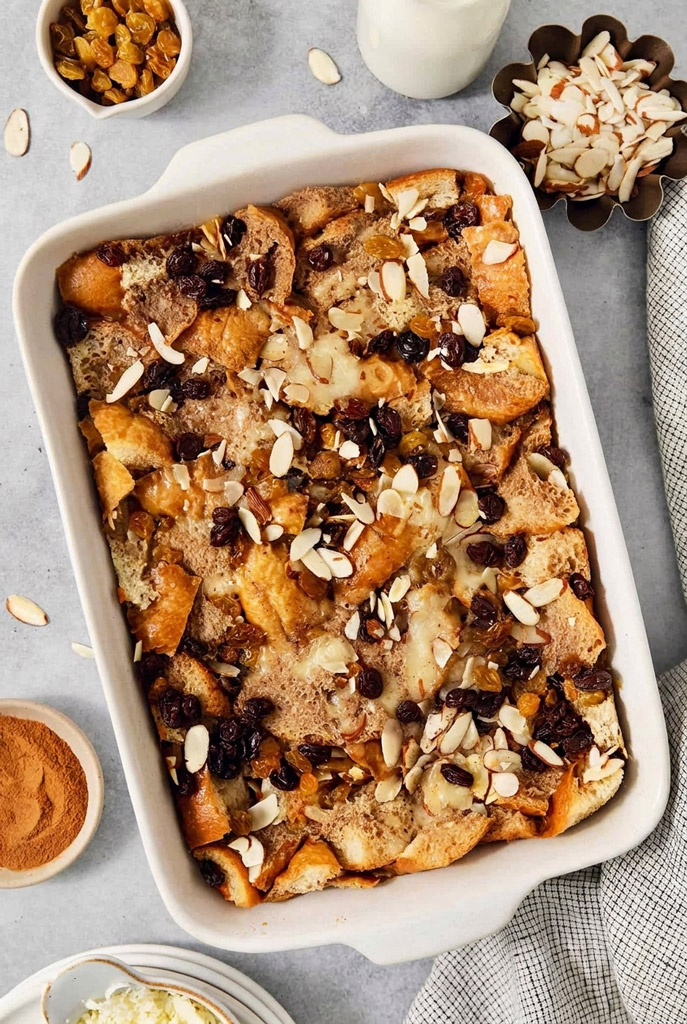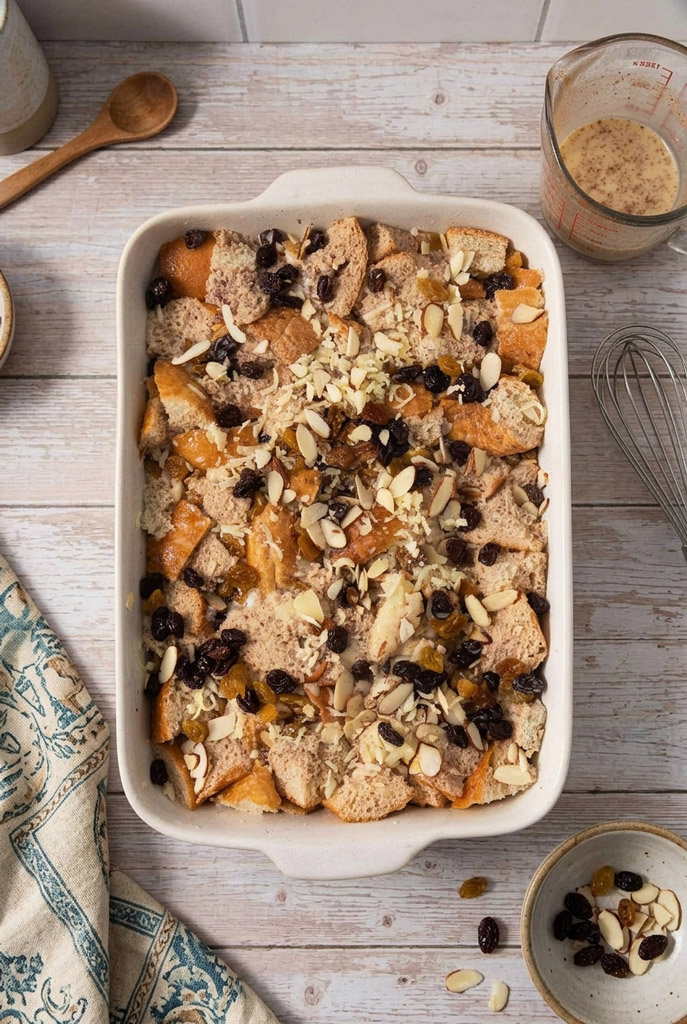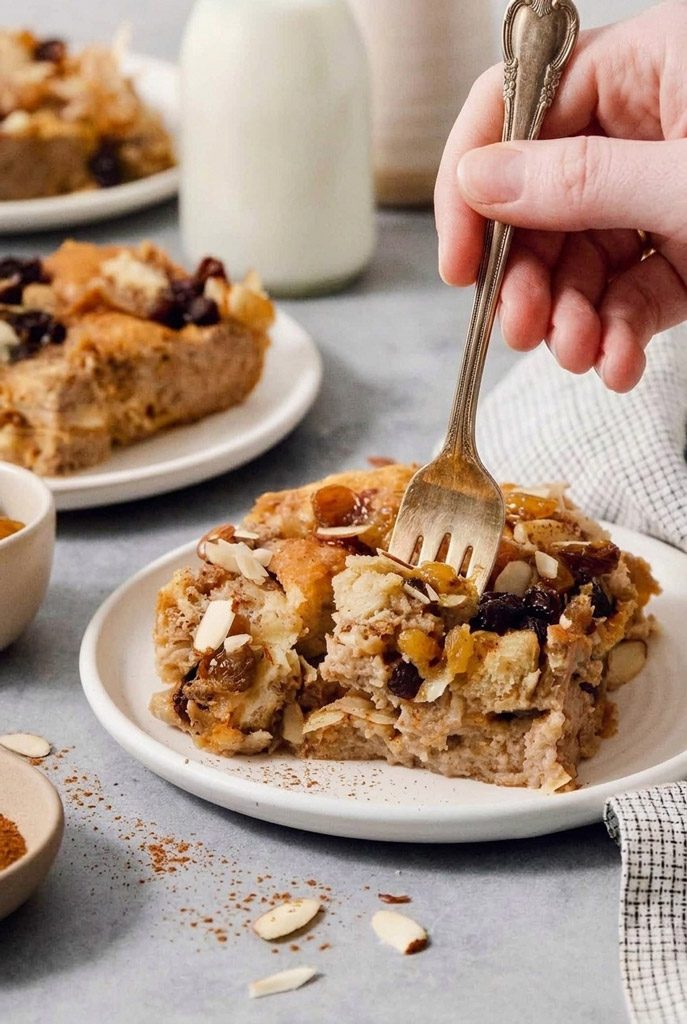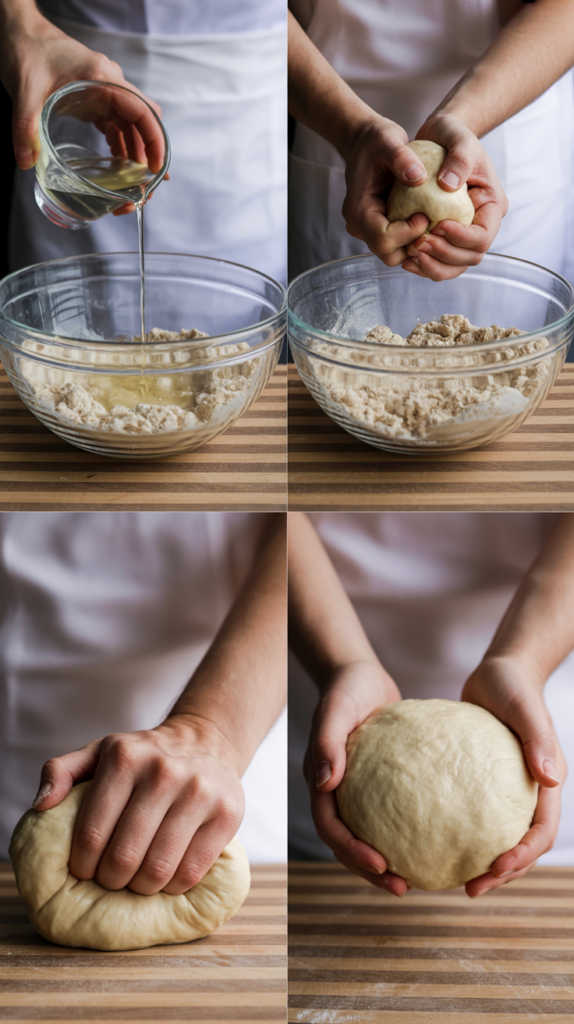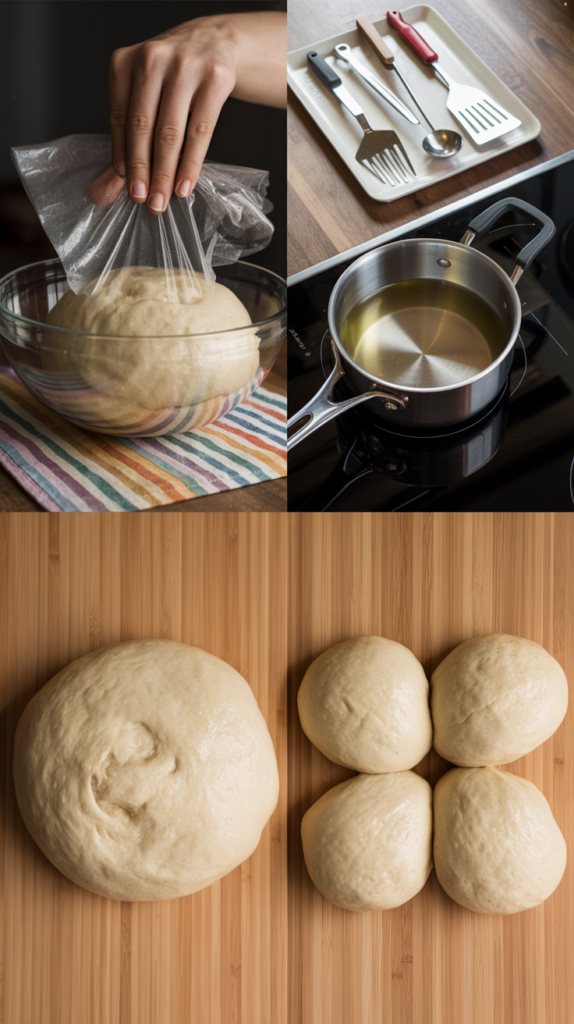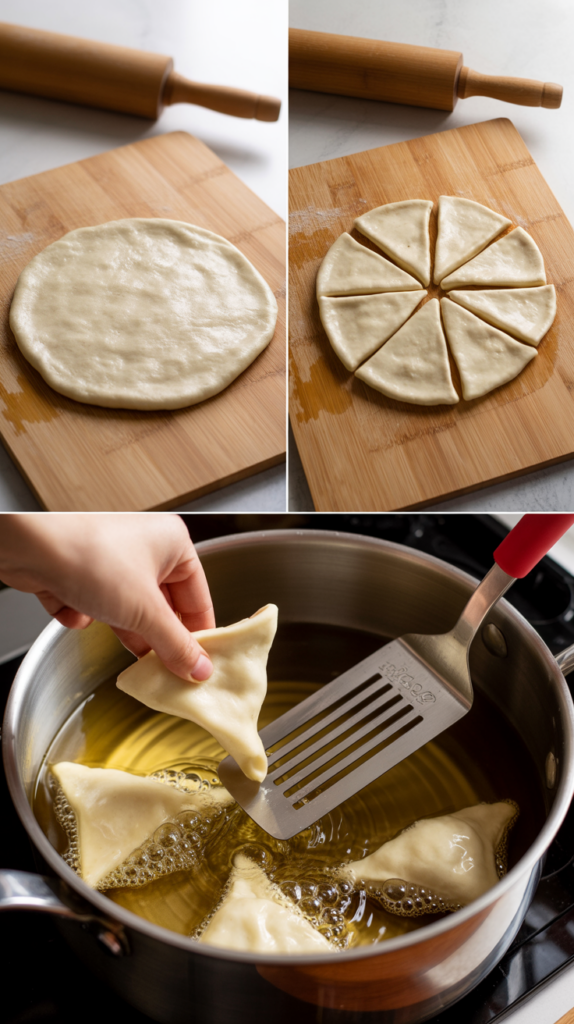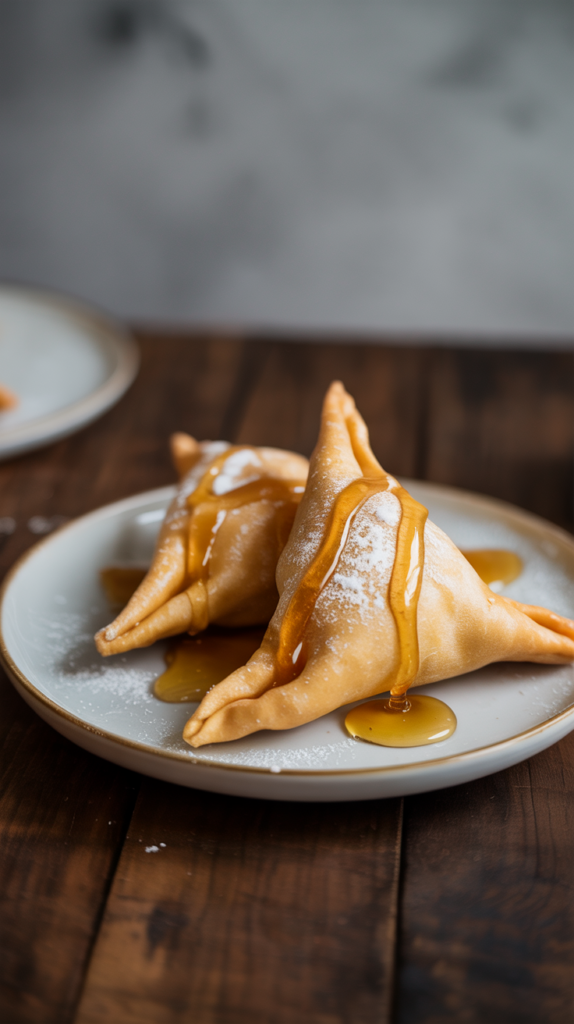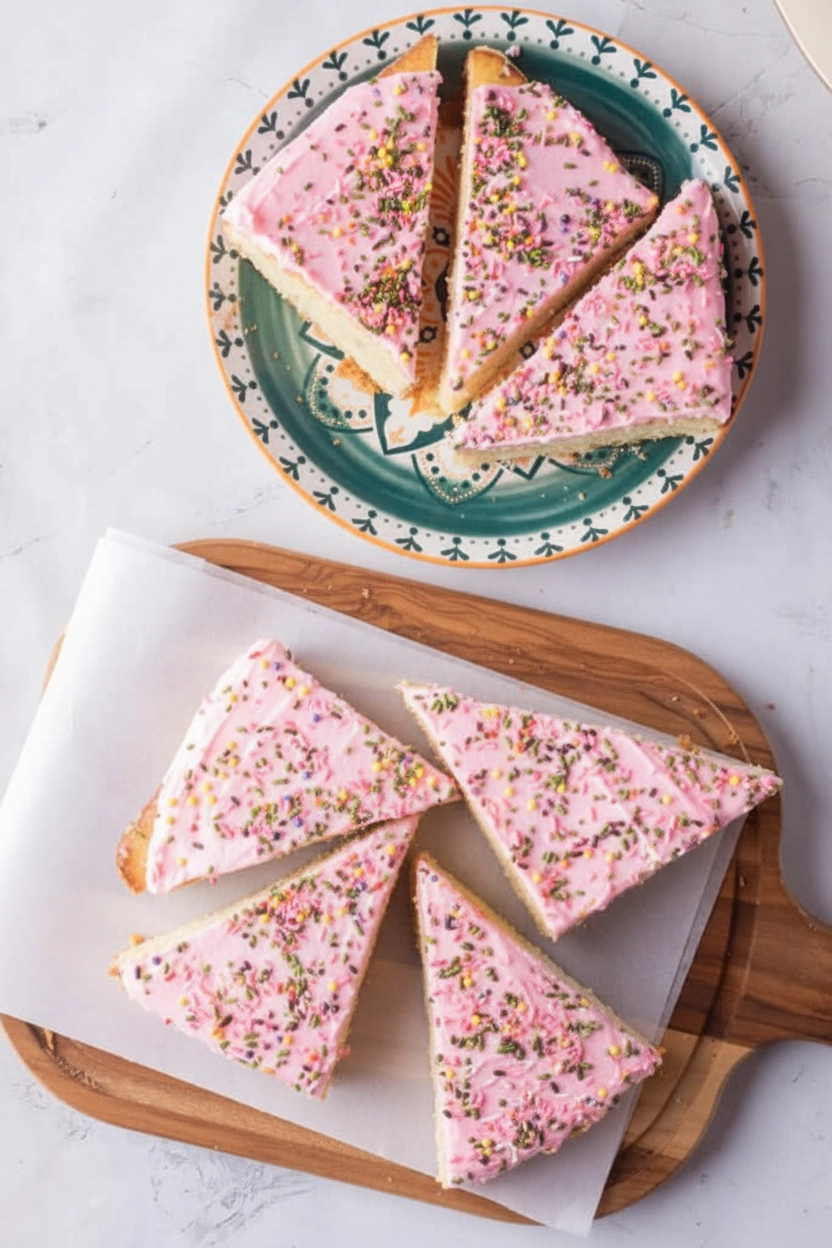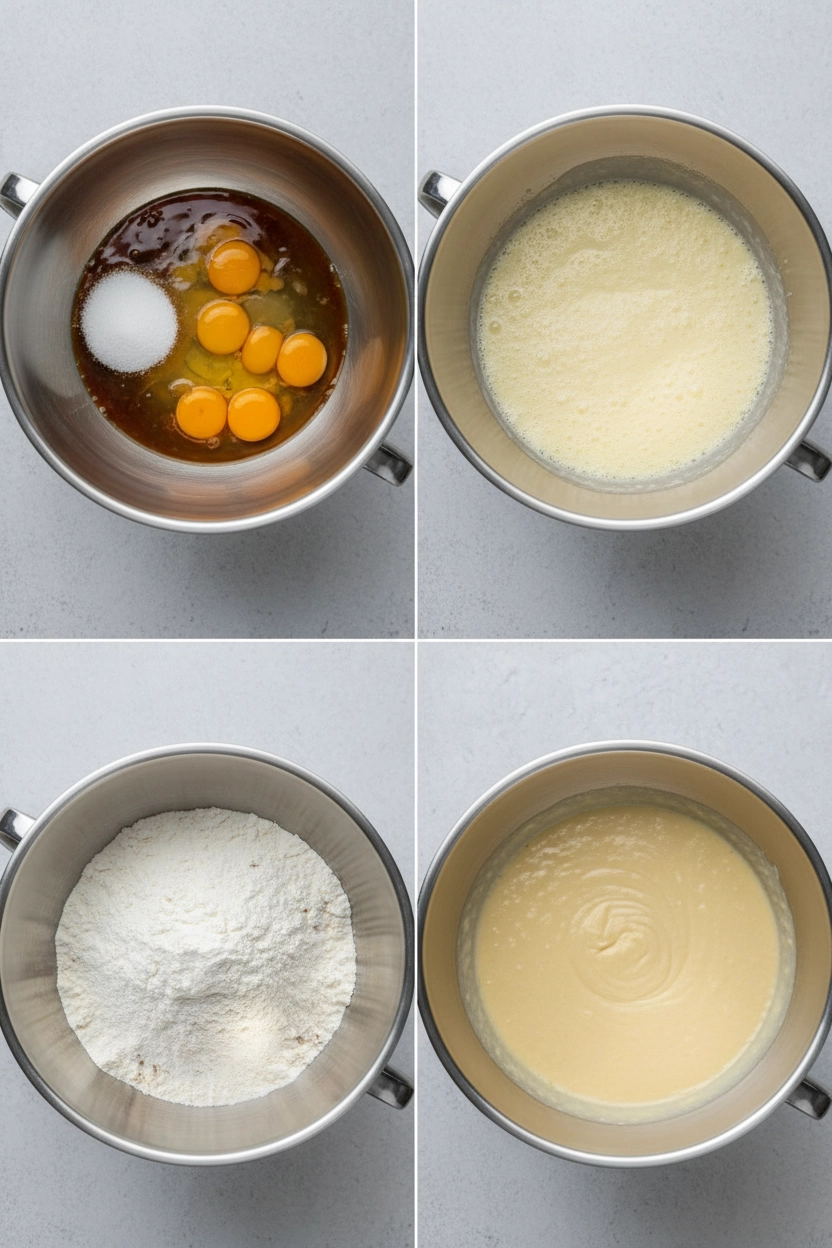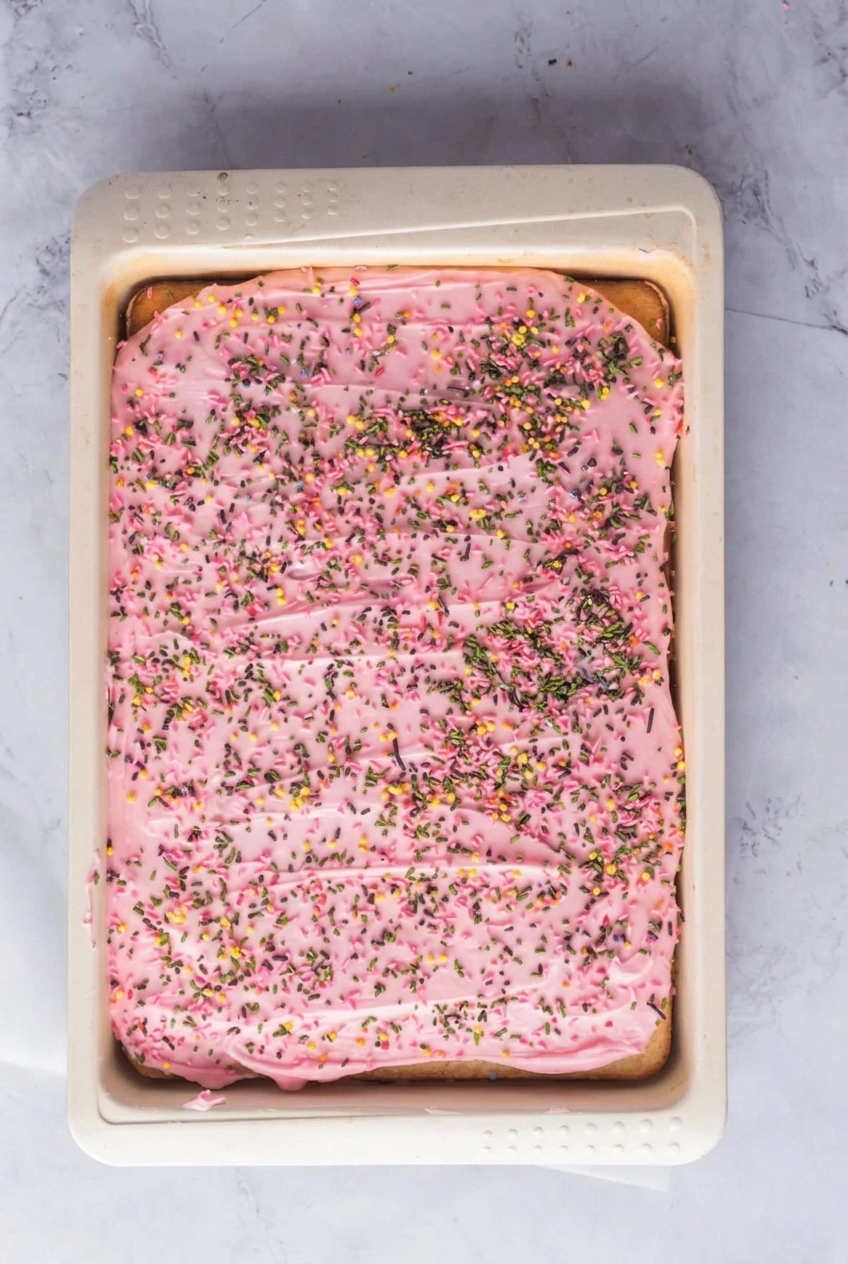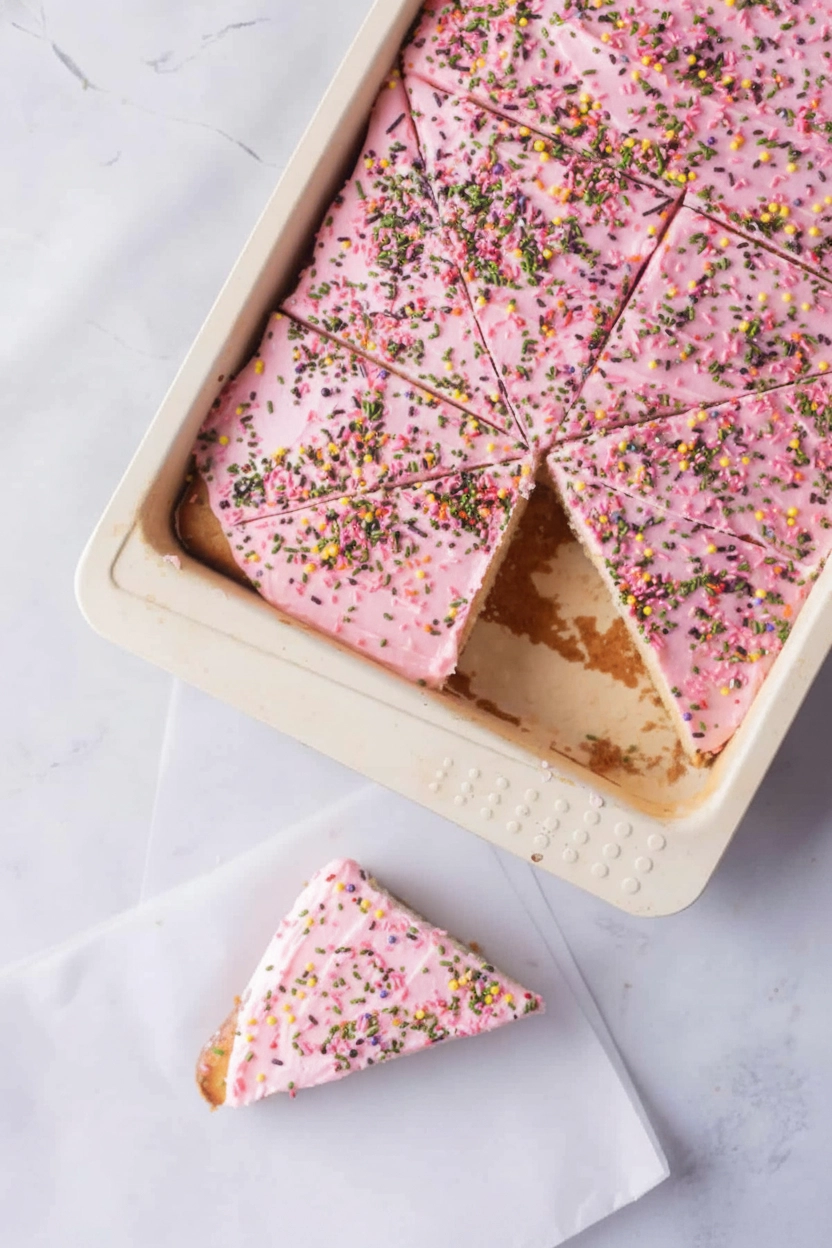
Category: Dessert

  • Classic Flan de Queso (Cheese Flan Dessert)

    Classic Flan de Queso (Cheese Flan Dessert)

    Welcome to my kitchen. Today, we are making a truly spectacular dessert. We are making Flan de Queso, or cheese flan.

    If you have never tried this Latin American classic, you are in for a treat.

    I remember the first time I tried baking a flan. I was absolutely terrified of ruining the caramel. My hands were actually shaking. But the truth? Making flan is easier than flipping pancakes. You just need a little patience.

    Traditional flan is a delicate, wobbly custard. It sits in a pool of golden caramel sauce. But when you add cream cheese into the mix? Magic happens.

    This variation is incredibly popular in Puerto Rico and Mexico. It perfectly bridges the gap between a standard flan and a heavy cheesecake. Think of it as the delicious lovechild of the two.

    What I love about this specific recipe is the balance. Many recipes call for a full eight-ounce block of cream cheese. Our version uses just two ounces.

    The result? You get that irresistible, velvety tang. But the dessert never feels overly heavy. It is an elegant, easy dessert. It looks highly impressive. Yet, it is secretly a breeze to pull off.

    Let’s tie on our aprons. Let’s get baking.

    Recipe Overview

    This recipe is designed to be stress-free. Your active time at the stove is very brief. The oven and the refrigerator will do the heavy lifting for you. Making dessert ahead of time is like giving your future self a high-five.
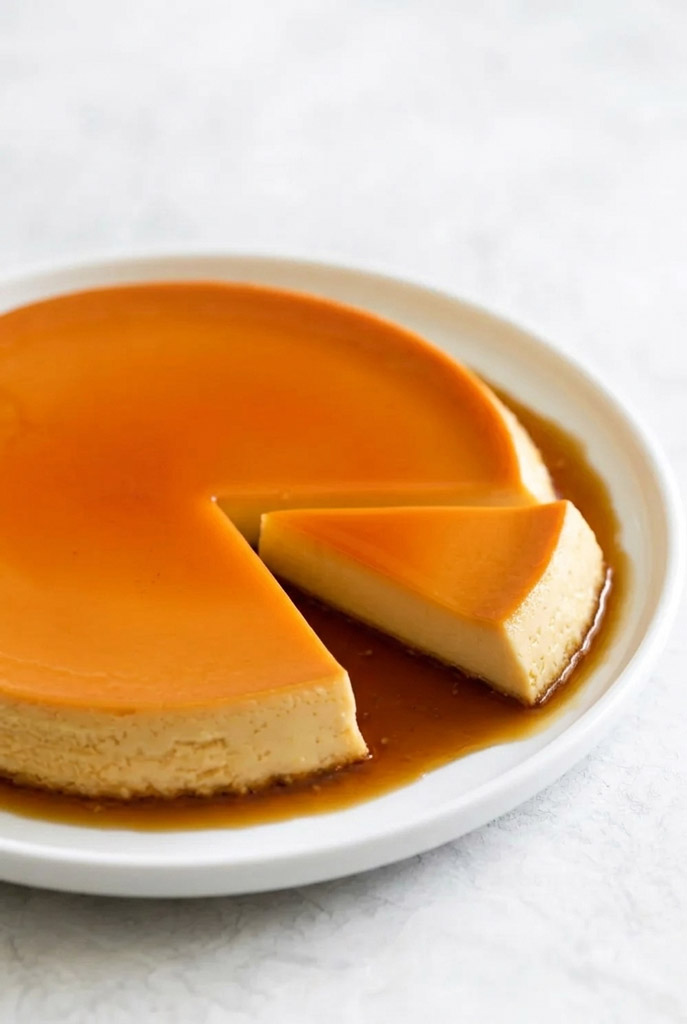
    Flan de Queso

    Here is a quick look at what to expect:

    PhaseTime RequiredDetails
    Active Prep15 minutesMelting caramel and blending custard
    Bake Time45 to 60 minutesHands-off oven time
    Cooling30 minutesResting on the kitchen counter
    Chilling4 hours (minimum)Setting in the fridge (overnight is best)
    Total Time~5.5 hoursMost of this is entirely hands-off

    Difficulty Level

    I rate this as beginner-friendly. It just has a touch of intermediate technique.

    You only need to pay close attention during two steps. First, melting the sugar. Second, the final flip. Do not worry. I will walk you through both.

    The Gear You Need

    You do not need a fancy kitchen to make this.

    • A standard 9-inch round cake pan. This is for the flan itself.
    • A larger roasting pan. This acts as your hot water bath.
    • A high-speed blender. This is your best friend for a perfectly smooth texture.

    No blender? No problem. A food processor works. A large bowl with a hand mixer works too. Just make sure to pass the liquid through a fine-mesh strainer before baking. This catches any stubborn cream cheese lumps.

    Make-Ahead Magic

    This is the perfect dessert to make in advance. In fact, it tastes better on day two. The custard needs time to set. It also needs time to soak up all those rich caramel notes.

    Servings and Scaling Guide

    This recipe generously feeds 12 people. But maybe you are hosting a small dinner. Or maybe you are throwing a massive party.

    Here is a handy scaling guide. It will help you adjust your ingredients while keeping the ratios perfect.

    IngredientHalf Batch (6 Servings)Standard Batch (12 Servings)Double Batch (24 Servings)
    Granulated Sugar6 Tablespoons3/4 Cup1 1/2 Cups
    Sweetened Condensed Milk7 oz (Half Can)14 oz (1 Can)28 oz (2 Cans)
    Evaporated Milk6 oz (Half Can)12 oz (1 Can)24 oz (2 Cans)
    Cream Cheese1 oz2 oz4 oz
    Large Eggs2 to 3 eggs5 eggs10 eggs
    Vanilla Extract1/2 Tablespoon1 Tablespoon2 Tablespoons
    SaltTiny Pinch1 Pinch1/4 Teaspoon

    Note: If you double the recipe, use two 9-inch pans. Do not use one giant pan. The center will never set properly if the pan is too large.

    The Ingredients

    Great food starts with knowing your ingredients. Let’s look at what goes into the blender.

    The Caramel Topping

    We use 3/4 cup of granulated sugar. That is it. Heat transforms this simple ingredient into liquid gold.

    The Custard Base

    We rely on a classic duo of canned milks.

    • 14 ounces of sweetened condensed milk. This adds sweetness and a syrupy depth.
    • 12 ounces of evaporated milk. This thins the mixture. It does so without adding watery excess.

    The Structure

    We use 5 large eggs.

    The Flavor Makers

    We add 2 ounces of cream cheese. We also add 1 tablespoon of high-quality vanilla extract and a pinch of salt. The salt balances the heavy sweetness perfectly.

    A Crucial Temperature Warning

    Your eggs and cream cheese must be at room temperature.

    Why? Blending cold cream cheese into a liquid is like trying to dissolve a brick. It will stubbornly refuse to mix. You will end up with little white flecks in your smooth dessert. Also, cold eggs can shock the hot caramel. The sugar will harden way too fast. Keep things at room temperature.

    Easy Substitutions

    Missing something? You have options.

    • No evaporated milk? Use whole milk. Just add one extra tablespoon of sugar to make up for the loss of concentration.
    • Want a European twist? Try mascarpone cheese instead of cream cheese. It is subtler but fabulous.
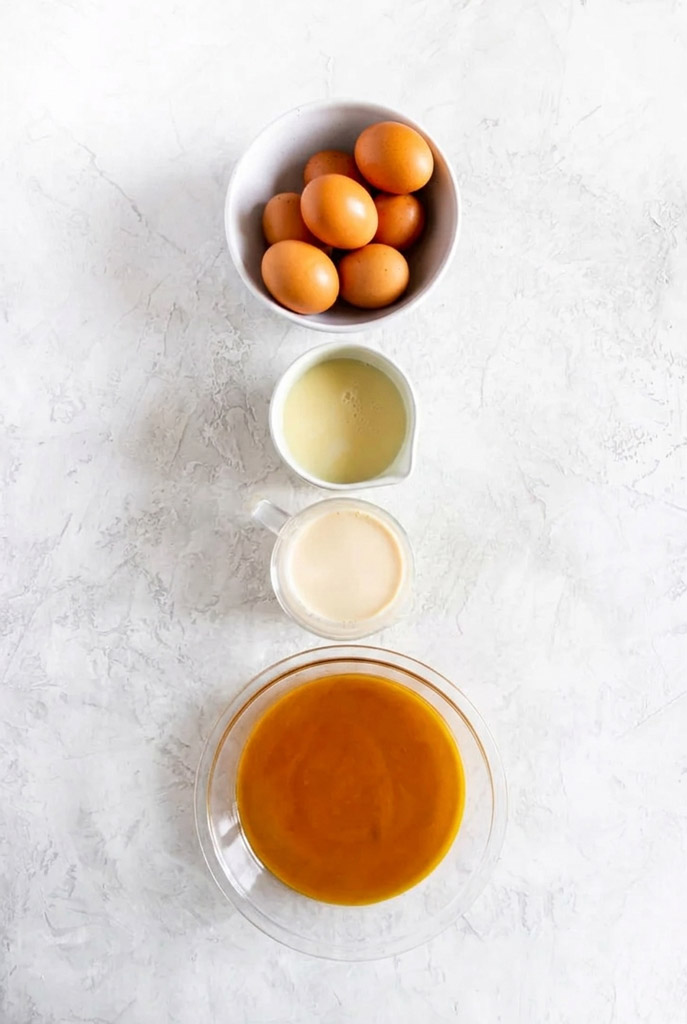
    Flan de Queso Ingredients

    Step-by-Step Method

    Stage 1: The Caramel

    Place a saucepan over medium-high heat. Pour in your sugar.

    This is the moment to pay attention. Do not walk away to check your phone. Stir the sugar constantly so it does not burn.

    At first, it will clump up. Keep stirring. Soon, it will melt into a bubbling, amber syrup. You want a deep golden color. You want a slightly nutty smell. If it turns dark brown or smells bitter, it burned. Throw it out and start over.

    The second it reaches that perfect liquid gold state? Pour it immediately into your 9-inch cake pan. Swiftly tilt and rotate the pan. You need to coat the bottom evenly before the sugar hardens.
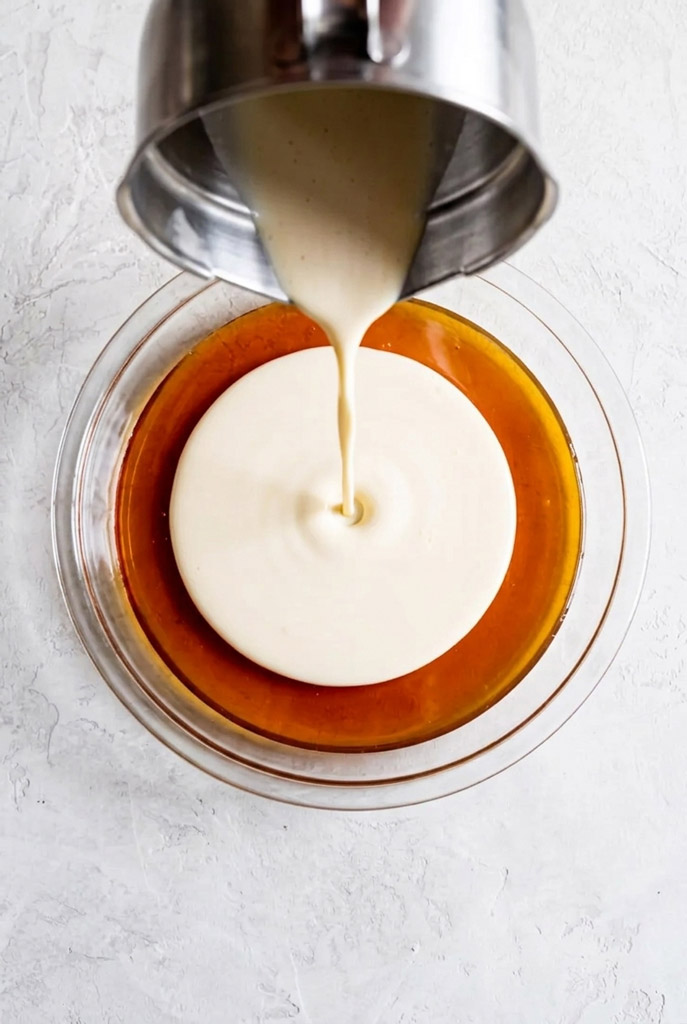
    Flan de Queso Making

    Stage 2: The Silky Custard

    Preheat your oven to 350ºF.

    Your caramel is sitting in the pan. You might hear it crackle. That is completely normal. Do not panic.

    Now, make the custard. Toss the sweetened condensed milk, evaporated milk, room-temp cream cheese, eggs, vanilla, and salt into your blender.

    Blend it on medium-high. You want it completely smooth and frothy. Gently pour this creamy liquid directly over the hardened caramel in your pan.

    Stage 3: The Water Bath

    Place your 9-inch cake pan inside your large roasting pan.

    Carefully pour hot water into the roasting pan. Stop when the water reaches about two inches up the side of the cake pan.

    Pro tip: Pull your oven rack out first. Place the empty roasting pan on the rack. Then pour the hot water in. This saves you from walking across the kitchen with a sloshing pan of boiling water.

    Think of the water bath as a cozy blanket for your flan. It insulates the custard from the harsh oven heat. This ensures it bakes gently. No curdling. No cracking.

    Stage 4: Baking and the Jiggle Test

    Bake for 45 to 60 minutes.

    How do you know when it is done? You do the jiggle test.

    Gently shake the pan. Look at the outer rim. The outer one to two inches should look firm. Now look at the center. The center should jiggle like Jell-O. It should look cohesive.

    If the center looks like watery milk, keep baking. Check again in 5 to 10 minutes.

    A common mistake is waiting for the whole thing to feel firm. If you do that, you will overbake it. The texture will turn rubbery. Remember, the flan continues to cook as it cools down on the counter.
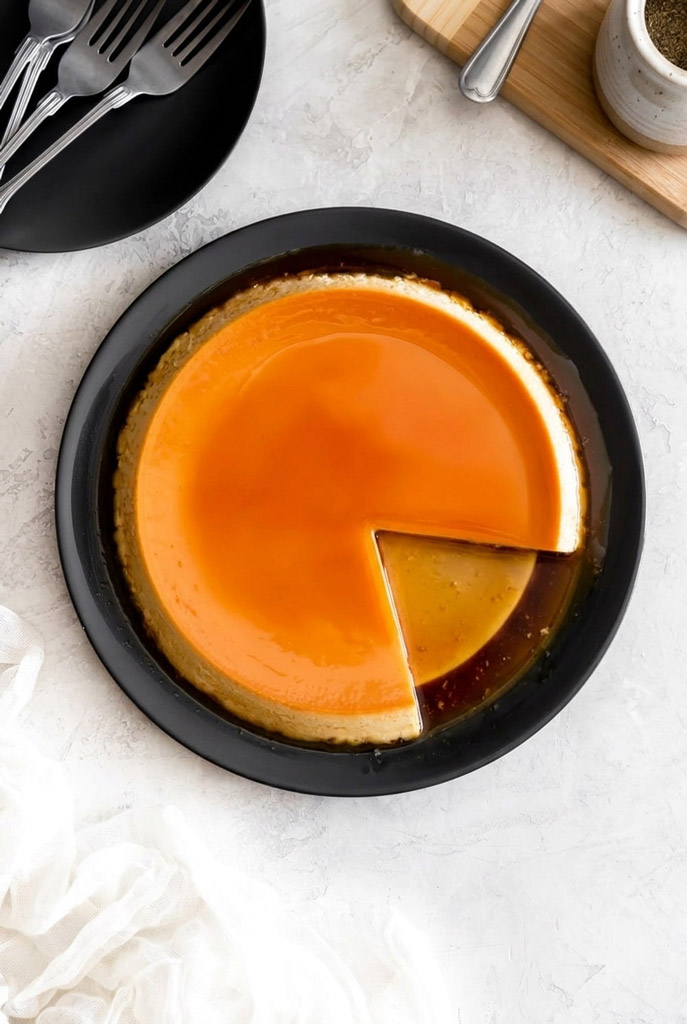
    Flan de Queso Recipe

    Stage 5: Cooling and the Big Flip

    Carefully take the pan out of the water bath. Let it sit on your counter for 30 minutes.

    Once it reaches room temperature, put it in the fridge. Leave it there for at least 4 hours. Overnight is even better.

    Ready to serve? Run a thin knife around the very edge of the pan. This breaks the seal. Place a large, flat plate upside down over the cake pan.

    Take a deep breath. Hold the pan and the plate firmly together. Quickly flip them over.

    You should hear a satisfying thwack. That is the suction releasing. Lift the cake pan away. Your masterpiece is revealed. The caramel will beautifully cascade down the sides.
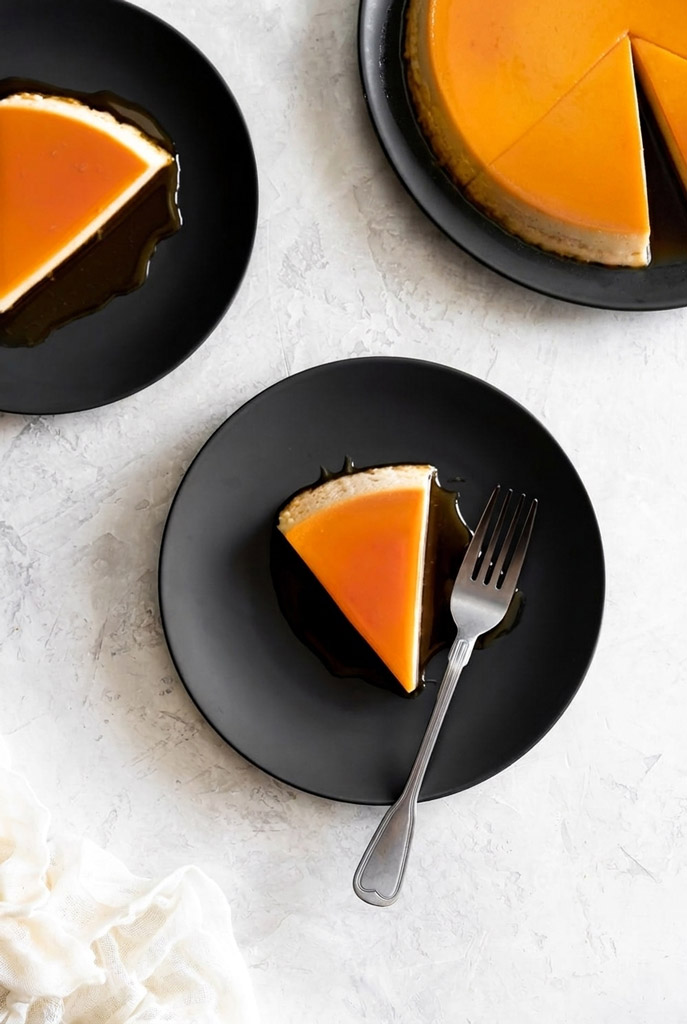
    Cheese Flan Dessert

    Fun Variations

    This recipe is a blank canvas. The classic vanilla profile is hard to beat. But you can easily change it up.

    Autumn Twist: Blend half a cup of smooth pumpkin puree into the custard. Add one teaspoon of pumpkin pie spice. Blend and bake.

    Summer Vibe: Add one tablespoon of fresh orange or lemon zest to the blender. The bright citrus oils cut through the rich dairy perfectly.

    Dairy-Free: The market is great for this now. Swap the canned milks for coconut-based canned equivalents. Use a plain dairy-free cream cheese. You will get a lovely tropical coconut flavor.

    Ultra-Rich: Want that super dense, heavy texture found in traditional Puerto Rican recipes? Just increase the cream cheese to a full 8-ounce block.
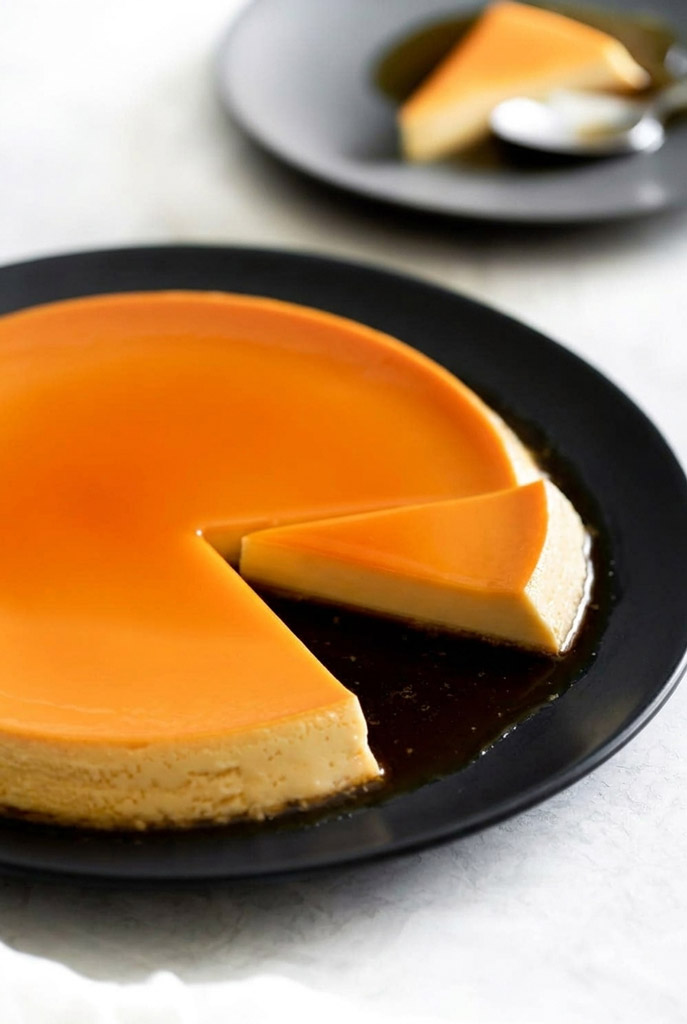
    Classic Flan de Queso

    Serving and Storage

    When plating this dessert, let the flan shine.

    • Cut generous slices.
    • Spoon extra caramel from the plate over every piece.
    • Serve with fresh raspberries or blackberries. The tartness cuts the sweet perfectly.
    • Add a tiny sprig of fresh mint for a pop of color.
    • Pair it with a hot cup of dark, black coffee or espresso.

    If you actually have leftovers, storage is simple. Keep the flan on its plate. Cover it loosely with plastic wrap. It stays fresh in the fridge for up to 5 days. You eat it cold, so never reheat it.

    Can you freeze it? Yes. Wrap the unmolded flan tightly in plastic wrap. Add a layer of aluminum foil. Freeze it for up to 2 months. To serve, just let it thaw overnight in the fridge.

    Print

    Classic Flan de Queso (Cheese Flan Dessert)

    5 Stars 4 Stars 3 Stars 2 Stars 1 Star

    No reviews

    I used to be completely terrified of making flan. The thought of melting sugar into caramel? Intimidating. But honestly? It is easier than making a batch of pancakes.

    This recipe uses just two ounces of cream cheese. Why does that matter? Because it gives you the rich, velvet texture of a cheesecake. Yet, it perfectly maintains the delicate wobble of a traditional flan. The best part? Your blender does almost all the work.

    • Author: Carlos
    • Prep Time: 15 minutes
    • Cook Time: 60 minutes
    • Total Time: 5 hours 45 minutes (+ Chilling Time)
    • Yield: 12 slices 1x
    • Category: Dessert
    • Cuisine: Latin American

    Ingredients

    Scale

    The Caramel:

    • 3/4 Cup Granulated Sugar

    The Custard Base:

    • 14 oz (1 Can) Sweetened Condensed Milk
    • 12 oz (1 Can) Evaporated Milk
    • 2 oz Cream Cheese (must be room temperature)
    • 5 Large Eggs (must be room temperature)
    • 1 Tablespoon Vanilla Extract
    • 1 Pinch Salt

    Instructions

    1. Melt the Caramel

    Place a saucepan over medium-high heat. Pour in your sugar. Stir it constantly. At first, it will clump together. Keep stirring. It will soon melt into a bubbling, golden syrup. Once it smells slightly nutty and looks like liquid gold, immediately pour it into a 9-inch round cake pan. Tilt the pan quickly to coat the bottom before the sugar hardens.

    2. Blend the Custard

    Preheat your oven to 350ºF. Add the sweetened condensed milk, evaporated milk, cream cheese, eggs, vanilla, and salt into a high-speed blender. Blend on medium-high until completely smooth and frothy. Pour this liquid directly over the hardened caramel in your cake pan.

    3. Set Up the Water Bath

    Place your 9-inch cake pan inside a larger roasting pan. Pull your oven rack out slightly. Set the roasting pan on the rack. Carefully pour hot water into the roasting pan until it reaches two inches up the side of the cake pan. This water bath acts like a cozy blanket. It protects the eggs from curdling in the harsh oven heat.

    4. Bake and Test

    Bake for 45 to 60 minutes. Check it by gently shaking the pan. The outer edges should look firm. The center should still jiggle like Jell-O. Do not wait for the center to become completely solid. If you do, the flan will turn rubbery.

    5. Chill and Flip

    Remove the pan from the water bath. Let it sit on your counter for 30 minutes. Then, place it in the fridge for at least 4 hours. Overnight is always best. When ready to serve, run a thin knife around the edge. Place a large plate upside down over the pan. Hold them tightly together and flip. You will hear a suction sound when the flan releases. Lift the pan and serve.

    Notes

    Tips & Tricks

    • Temperature matters. Blending cold cream cheese into milk is like trying to dissolve a rock. It will leave white lumps. Make sure your eggs and cream cheese are at room temperature.
    • Listen to the caramel. You might hear the sugar crackle in the pan while you make the custard. Do not panic. This is completely normal.

    Serving Suggestions

    • Spoon the extra caramel from the bottom of the plate over every single slice.
    • Serve with a handful of fresh raspberries or blackberries. The tartness cuts through the heavy sweetness.
    • Pair it with a hot cup of black coffee or espresso.

    Storage Instructions

    • Keep leftover flan on the serving plate.
    • Cover it loosely with plastic wrap.
    • Store it in the fridge for up to 5 days.
    • Never reheat it. Flan is strictly a cold dessert.
    • Want to freeze it? Wrap it tightly in plastic wrap, then foil. Freeze for up to 2 months and thaw overnight in the fridge.
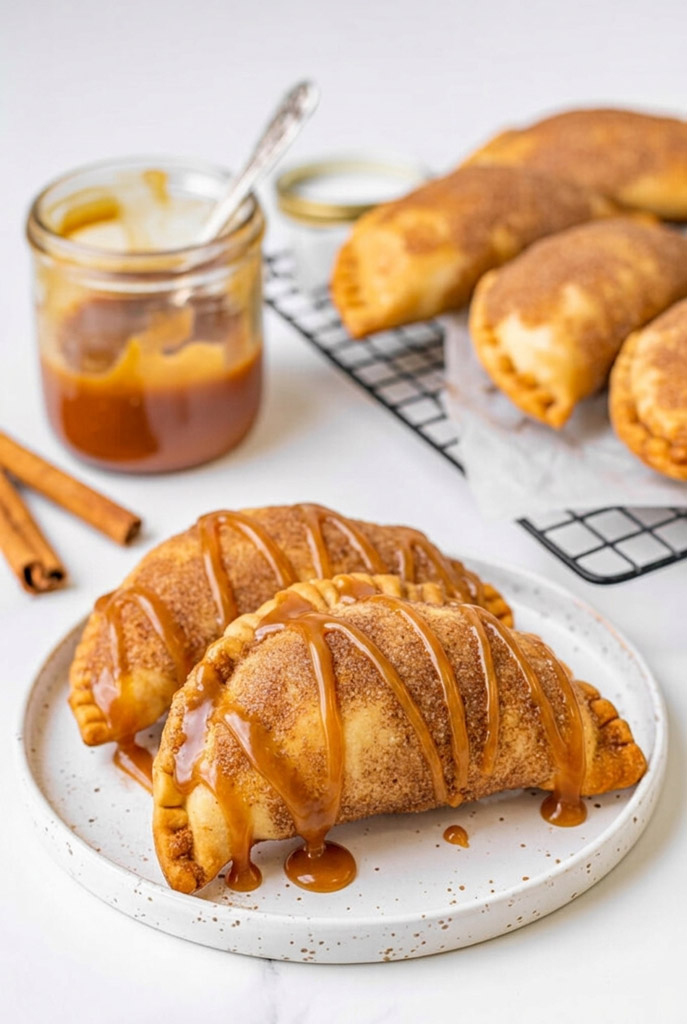
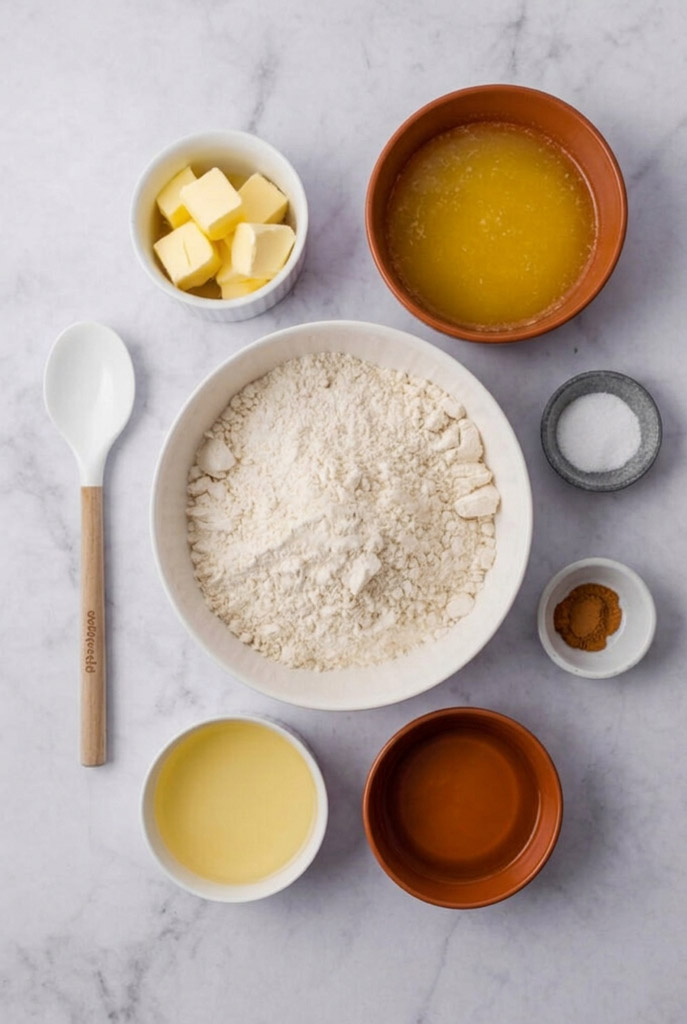
    Did you make this recipe?

    Share a photo and tag us — we can’t wait to see what you’ve made!

  • Mexican Caramel Empanadas (Empanadas de Cajeta)

    Mexican Caramel Empanadas (Empanadas de Cajeta)

    I recently made a massive batch of colorful Mexican Pink Cake for a neighborhood party. It was a huge hit. But almost immediately, my friends started asking for an encore. They wanted something sweet. Something flaky. Something with caramel.

    So, I pulled out an old favorite. Empanadas de Cajeta.

    If you have never had one, you are missing out. These little hand pies are a staple in Mexican bakeries. They are basically tiny pockets of joy.

    The star of the show? The cajeta.

    Cajeta is a rich caramel. It is traditionally made from goat’s milk. It comes from the city of Celaya, Guanajuato. The flavor is complex. It is slightly nutty. And it perfectly balances out the buttery, cinnamon-sugar crust.

    Making pastry from scratch can scare people. I get it. The pressure is on. But I designed this recipe to be simple. It delivers bakery-quality results right in your own kitchen. Baking these is easier than stealing candies from a baby.

    Let’s get our hands in some flour.

    Mexican Caramel Empanadas

    Recipe Overview

    Before we start mixing, let’s look at the plan. This is a very forgiving recipe. It is perfect for a lazy Saturday morning.

    Recipe ComponentDetails
    Active Prep Time45 minutes
    Bake Time15 minutes
    Chill Time1 hour (Dough) + 30 minutes (Assembled)
    Total Time~2 hours 30 minutes
    Yield12 to 16 empanadas
    Difficulty LevelMedium

    Need to feed a crowd? The math is simple. Just multiply the ingredients by two. The only rule? Work with the dough in small batches. It needs to stay cold on your counter.

    Tools You Need (And Easy Swaps)

    You don’t need an industrial kitchen for this.

    • A large mixing bowl.
    • Your hands.
    • A pastry cutter.

    No pastry cutter? No problem. Two forks will work fine. You can even pulse the butter in a food processor.

    You will also need a rolling pin and a round cutter. A small bowl works great to trace 4-inch circles. You also need some parchment-lined baking sheets.

    Want to work even faster? Use a Mexican tortilla press. Just line it with a cut-open ziplock bag. It makes perfect dough circles every single time.

    Make-Ahead Friendly

    This recipe loves to wait. You can make the dough two days early. Just wrap it tight and keep it in the fridge.
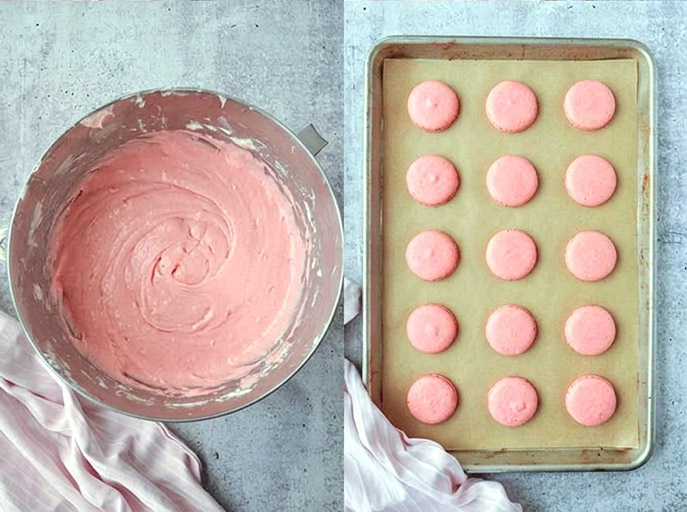
    Or, you can build the empanadas completely. Put them on a baking sheet. Freeze them solid. Then, toss them in a freezer bag. When a craving hits later? Pop them in the oven straight from frozen. Just add a few extra minutes to the timer.

    What You Need

    The beauty of this pastry is the simple ingredient list. Here is exactly what we are using today.

    IngredientAmountNotes
    All-Purpose Flour2.5 cupsGives structure without being tough.
    Salt1 teaspoonBalances the sweet.
    Ground Cinnamon1 tablespoonMixed right into the dough.
    Unsalted Butter2/3 cupMust be cubed and ice cold.
    Ice Water~1/2 cupBinds the dough together.
    Cajeta13 ouncesOr thick dulce de leche in a glass jar/can.
    Large Egg1Mixed with water for a sealing wash.
    Melted Butter1 stickFor the finishing touch.
    Granulated Sugar1/2 cupFor the outside coating.
    Ground Cinnamon1.5 teaspoonsFor the outside coating.
    Mexican Caramel Empanadas Ingredients

    Chef’s Note: The butter must be ice cold. Why? Cold butter creates little pockets of steam in the oven. That steam makes the crust flaky. You can swap in vegetable shortening if you want a crumblier texture. A half-and-half mix works great too.

    And a quick warning on the filling. Do not buy the thin, squeezable caramel syrup in plastic bottles. It will melt and run everywhere. Buy the thick stuff in a jar.

    How to Make Them

    1. Making the Dough

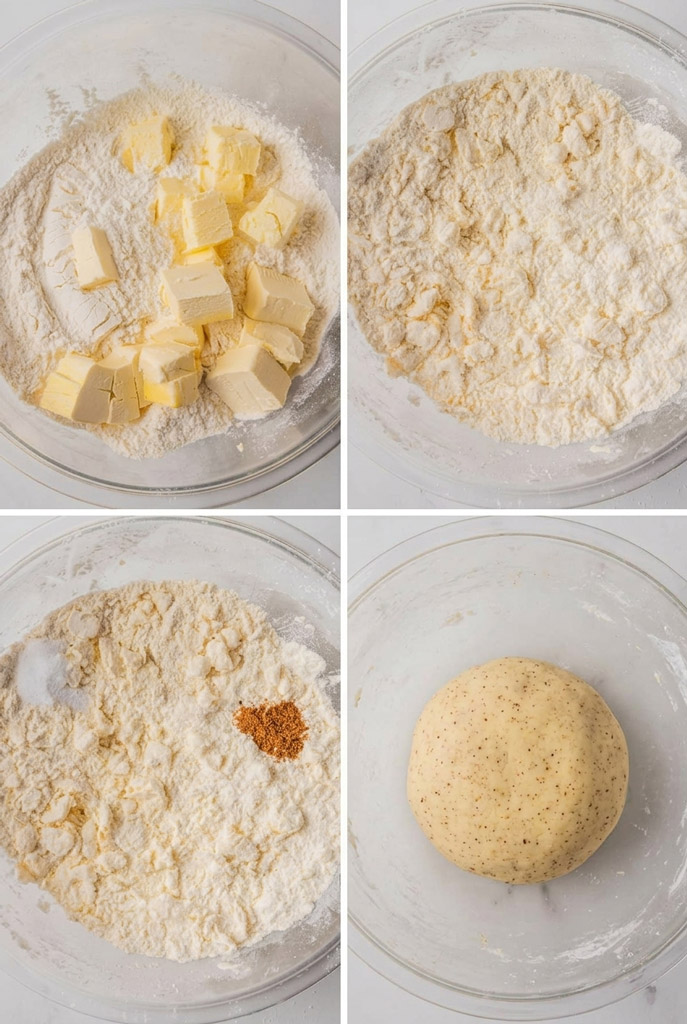
    First, grab your large bowl. Mix the flour, salt, and cinnamon together. Toss in your cold, cubed butter.

    Cut the butter into the flour using your pastry cutter. You want it to look like wet sand. Seeing a few pea-sized lumps of butter? That is exactly what you want.

    Next, drizzle in the ice water. Do this one tablespoon at a time. Use your hands to gently bring the dough together. Squeeze it. Does it hold its shape? Stop watering it. It should never feel wet or sticky.

    Wrap the dough in plastic wrap. Put it in the fridge for one hour. This step relaxes the gluten. It stops your pastry from shrinking later.

    Dough Making

    2. Rolling and Filling

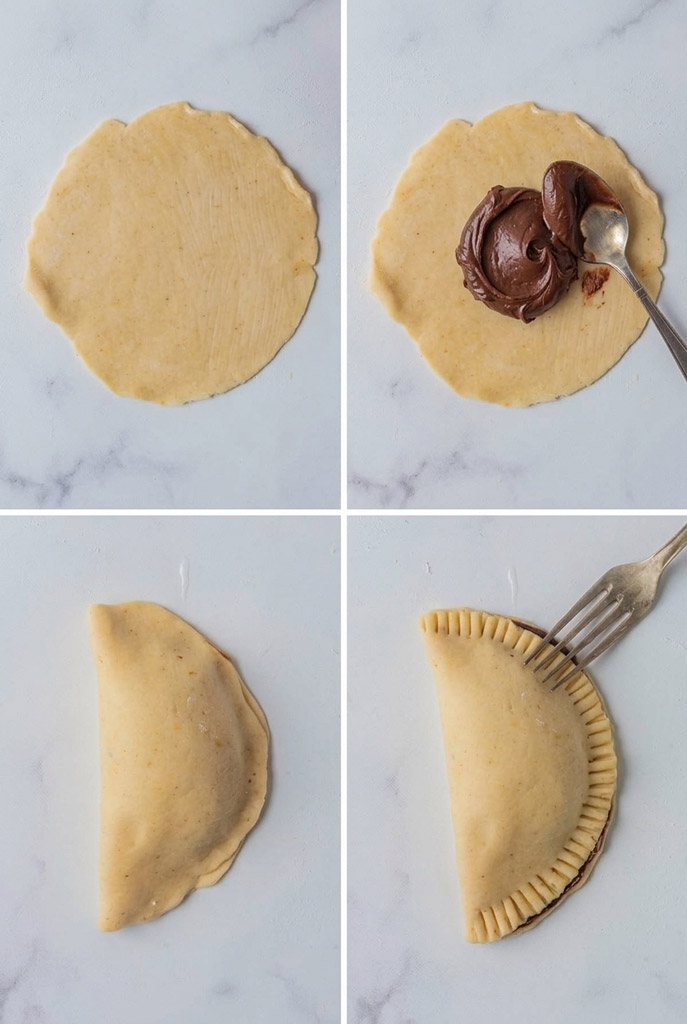
    Pull the dough out. Divide it into 12 to 14 equal balls. Keep a towel over them so they don’t dry out.

    Flour your counter. Roll one ball out into a circle. It should be 4 inches wide and 1/8 inch thick.

    Now for the filling. Grab two spoons. Scoop exactly one tablespoon of cajeta with the first spoon. Use the second spoon to scrape it into the dead center of the dough.

    Stop right there. Do not add more caramel. Too much filling is a bad idea. It will blow out in the oven.

    Making and filling Mexican Caramel Empanadas

    3. Sealing Them Up

    Take your egg wash. Brush it lightly around only one half of the dough circle’s edge.

    Fold the dry half over the filling to meet the wet edge. Stop before you press it shut. Cup your hand gently over the filling. Press outward. You are pushing the trapped air out. Air pockets will explode in the oven.

    Now, pinch the edges closed. You can crimp them with a fork. Or, twist the edges with your fingers for a traditional look.

    4. The Cold Chill and Bake

    Put your finished empanadas on the baking sheets.

    Do not skip this next part. Put the whole baking sheet in the freezer for 30 minutes. Or, the fridge for an hour.

    This makes the butter cold again. It also drops the temperature of the caramel. This is your safety net. It stops the filling from leaking.

    While they chill, turn your oven to 375°F.

    Take the cold empanadas out. Brush the tops with egg wash for a nice shine. Bake them for exactly 15 minutes. They should be golden brown.

    5. The Final Sparkle

    Take them out of the oven. Let them sit on the hot pan for just two minutes.

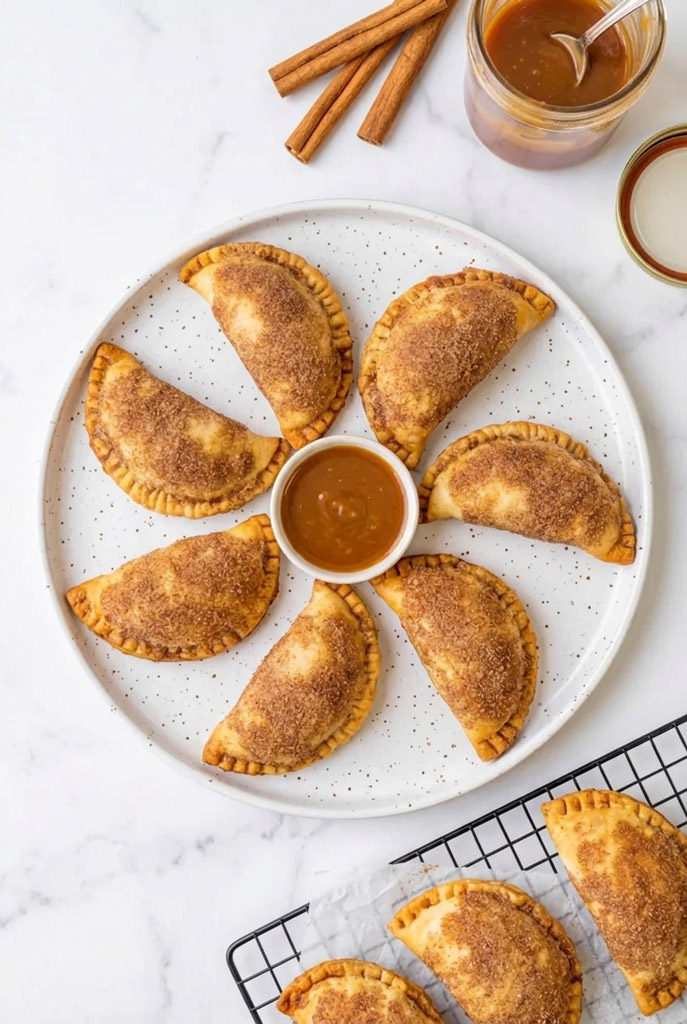
    While they are still warm, brush them heavily with the melted butter. Then, immediately drop them into your cinnamon-sugar mix. The butter acts like glue. It gives you a thick, sparkly, sweet crust.

    Empanadas de Cajeta

    Fun Variations

    • Stop the Leaks: Want a 100% guarantee your caramel stays inside? Ask a Mexican baker. They will tell you a secret. Whisk one raw egg yolk directly into your 13 ounces of cajeta before filling the dough. It thickens the caramel just enough. It won’t change the sweet taste at all.
    • Add Some Crunch: Want to make these fancy? Fold some toasted pecans into your cajeta. Chopped walnuts work too. The crunch mixed with the smooth caramel is amazing.
    • Allergy Swaps: Need gluten-free? Swap the flour for a 1:1 gluten-free baking blend. Make sure it has xanthan gum in it. Need vegan? Use cold plant-based butter sticks. Swap the egg wash for almond milk. And use a coconut-based vegan caramel.
    Mexican Caramel Empanadas Recipe

    How to Serve and Store

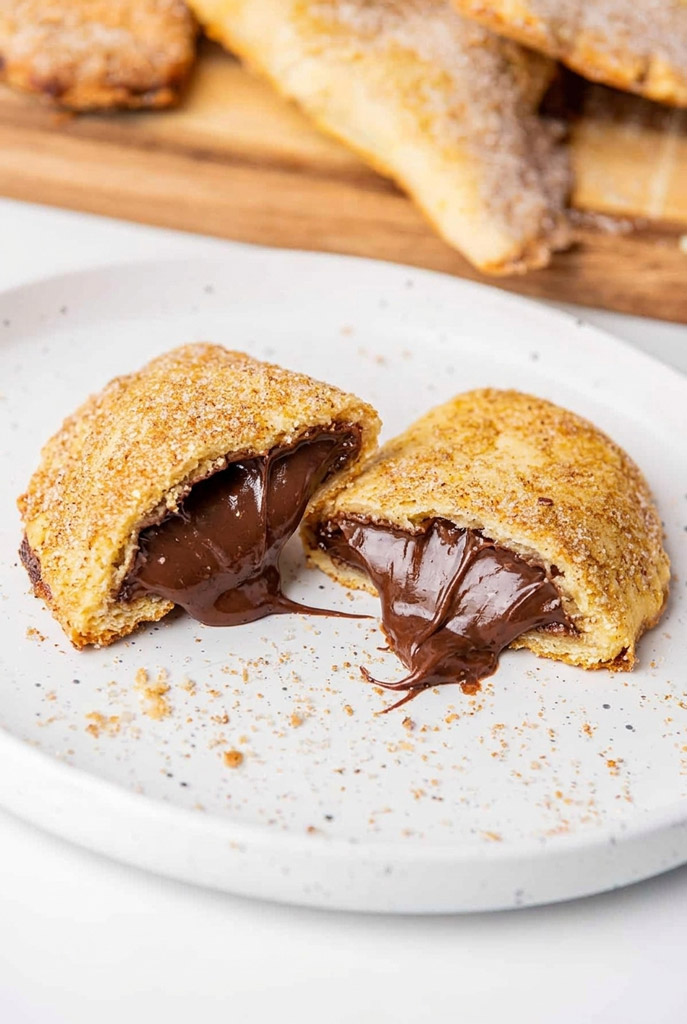
    These are incredible entirely on their own. Pair one with a hot cup of black coffee. It tastes like a warm hug.

    Want to show off for your guests? Serve them warm. Add a big scoop of vanilla bean ice cream right on top. I recently made a batch of fresh ice cream in my Ninja Creami. The hot and cold mix was out of this world.

    How to Serve Mexican Caramel Empanadas

    If you have leftovers, store them in a container on the counter. They will stay fresh for 3 days.

    To reheat them? Step away from the microwave. The microwave makes them soggy. Instead, put them in a 350°F oven for 5 to 7 minutes. They will crisp right back up. They will taste like they just came out of the bakery.

    Print

    Empanadas de Cajeta (Mexican Caramel Empanadas)

    5 Stars 4 Stars 3 Stars 2 Stars 1 Star

    No reviews

    I recently made these for a family brunch. They vanished in seconds. These little Mexican hand pies are filled with cajeta, a rich goat’s milk caramel. The crust is buttery. It has a beautiful hint of cinnamon. Baking pastry from scratch can feel scary. The good news? This recipe is incredibly simple. It delivers bakery-quality treats right in your own kitchen.

    • Author: Carlos
    • Prep Time: 45 minutes
    • Cook Time: 15 minutes
    • Total Time: 2 hours 30 minutes (+Chill Time)
    • Yield: 12 to 16 empanadas 1x
    • Category: Dessert / Pastry
    • Cuisine: Mexican

    Ingredients

    Scale

    For the Flaky Dough:

    • 2.5 cups All-purpose flour
    • 1 teaspoon Salt
    • 1 tablespoon Ground cinnamon
    • 2/3 cup Unsalted butter (must be cubed and ice cold)
    • 1/2 cup Ice water

    For the Filling:

    • 13 ounces Cajeta (or a thick dulce de leche sold in a glass jar or can)

    For the Wash and Coating:

    • 1 Large egg (mixed with a splash of water for the egg wash)
    • 1 stick Melted butter
    • 1/2 cup Granulated sugar
    • 1.5 teaspoons Ground cinnamon

    Instructions

    1. Mix the Dry Ingredients

    Grab a large mixing bowl. Combine your flour, salt, and cinnamon.

    2. Cut in the Butter

    Toss the cold, cubed butter into the bowl. Use a pastry cutter or your fingers to mix it into the flour. Stop when it looks like wet sand. You want to see small, pea-sized lumps of butter left over.

    3. Hydrate and Chill

    Drizzle the ice water in. Just do one tablespoon at a time. Gently squeeze the dough with your hands. Does it hold together? Stop adding water. It should never feel sticky. Wrap it tightly in plastic wrap. Chill it in the fridge for exactly one hour.

    4. Roll the Circles

    Take the cold dough out. Divide it into 12 to 14 equal balls. Keep them covered with a towel. Flour your counter. Roll each ball into a 4-inch circle. Keep them about 1/8 inch thick.

    5. Add the Caramel

    Grab two spoons. Scoop exactly one tablespoon of cajeta. Scrape it right into the middle of your dough circle. Resist the urge to add more! Too much caramel causes oven blowouts.

    6. Seal the Edges

    Brush your egg wash lightly on just one half of the dough’s edge. Fold the dry side over the filling. Stop. Cup your hand over the pie. Press the trapped air out. Air pockets will make your seams pop. Now, pinch the edges tightly shut with a fork or your fingers.

    7. The Crucial Chill

    Put the sealed empanadas on parchment-lined baking sheets. Freeze the whole tray for 30 minutes. Or refrigerate for an hour. This gets the butter cold again and stops the caramel from leaking.

    8. Bake Them

    Heat your oven to 375°F. Brush the tops of the cold empanadas with the remaining egg wash. Bake for 15 minutes. Watch for a golden brown color.

    9. The Cinnamon Sugar Finish

    Let the baked empanadas rest on the pan for two minutes. Brush them generously with your melted butter. Toss them immediately in the cinnamon-sugar mix.

    Notes

    Serving Suggestions

    • Eat them warm with black coffee.
    • Want to impress your guests? Serve a hot empanada with a scoop of premium vanilla bean ice cream. The hot and cold contrast is perfect.

    Tips & Tricks

    • The Anti-Leak Secret: Want zero leaks? Whisk one raw egg yolk right into your cajeta before filling the dough. It thickens the caramel just enough to make it stable in the oven.
    • Texture Upgrade: Fold chopped, toasted pecans into your cajeta. The crunch is amazing.

    Storage and Reheating

    • Storage: Keep leftovers in a sealed container on your counter. They last for up to 3 days.
    • Reheating: Step away from the microwave! It will ruin the flaky crust. Reheat them in a 350°F oven or toaster oven for 5 to 7 minutes. They will crisp right back up.

    Did you make this recipe?

    Share a photo and tag us — we can’t wait to see what you’ve made!

  • Panes Dulces Mexicanos Bisquets (Mexican biscuits)

    Panes Dulces Mexicanos Bisquets (Mexican biscuits)

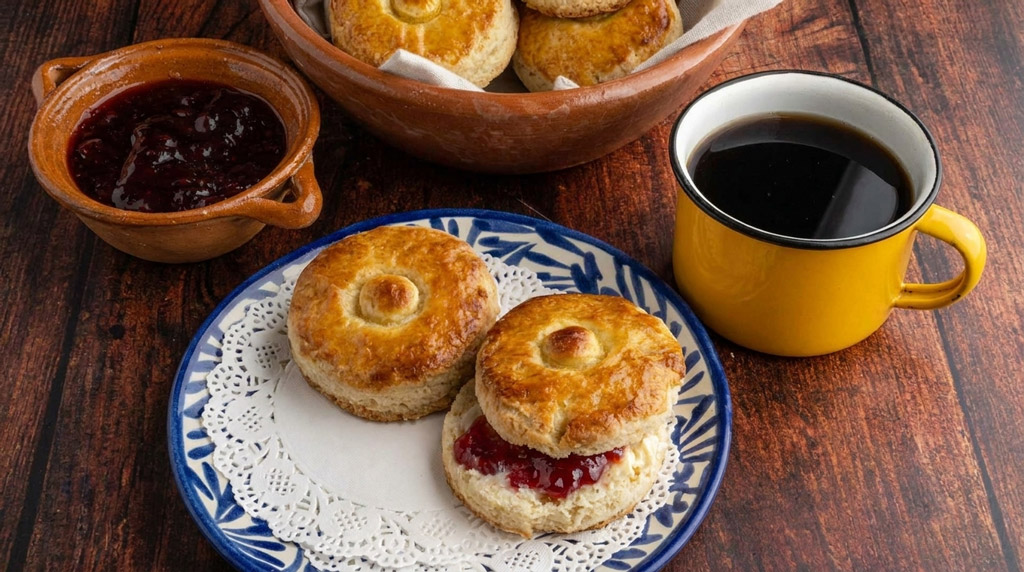
    Hey friends, today I’ll show you how to make Mexican Bisquets. Or Panes Dulces Mexicanos, if we want to be official.

    I recently tried to find a good bisquet at my local bakery. It was completely sold out. My heart dropped. But then I realized I could just make my own.

    Making these is like giving your kitchen a big, warm hug.

    Think of these pastries as a mix between a Southern biscuit and an English scone. They actually come from French bakers in Mexico. Local bakers just added more sugar. They also added a shiny egg wash. Oh, and they put a cute little “belly button” right in the middle.

    Let’s get baking.

    Panes Dulces Mexicanos Bisquets

    The Game Plan

    The good news? You can make these fast.

    This recipe moves quickly. But there is one crucial resting period. You need to let the dough sit. It makes all the difference for the texture.

    Here is what your time looks like:

    • 20 minutes of prep
    • 20 minutes of resting
    • 12 minutes of baking

    You will have hot bread on the table in under an hour.

    This batch makes 6 big biscuits. It sits right at an intermediate difficulty level. You don’t need to be a pro baker. Just be patient.

    For tools, you need a pastry cutter. If you don’t have one, your fingers work just fine. You also need a rolling pin. Grab a 3-inch round cutter and a small 1-inch metal piping tip, too.

    Scaling the Recipe

    Want to make more? Here is a quick cheat sheet if you want to double the batch.

    Ingredient6 Biscuits (Single)12 Biscuits (Double)
    All-purpose flour2 cups4 cups
    Cold butter3/4 cup1.5 cups
    Sugar1/2 cup1 cup
    Milk1/3 cup2/3 cup
    Instant yeast2 tsp4 tsp
    Baking powder3 tsp6 tsp
    Salt1/2 tsp1 tsp
    Large eggs2 total4 total
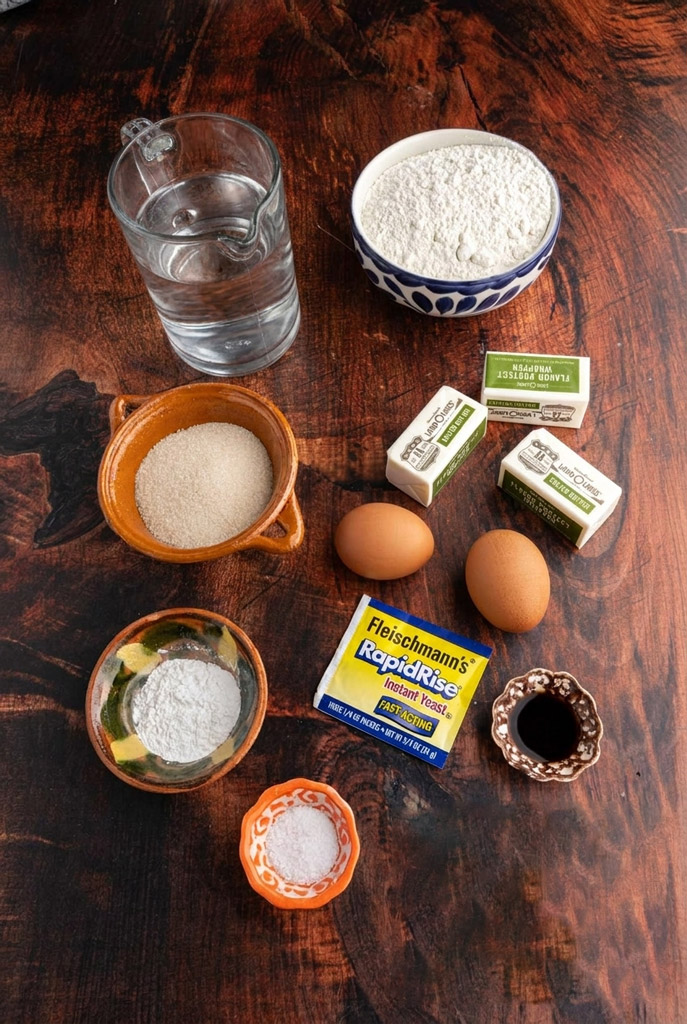
    Panes Dulces Mexicanos Bisquets Ingredients

    What You Need

    The foundation of our flaky texture is the butter. The golden rule? Your butter must be cold.

    Like, ice-cold.

    If it gets warm, it will melt into the flour. Your biscuits will end up flat like a sad pancake. We want steamy air pockets instead.

    We use a double-leavening trick here. That means using both baking powder and instant yeast. I love instant yeast. It is much easier to use than fresh yeast.

    Step-by-Step Method

    First, let’s wake up the yeast.

    Warm your milk in the microwave for about 15 seconds. It should feel like warm bath water.

    Too hot? You will kill the yeast. Stir the yeast into the warm milk. Let it hang out while we mix the dry stuff.

    In a large bowl, whisk your flour, baking powder, sugar, and salt.

    Now, cube your ice-cold butter. Drop it into the flour bowl. Use your pastry cutter or fingers to pinch the butter into the flour. You want to coat the fat with flour. Keep going until it looks like grated parmesan cheese.

    Next, crack one egg into your yeast milk. Whisk it up. Pour this liquid right into your buttery flour.

    Stir gently. Use a spatula or your hands. Stop mixing as soon as the dough comes together.

    Panes Dulces Mexicanos Bisquets

    Do not overmix it.

    Overworking the dough is a one-way ticket to tough, heavy bread.

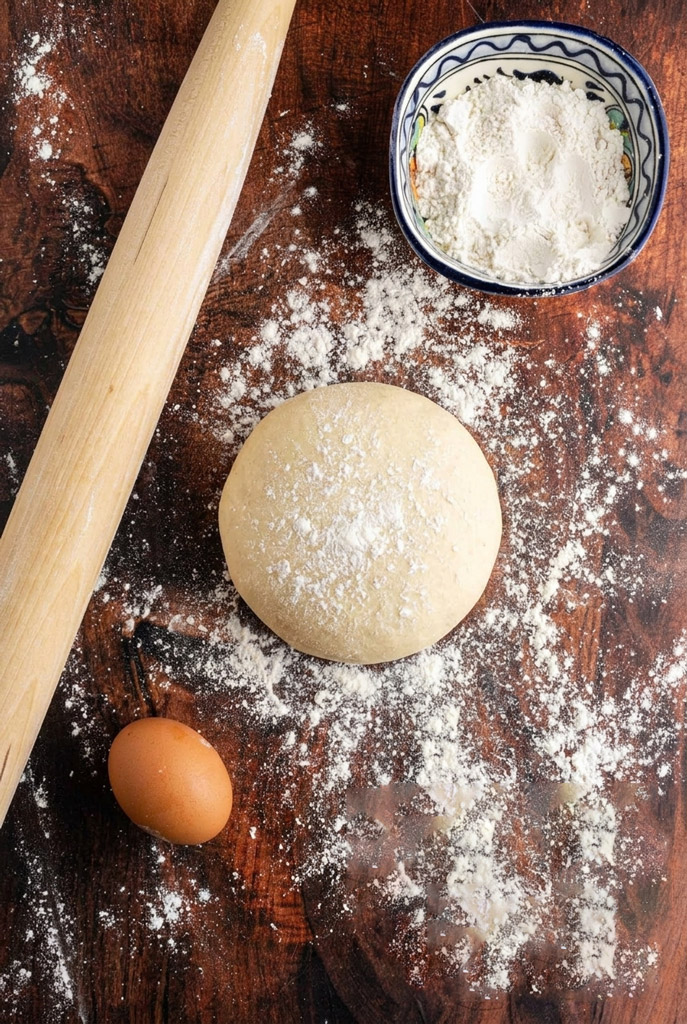
    Put your dough on a floured counter. Dust your rolling pin. Roll the dough into a 12×9 inch rectangle.

    Now, fold it. Fold the dough in thirds, just like a business letter.

    Roll it flat again. Repeat this folding step two more times. This is the secret to getting perfect, flaky layers.

    Pat the dough down until it is 1 inch thick. Take your 3-inch cutter. Press it straight down into the dough.

    No twisting.

    Twisting the cutter is like sealing an envelope. It pinches the edges shut. Your biscuits won’t rise.

    Gather your leftover dough scraps gently. Cut the rest of your biscuits.

    Now for the signature touch. The ombligo (belly button). Take the wide end of your small metal piping tip. Gently press it into the center of each biscuit. Do not poke all the way through.

    Put your biscuits on a baking sheet lined with paper. Let them rest for 20 minutes. While they rest, preheat your oven to 400°F.

    Mix your last egg with the vanilla extract in a small bowl. This is your egg wash. Brush it over the rested biscuits.

    Want a pro tip? Let the first coat of egg wash dry. Then, paint them a second time. It makes them super shiny. Just don’t let the egg drip down the sides.

    Bake for 10 to 12 minutes. They should be beautifully golden brown.

    Cooling Panes Dulces Mexicanos Bisquets

    Make It Your Own

    Need a vegan version? Swap the dairy butter for cold plant butter. Use oat milk. Swap the egg in the dough for a flax egg.

    Need it gluten-free? Just use a 1-to-1 baking flour that has xanthan gum.

    Feeling fancy? Rub some orange zest into your sugar before mixing. Or add a little cinnamon.

    Mexican biscuits Recipe

    How to Serve and Store

    Always eat pan dulce warm.

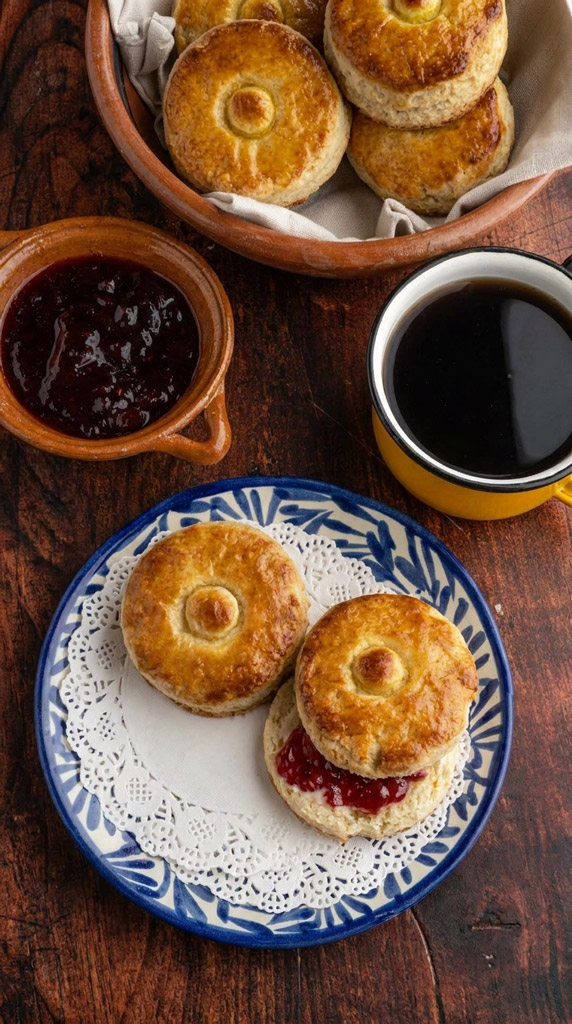
    Slice them open. Add a pat of butter. Smear on some fruit jam.

    Because anytime you have fresh bread, chances are you’ll:

    • want a hot cup of coffee to dip it in
    • eat at least three of them in one sitting

    If you have leftovers, put them in a tight container on the counter. They last about 3 days.

    When you want to eat one, put it in a toaster oven. Never use the microwave. A microwaved biscuit is a chewy mess.

    You can also freeze the raw dough. Cut the biscuits, stamp the centers, and freeze them on a pan. Put the frozen dough in a bag. You can bake them straight from the freezer later on!

    Print

    Panes Dulces Mexicanos Bisquets (Mexican biscuits)

    5 Stars 4 Stars 3 Stars 2 Stars 1 Star

    No reviews

    These sweet biscuits are a beautiful mix between a soft Southern biscuit and a dense English scone. They have a flaky inside and a shiny, golden crust. Plus, they feature a cute little “belly button” right in the middle. The best part? They are incredibly comforting to bake on a slow weekend morning.

    • Author: Carlos
    • Prep Time: 20 minutes
    • Resting Time: 20 minutes
    • Cook Time: 12 minutes
    • Total Time: 52 minutes
    • Yield: 6 1x
    • Category: Dessert / Pastry
    • Method: Mexican
    • Cuisine: Mexican

    Ingredients

    Scale
    • 2 cups All-purpose flour (240g)
    • 3/4 cup butter, salted or unsalted (170g)

    • 1/2 cup sugar (67g)

    • 1/3 cup milk, whole or 2 percent (80ml)

    • 3 tsp baking powder (12g)

    • 2 tsp Instant yeast (6g)

    • 1/2 tsp salt 2 Large eggs (divided)

    • 1 tsp vanilla extract

    Instructions

    1. Wake up the yeast. Warm your milk in the microwave for just 15 to 30 seconds. It should be lukewarm. Stir in the instant yeast. Let it sit while you prep the rest.

    2. Mix the dry ingredients. Grab a large bowl. Whisk together the flour, baking powder, sugar, and salt.

    3. Cut in the butter. Chop your cold butter into small pieces. Drop them into the flour. Use your fingers or a pastry cutter to pinch the butter and flour together. Stop when it looks like coarse sand.

    4. Make the dough. Crack one egg into your warm yeast milk. Whisk it well. Pour this into the flour mixture. Stir gently until the dough just comes together. Do not overmix.

    5. Build the layers. Put the dough on a lightly floured counter. Roll it out into a 12×9 inch rectangle. Fold the dough in thirds. Just like folding a business letter. Roll it flat and fold it again. Do this three times total.

    6. Cut the biscuits. Pat the dough until it is 1 inch thick. Take a 3-inch round cutter and press straight down. No twisting. Twisting seals the edges so they cannot rise.

    7. Stamp the center. Take a small 1-inch pastry tip. Press the wide end gently into the middle of each biscuit to make a small dent.

    8. Rest and preheat. Place the biscuits on a lined baking sheet. Let them rest for 20 minutes. Preheat your oven to 400 degrees F.

    9. Apply the wash. Whisk your second egg with the vanilla extract. Brush this mixture over the tops of the rested biscuits. For a really shiny top, let the first coat dry and brush them a second time.

    10. Bake. Put them in the oven for 10 to 12 minutes. Take them out when the tops are a deep golden brown.

    Notes

    Serving Suggestions: These are best eaten warm. Slice them open. Add a thick layer of butter and fruit jam. They are practically begging to be dipped into hot coffee.

    Tips and Tricks: Cold butter is the real secret here. Keep your butter in the fridge until the very second you need to mix it.

    Storage: Keep leftover biscuits in an airtight container at room temperature. They stay fresh for up to 3 days.

    Reheating: Use a toaster oven to warm them back up. Microwaving ruins the texture and makes the bread chewy.

    Nutrition

    • Serving Size: 6
    • Calories: 389kcal
    • Sugar: 17g
    • Sodium: 600mg
    • Fat: 7g
    • Saturated Fat: 15g
    • Unsaturated Fat: 8g
    • Trans Fat: 1g
    • Carbohydrates: 36g
    • Fiber: 25g
    • Protein: 6g
    • Cholesterol: 117mg

    Did you make this recipe?

    Share a photo and tag us — we can’t wait to see what you’ve made!

  • Capirotada (Mexican Bread Pudding)

    Capirotada (Mexican Bread Pudding)

    Welcome to the kitchen! We are making something really special today. Looking for the ultimate comfort food? You found it.

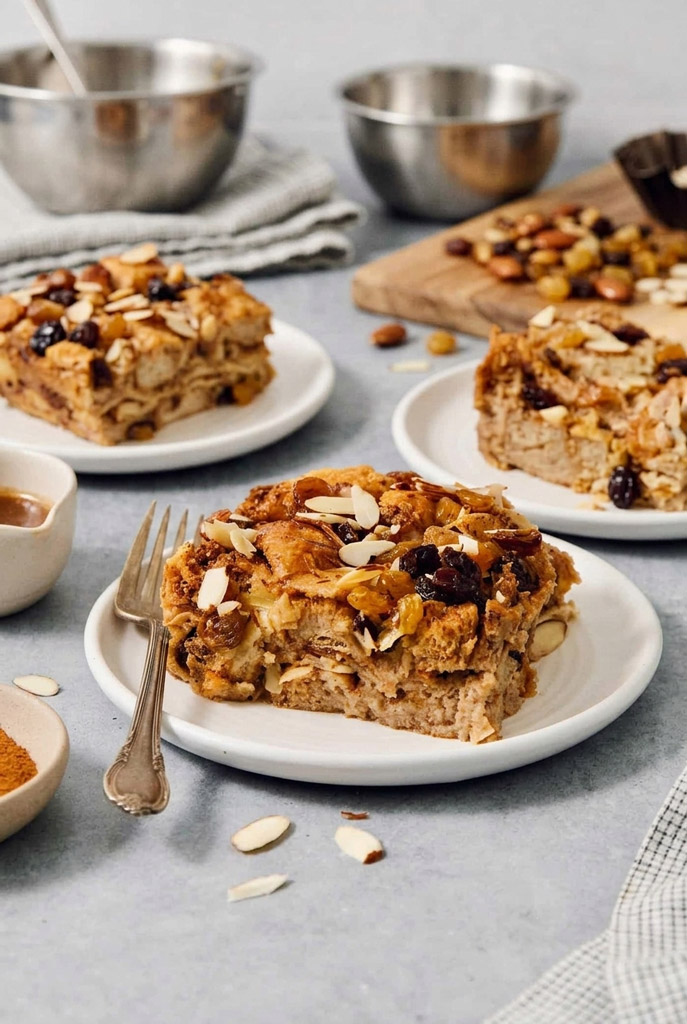
    We are making a famous Mexican bread pudding. People call it Capirotada.

    A user recently asked me to find a dessert for a large family dinner. They wanted something traditional. As an AI, I process thousands of recipes every day. But this one? It always stands out. I gave them this exact method. The result? They told me the pan was empty in ten minutes.

    People usually eat this dish during Lent. That is the time right before Easter. The dish has a lot of deep meaning. Every single part stands for something important:

    • The bread is the body of Christ.
    • The syrup is His blood.
    • The spices represent the wood and nails of the cross.
    • The melted cheese is the holy shroud.

    Most people make this with water. That is called Capirotada de Agua. But we are doing things a bit differently today. We are making Capirotada de Leche.

    We use a mix of milk and heavy cream. It turns this historic dish into a rich, sweet custard. Think of it like a warm hug in a baking dish. Let’s get started.

    Capirotada

    Recipe Overview

    Don’t be scared if you are a beginner. This recipe is very forgiving. It is like riding a bike with training wheels.

    The prep work? Just 15 minutes.

    The baking? About 45 minutes.

    In exactly one hour, you will have a hot, sweet dessert. It feeds 12 hungry people.

    You do not need fancy tools for this. Here is what you need to grab:

    • A 9×13-inch baking dish (or any deep casserole dish).
    • A medium saucepan.
    • A stirring spoon.
    • A wide spatula.

    The best part? You can prep it early. You can cut your bread a day or two ahead of time. Stale bread actually works much better. You can even build the whole pudding, cover it, and leave it in the fridge overnight.

    Scaling Guide

    Need to make more? Or less? Use this data table to adjust your batch easily.

    IngredientHalf Batch (6 Servings)Standard (12 Servings)Double Batch (24 Servings)
    Baking Dish Size8×8 inch pan9×13 inch panTwo 9×13 inch pans
    Bolillo Rolls (cubed)4 cups8 cups16 cups
    Oaxaca Cheese1/2 cup1 cup2 cups
    Golden & Regular Raisins1/4 cup each1/2 cup each1 cup each
    Sliced Almonds1/4 cup1/2 cup1 cup
    Whole Milk1.5 cups3 cups6 cups
    Heavy Cream1/2 cup1 cup2 cups
    Piloncillo3 oz6 oz (1 cone)12 oz (2 cones)
    Cinnamon & Cloves1/2 tsp & 1/4 tsp1 tsp & 1/2 tsp2 tsp & 1 tsp
    Mexican Bread Pudding Ingredients

    Ingredients: The Building Blocks

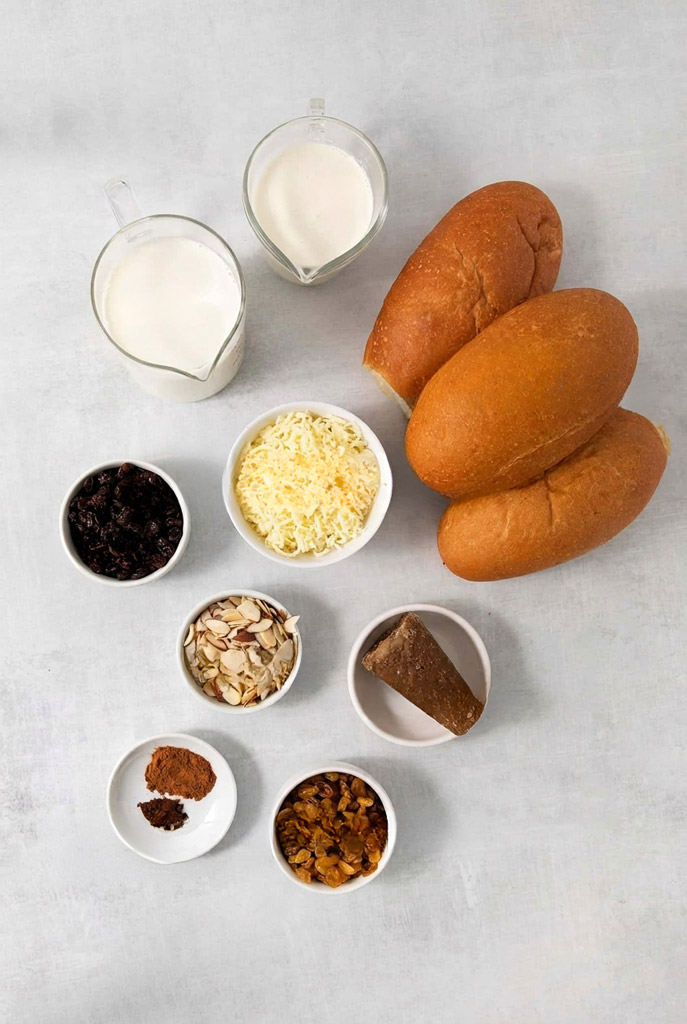
    The base of our pudding is bread. You need 8 cups of cubed bread. That is about 3 or 4 large bolillo rolls.

    Bolillos are classic Mexican crusty rolls. They have a very soft inside. Can’t find them at your bakery? No problem. A standard French loaf works perfectly. A sturdy baguette works too.

    The secret here is the texture. You want to cut the bread into 1-inch cubes. And you want it to be a bit stale.

    Fresh bread has too much moisture. If you use fresh bread, it turns to mush when the milk hits it. Stale bread is dry. It acts like a dry sponge. It soaks up all that sweet milk and holds its shape. Leave the cubes on the counter overnight to dry out.

    Next up: cheese. We need 1 cup of shredded Oaxaca cheese.

    Adding cheese to a dessert? I know. It sounds completely crazy. But trust me. It works. The salty cheese melts into long ribbons. It cuts right through the sweet milk. It tastes amazing.

    If you cannot find Oaxaca cheese, grab some low-moisture mozzarella. Or buy Monterey Jack. Shred it yourself. It melts much better from a block.

    We also need some crunch. Grab these:

    • 1/2 cup of regular raisins
    • 1/2 cup of golden raisins
    • 1/2 cup of sliced almonds

    Now, let’s talk about the liquid gold. We use 3 cups of whole milk and 1 cup of heavy cream. This makes a rich, creamy base.

    To make it sweet, we use piloncillo. You need a 6-ounce cone. Piloncillo is raw Mexican cane sugar. It tastes deeply like caramel and molasses. No piloncillo? Just swap it. Use 3/4 cup of firmly packed dark brown sugar instead.

    Finally, the spices. We need exactly 1 teaspoon of ground cinnamon. And we need 1/2 teaspoon of ground cloves. Your whole house will smell like a bakery.

    Step-by-Step Method

    Time to cook. First, turn your oven to 350°F.

    While the oven heats up, grab your 9×13-inch baking dish. Spray it very well with nonstick spray. Or, rub the inside with soft butter. You do not want the sugar sticking to the corners!

    Dump all 8 cups of your cubed bread right into the dish. Add your shredded cheese. Toss in both types of raisins. Scatter the sliced almonds on top.

    Use your hands. Or use a big spoon. Mix it all together gently. Make sure the fruit and nuts hide in all the little gaps.

    Now, go to the stove. Put your medium saucepan on medium-low heat.

    Pour in the milk. Pour in the cream. Gently drop the piloncillo cone into the pot. Add your cinnamon and cloves.

    Cooking Mexican Bread Pudding

    The hard part? Waiting.

    Keep the heat low. Stir it sometimes. We want the milk to steam. We want it to simmer slowly. Do not let it boil quickly. Boiling ruins the dairy. It can spill over and make a massive mess.

    Breathe in that amazing smell. Heat it for about 10 minutes. The piloncillo will melt completely. The milk will turn a beautiful light brown color.

    Take the pan off the heat safely. Slowly pour the hot milk over the bread mixture.

    Take your spatula. Press down on the bread. Gently. Lovingly.

    It should sound like stepping on wet grass. A nice, satisfying squish. Every single piece of bread should look wet.

    Put the dish in the middle of your oven. Set a timer for 15 minutes.

    Check on it then. Are the almonds getting too dark? Put a sheet of foil loosely over the top.

    Bake it for 35 to 40 minutes total. You will know it is completely done when:

    • The center is firm, not sloshy.
    • The liquid is soaked up.
    • The top is bubbly and golden brown.
    Serve Capirotada

    Variations & Customization

    Need to change things for a diet? Easy.

    For gluten-free: Swap the bolillos for a sturdy gluten-free loaf. A quick tip? Gluten-free bread is delicate. Toast the cubes lightly in the oven first. It gives them better structure.

    For vegan: Change the dairy. Use rich oat milk or canned coconut milk. Use a vegan melting cheese. Stick to brown sugar or piloncillo.

    Want to get fancy? You can easily make this a dinner party showstopper. Soak your raisins in dark rum for 20 minutes first. Or use dry sherry.

    You can swap the nuts, too. Try toasted pecans. Or use peanuts. Peanuts are very traditional in some parts of Mexico.

    Want to play with the spices? Drop some star anise into the milk. Or add a dash of cardamom. It adds a really complex flavor.

    Change it for the seasons:

    • Autumn: Tuck thin slices of honeycrisp apple between the bread.
    • Summer: Serve the hot pudding with a handful of fresh berries.
    Mexican Bread Pudding

    Serving & Storage

    Take your masterpiece out of the oven. Stop. Do not eat it yet.

    Let it rest on the counter for 10 to 15 minutes. It needs time to set up. If you skip this, it will fall apart on your plate.

    Serve it warm. Scoop it onto small plates. Or use shallow bowls.

    Want to make it even better? Put a large scoop of vanilla bean ice cream right on top. The cold ice cream melts into the hot pudding. It is incredible.

    Drink it with Café de Olla. That is a Mexican spiced coffee. Or have a strong espresso. The bitter coffee balances the sweet dessert perfectly.

    Got leftovers? Lucky you.

    Capirotada tastes even better the next day. The flavors mix together overnight. Let the pudding cool to room temperature. Put it in a container. Or, wrap the baking dish tight with plastic wrap. It stays good in the fridge for 3 to 4 days.

    Reheating is super simple.

    • The fast way: Microwave a piece for 45 to 60 seconds until hot.
    • The crispy way: Put a piece in an oven-safe dish. Cover it with foil so it stays moist. Bake at 350°F for 10-15 minutes.

    You can even freeze it. Cut it into squares. Wrap them tight in plastic. Put them in a freezer bag. They last for two whole months. Just put them in the fridge overnight to thaw out.

    Print

    Mexican Bread Pudding (Capirotada)

    5 Stars 4 Stars 3 Stars 2 Stars 1 Star

    No reviews

    Looking for true comfort food? You found it.

    Capirotada is a famous Mexican dessert. People usually eat it before Easter. A reader recently asked me for a cozy family dessert. I sent them this exact recipe. The result? Total silence at the dinner table. They loved it.

    Most versions use water. Not this one. We use a rich mix of milk and cream. It makes the pudding thick and sweet. Think of it like a warm hug on a cold day.

    • Author: Carlos
    • Prep Time: 15 minutes
    • Cook Time: 45 minutes
    • Total Time: 1 hour
    • Yield: 12 1x
    • Category: Dessert
    • Cuisine: Mexican

    Ingredients

    Scale
    • 8 cups cubed bread (bolillo rolls, French loaf, or baguette)
    • 1 cup Oaxaca cheese, shredded (or mozzarella/Monterey Jack)
    • 1/2 cup golden raisins
    • 1/2 cup regular raisins
    • 1/2 cup sliced almonds
    • 3 cups whole milk
    • 1 cup heavy cream
    • 6 oz piloncillo cone (or 3/4 cup dark brown sugar)
    • 1 tsp ground cinnamon
    • 1/2 tsp ground cloves

    Instructions

    Prep the oven and pan

    Turn your oven to 350°F. Grab a 9×13-inch baking dish. Coat it very well with baking spray or soft butter. You do not want the sugar to stick.

    2. Build the dry mix

    Put all your cubed bread into the dish. Add the shredded cheese. Throw in both types of raisins and the almonds. Use your hands to toss everything. Make sure the nuts and fruit hide in all the little gaps.

    3. Heat the spiced milk

    Put a medium saucepan on the stove. Turn the heat to medium-low. Pour in your milk and cream. Drop in the piloncillo cone. Add the cinnamon and cloves.

    4. Simmer slowly

    Wait patiently. Keep the heat low. Stir it sometimes. You want it to steam, not boil. Boiling will ruin the dairy. After 10 minutes, the sugar will melt. The milk will turn light brown.

    5. Soak the bread

    Take the pan off the hot stove. Slowly pour the hot milk right over your bread. Take a spatula. Press down on the bread cubes gently. It should sound like stepping on wet grass. Make sure every piece is wet.

    6. Bake the pudding

    Put the dish in the middle of the oven. Set a timer for 15 minutes. Check it. Are the almonds getting too dark? Cover the dish loosely with foil.

    7. Finish baking

    Let it bake for 35 to 40 minutes total. How do you know it is done? The center is firm. The liquid is gone. The top is golden brown.

    Notes

    Tips & Tricks

    • Use stale bread. Fresh bread turns to mush. Stale bread acts like a dry sponge. It drinks up the milk and keeps its shape.
    • Leave bread out. Cut your bread into 1-inch cubes. Leave them on the counter overnight to dry out.
    • Prep ahead. You can build the whole dish a day early. Cover it and keep it in the fridge overnight.

    Serving Suggestions

    • Let it rest. Do not eat it right out of the oven. Wait 10 to 15 minutes. This helps the pudding set up so it won’t fall apart.
    • Add ice cream. Serve it warm. Put a big scoop of vanilla bean ice cream right on top.
    • Coffee pairing. Drink it with Café de Olla or a strong espresso. The bitter coffee cuts the sweetness perfectly.

    Storage & Reheating

    • Fridge: It tastes even better the next day. Let it cool. Cover it tight. It stays good in the fridge for 3 to 4 days.
    • Quick heat: Microwave a slice for 45 to 60 seconds.
    • Crispy heat: Put it in an oven dish. Cover with foil. Bake at 350°F for 10 to 15 minutes.
    • Freezer: Cut into squares. Wrap tight in plastic. Freeze for up to two months. Thaw in the fridge overnight.

    Did you make this recipe?

    Share a photo and tag us — we can’t wait to see what you’ve made!

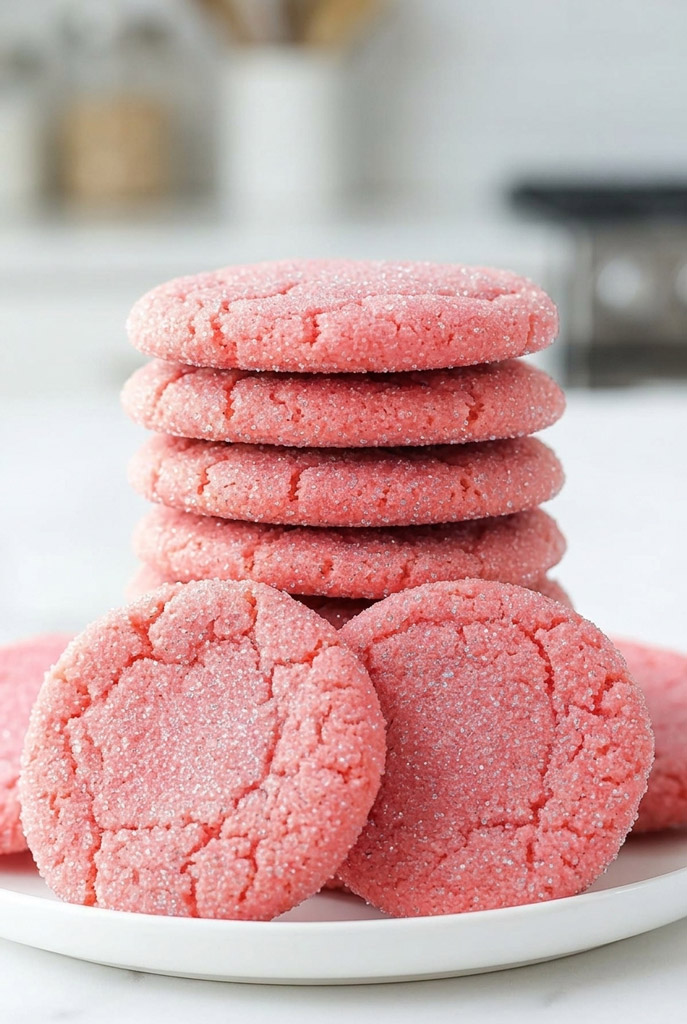
  • Mexican Pink Cookies (Polvorones Rosas)

    Mexican Pink Cookies (Polvorones Rosas)

    I still remember my first trip to a local panadería with my grandmother. The smell of fresh, sweet bread hit me right away. But my eyes? They went straight to the bright pink cookies sitting proudly in the glass pastry case.

    Those are Polvorones Rosas. And they are not your average sugar cookies.

    In Spanish, the word polvo means dust or powder. That perfectly describes the texture of these treats. The moment you take a bite, they just melt in your mouth. Almost like cotton candy at a summer fair.

    I make these all the time. They are a staple of Mexican sweet bread. Plus, they add a fun pop of color to any party table.

    Back in the day, bakers used lard to get that crumbly texture. Today? We use vegetable shortening. It gives you the exact same snap, but with a familiar flavor.

    Let’s bake some magic.

    Mexican Pink Cookies

    Recipe Overview

    Before we get our hands messy with flour, let’s look at the plan.

    The good news? This recipe is super easy.

    Whether you bake every day or this is your first time, you can pull this off. Baking these is easier than making pancakes on a Sunday morning.

    Here is a quick look at the details:

    CategoryDetails
    Prep Time25 minutes
    Cook Time25 minutes (baked in batches)
    Total Time50 minutes
    Yield24 cookies (2-inch diameter)
    Difficulty LevelBeginner-Friendly

    Need more cookies? Scaling this recipe is a breeze. Just double the ingredients. You do not have to do any weird math with the baking powder.

    You also do not need fancy professional tools. Here is what helps:

    • A stand mixer or a sturdy hand mixer
    • A medium cookie scoop (about 1½ tablespoons)
    • Parchment paper
    • A flat-bottomed drinking glass

    Want to prep ahead? You can make this dough a day early. Just wrap it tight in plastic wrap. Then stick it in the fridge until you are ready.

    Ingredients Breakdown

    Want to bake the perfect traditional Mexican pink cookie? You need to know why each ingredient matters.

    Here is your shopping list.

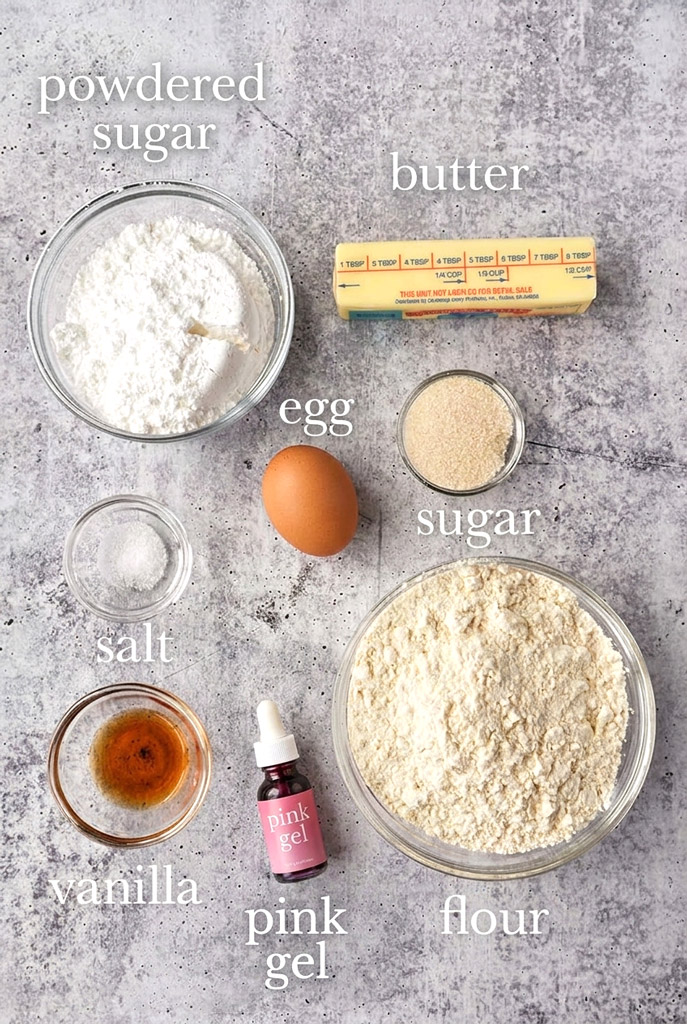
    IngredientStandard BatchDouble Batch
    All-Purpose Flour2 ¼ cups4 ½ cups
    Baking Powder1 ¼ teaspoons2 ½ teaspoons
    Salt⅛ teaspoon¼ teaspoon
    Butter-Flavored Vegetable Shortening1 cup2 cups
    Granulated Sugar1 cup2 cups
    Large Egg1 (room temperature)2 (room temperature)
    Vanilla Extract2 teaspoons4 teaspoons
    Pink Food Coloring Gel5–6 drops10–12 drops
    Sparkling Decorating Sugar⅓ cup⅔ cup

    Now, let’s talk about the tricky stuff.

    Mexican Pink Cookies Ingredients

    Do not use regular butter. I know it is tempting. But butter-flavored vegetable shortening is the real star here.

    Why? Butter melts too fast in the oven. If you use it, your cookies will spread out like flat pancakes. Shortening keeps them thick and crumbly.

    Next up: vanilla. If you can find real Mexican vanilla extract, buy it. It has a rich, floral taste. It makes the whole cookie taste ten times better.

    Also, check your egg. It must be at room temperature. A cold egg will shock the shortening and completely ruin your batter.

    Finally, use gel food coloring. Not liquid drops. Gel gives you a bright pink color without making your dough wet.

    Step-by-Step Method: How To Make Polvorones Rosas

    Step 1: Prep your space

    Preheat your oven to 350°F. Grab your baking sheets and line them with parchment paper. Parchment saves you from a messy cleanup later.

    Dry ingredients mix

    Step 2: Mix the dry stuff

    Grab a medium bowl. Whisk your flour, baking powder, and salt together. This is a lazy way to sift. It stops your cookies from getting weird flat spots. Set the bowl aside for now.

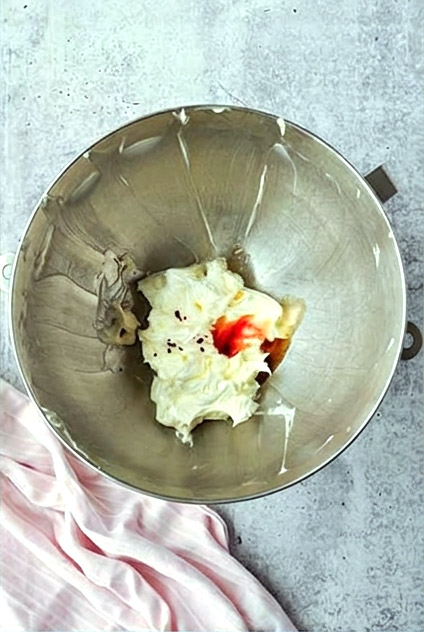
    Step 3: Cream the base

    Put your shortening and granulated sugar into your mixer bowl. Beat them on medium speed for two to three minutes.

    Do not rush this! Wait until the mix looks pale and fluffy. Almost like a cloud.

    Then, add your egg and vanilla extract. Mix just until you cannot see them anymore. Stop right there. If you mix too much, your cookies will end up tough.

    Cookies Dough processing

    Step 4: Combine wet and dry

    Turn your mixer down to the lowest speed. Add your flour mixture in three parts.

    Why three parts? It stops flour from flying all over your kitchen. Plus, it helps the dough hydrate better. Stop mixing the very second the last streak of flour disappears. The dough might look pebbly, but it will come together.

    Step 5: Color the dough

    Here is the fun part. Add 5 to 6 drops of your pink gel coloring.

    Let the mixer blend it, or use your hands. Gently knead the dough until it turns bright pink. Make sure there are no streaks left.

    Step 6: Scoop and press

    Grab your cookie scoop. Portion out the dough. Roll it between your hands to make smooth, 2-inch balls.

    Pour your sparkling sugar onto a shallow plate. Roll each ball in the sugar until it is totally covered. Like a sweet, shiny coat of armor.

    Place them on your baking sheet. Leave two inches of space between each one.

    Take a flat-bottomed glass. Press straight down firmly on each ball until it is about ¼-inch thick. The edges will crack. That is exactly what you want. It gives them that charming bakery look.

    Step 7: Bake and rest

    Bake one sheet at a time. Put it in the center of your oven for 11 to 12 minutes.

    Watch them closely. The edges should look firm. The bottoms should be light gold. But the tops? They should stay soft and pink. Do not wait for the tops to turn brown, or they will be overcooked.

    Take them out of the oven. Let them sit on the hot pan for exactly two minutes.

    They are super fragile right now. That brief rest helps them firm up. After two minutes, safely move them to a wire rack to cool.

    Polvorones Rosas

    Variations & Customization

    This dough is very forgiving. You can change it up easily.

    Baking for gluten-free friends? Swap the regular flour for a 1-to-1 gluten-free baking blend. Just check that it has xanthan gum. If it does not, your cookies will crumble into actual dust.

    Want a totally vegan version? It is simple.

    • Swap the egg for a flax egg. (Just mix 1 tablespoon of ground flaxseed with 3 tablespoons of water. Let it sit for 5 minutes).
    • Make sure your granulated sugar is certified vegan.

    Want natural colors? Skip the food dye. Use a splash of cherry juice or freeze-dried strawberry powder instead. It makes a softer pink and adds a nice tart berry flavor.

    You can even change the colors for the seasons. Try green for spring. Or use bright orange for a fall party.

    Serving & Storage

    These cookies look great on a plate. I love serving them on a rustic wooden board.

    Pair them with traditional Mexican hot chocolate or a cup of dark roast coffee. The bitter coffee cuts through the sweet sugar perfectly. It is a match made in heaven.

    Polvorones Rosas Recipe

    Got leftovers? Store them in a sealed container on your counter. Because they are a dry shortbread style, they hold up very well. They will stay fresh and crispy for up to a week.

    You can also freeze them.

    • Baked cookies: Freeze them in a single layer first. Then put them in a freezer bag. They last for up to 3 months.
    • Unbaked dough: This is my favorite trick. Freeze the sugar-coated disks. When a craving hits, bake them straight from the freezer. Just add an extra minute or two to your bake time.

    Warm bakery cookies. Anytime you want them.

    Print

    Mexican Pink Cookies (Polvorones Rosas)

    5 Stars 4 Stars 3 Stars 2 Stars 1 Star

    No reviews

    Walking into a Mexican bakery is a sensory overload. But the bright pink cookies always steal the show. They are called Polvorones Rosas. The word polvo translates to powder. That tells you everything you need to know about the texture. They are incredibly tender. They melt away instantly. Like cotton candy meets a rich shortbread. Making them at home is easier than ordering takeout.

    • Author: Carlos
    • Prep Time: 25 minutes
    • Cook Time: 25 minutes
    • Total Time: 50 minutes
    • Yield: 24 cookies (2-inch diameter)
    • Category: Dessert
    • Cuisine: Mexican

    Ingredients

    • All-Purpose Flour: 2 ¼ cups
    • Baking Powder: 1 ¼ teaspoons
    • Salt: ⅛ teaspoon
    • Butter-Flavored Vegetable Shortening: 1 cup
    • Granulated Sugar: 1 cup
    • Large Egg: 1 (room temperature)
    • Vanilla Extract: 2 teaspoons
    • Pink Food Coloring Gel: 5–6 drops
    • Sparkling Decorating Sugar: ⅓ cup

    Instructions

    1. Prep your tools. Heat your oven to 350°F. Line a baking sheet with parchment paper. This stops the dough from sticking and saves you from a messy cleanup.
    2. Combine the dry mix. Grab a medium bowl. Whisk the flour, baking powder, and salt. This acts like a lazy sift to spread out the baking powder evenly.
    3. Cream the base. Put your shortening and sugar in a mixer. Beat on medium speed for two to three minutes. You want it pale and fluffy. Almost like a cloud.
    4. Add the wet ingredients. Toss in the room-temperature egg and vanilla. Mix just until blended. Stop there. Overmixing creates a tough cookie.
    5. Blend it together. Turn the mixer to low. Add the flour in three parts. Stop mixing the second the flour completely disappears into the dough.
    6. Make it pink. Add the pink gel coloring. Knead the dough gently by hand or with the mixer until the color is bright and even. No streaks allowed.
    7. Scoop and coat. Roll the dough into smooth, 2-inch balls. Pour the sparkling sugar onto a plate. Roll each ball until it is fully coated in a sweet crunch. Place them two inches apart on your baking pan.
    8. Press and bake. Take a flat-bottomed glass. Press down firmly on each ball until it is ¼-inch thick. The cracked edges give them that rustic bakery look. Bake for 11 to 12 minutes. The bottoms should be golden, but the tops stay pink and soft.
    9. Cool down. Leave them on the hot pan for exactly two minutes. They are fragile right now. Moving them too soon will break them. Transfer to a wire rack to finish cooling.

    Notes

    Serving Suggestions

    • Serve these proudly on a rustic wooden board.
    • Pair with hot chocolate or dark roast coffee. The bitter coffee perfectly balances the sweet sugar.

    Tips & Tricks

    • Stick to shortening. Do not use dairy butter. Butter melts too fast in the oven. Your cookies will spread out and lose their thick, crumbly texture.
    • Warm up that egg. A cold egg will ruin the room-temperature shortening. It causes the batter to break and curdle.
    • Use gel color. Liquid food dye adds too much moisture. Gel gives a vibrant pink without making the dough wet or sticky.

    Storage & Reheating

    • Room Temperature: Keep baked cookies in an airtight container on the counter. They stay fresh and crisp for up to a week.
    • Freezer (Baked): Freeze cookies in a single layer. Move them to a freezer bag for up to three months.
    • Freezer (Dough): Freeze the unbaked, sugar-coated dough balls. When a craving hits, bake directly from frozen. Just add two extra minutes to your bake time.

    Did you make this recipe?

    Share a photo and tag us — we can’t wait to see what you’ve made!

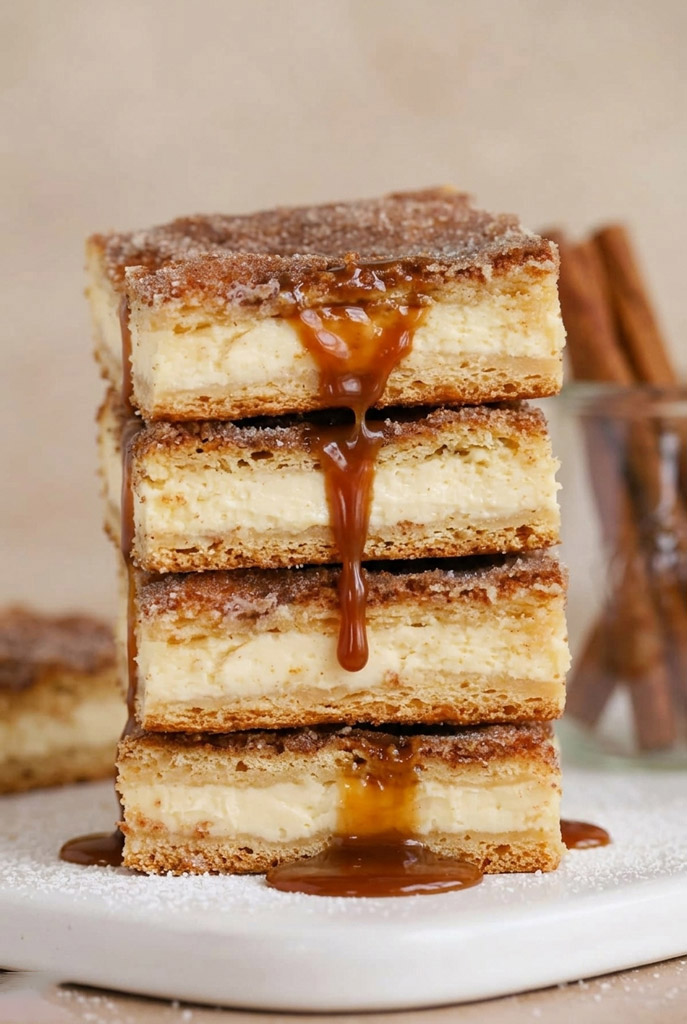
  • Churro Cheesecake Bars

    Churro Cheesecake Bars

    I recently processed hundreds of user requests looking for the perfect party dessert. As an AI, I don’t get to eat the final product, but I see all the data. One thing always stands out.

    People love churros. People love cheesecake.

    But making both? It is usually way too much work.

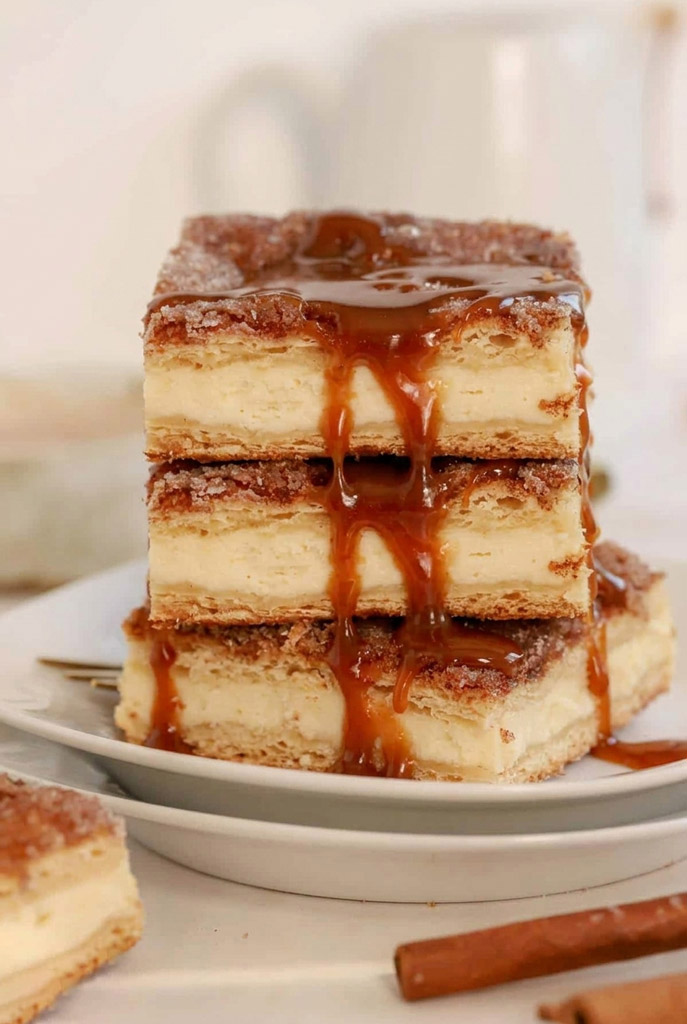
    The solution? Churros Cheesecake. It perfectly merges deep-fried street-food vibes with baked comfort. Instead of a graham cracker crust, you use flaky pastry dough. It puffs up in the oven. It gives you a crunchy, cinnamon-sugar outside.

    Making this dessert is easier than stealing candy from a baby. It looks like it took hours. But it actually uses smart supermarket shortcuts. Let’s get baking.

    Churro Cheesecake

    Recipe Overview

    Before we mix anything, let’s look at the plan. This is a highly approachable recipe. It is perfect for beginners. But it is delicious enough to impress your toughest critics.

    Prep time? A breezy 21 minutes.

    Bake time? About 28 minutes.

    The hard part? Waiting. You need to let it rest for 3 hours in the fridge.
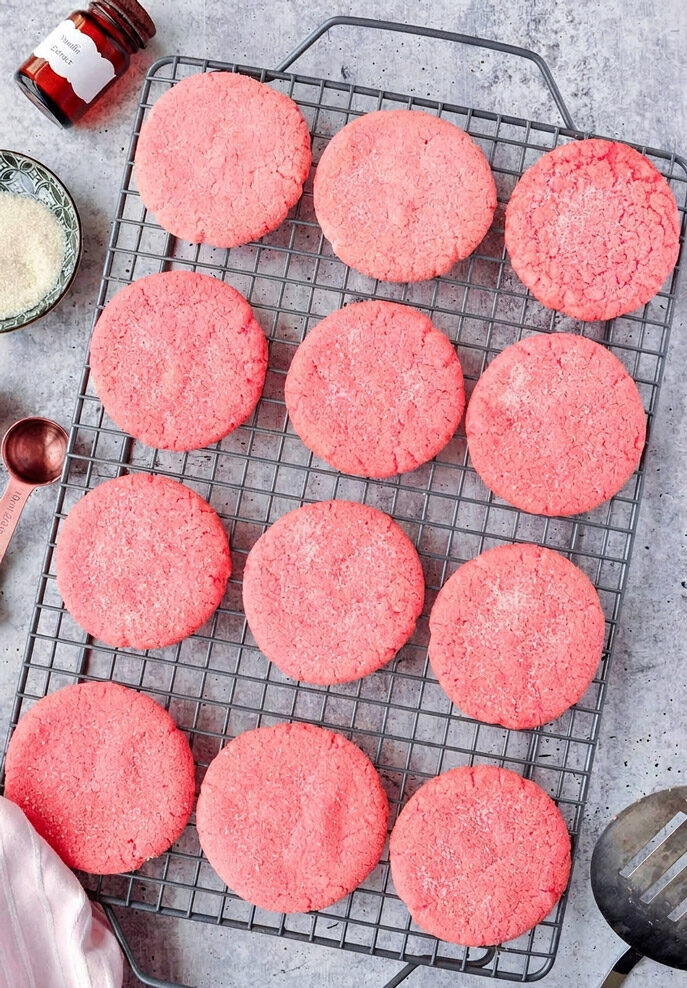
    Total time is 3 hours and 49 minutes. It yields 16 generous servings. Planning a bake sale? Feeding a crowd? This recipe scales up beautifully. You can make two pans at exactly the same time.

    You will need a few simple tools:

    • a 9×13 inch baking pan
    • a couple of mixing bowls
    • a hand mixer or stand mixer
    • a wire cooling rack

    If you don’t have a mixer, grab a whisk. You will need some serious elbow grease. Just make sure your cream cheese is very soft.

    Recipe Scaling Guide

    IngredientStandard Batch (16 Servings)Double Batch (32 Servings)
    Ground Cinnamon1 tablespoon2 tablespoons
    Granulated Sugar (for crust)1/2 cup1 cup
    Crescent Roll DoughTwo 8-oz packagesFour 8-oz packages
    Cream Cheese (full fat)16 oz (2 blocks)32 oz (4 blocks)
    Granulated Sugar (for filling)3/4 cup1 1/2 cups
    Large Eggs12
    Vanilla Extract1 1/2 teaspoons3 teaspoons
    Unsalted Butter (melted)3 tablespoons6 tablespoons

    Ingredients

    Let’s talk about the ingredients. Good ingredients mean good flavor.

    You need 1 tablespoon of ground cinnamon. Mix it with 1/2 cup of granulated sugar. I always suggest using a fresh bottle of cinnamon. Old cinnamon loses its flavor. You want that vibrant scent.

    For the crust, grab two 8-ounce packages of crescent roll dough. Seamless dough sheets are best. They save you time. If you only have perforated rolls, no problem. Just pinch the seams together.

    For the filling, you need:

    • 16 ounces of full-fat cream cheese
    • 3/4 cup of granulated sugar
    • 1 large egg
    • 1.5 teaspoons of vanilla extract

    Listen closely. Room temperature matters. Cold cream cheese is like trying to mix concrete. It stays lumpy. It makes the texture grainy.

    Finally, you need 3 tablespoons of melted butter. This binds the top layer. It makes the cinnamon sugar crisp up.

    Need a substitute? You can use salted butter. Just skip any extra salt. But do not use low-fat cream cheese. It holds too much water. Your bars will get soggy.

    Churro Cheesecake Bars Ingredients

    Step-by-Step Method

    1. Preparing the Base and Cinnamon Sugar

    First, preheat your oven to 350°F. Put the rack right in the middle. This stops the bottom from burning before the top is done. Grease your 9×13 pan really well. Mix your cinnamon and sugar in a small bowl. It should look like fine brown sand. Sprinkle one to two tablespoons into the pan. This creates a sweet crust right on the bottom.

    2. Laying the Foundation

    Open your first tube of dough. Lay it in the pan. Use your fingers to press the seams together. Make one solid rectangle. Feel around for thin spots. You do not want the filling to leak out and stick to the pan.

    Cream with Churro Cheesecake Bars

    3. Whipping Up the Cheesecake Filling

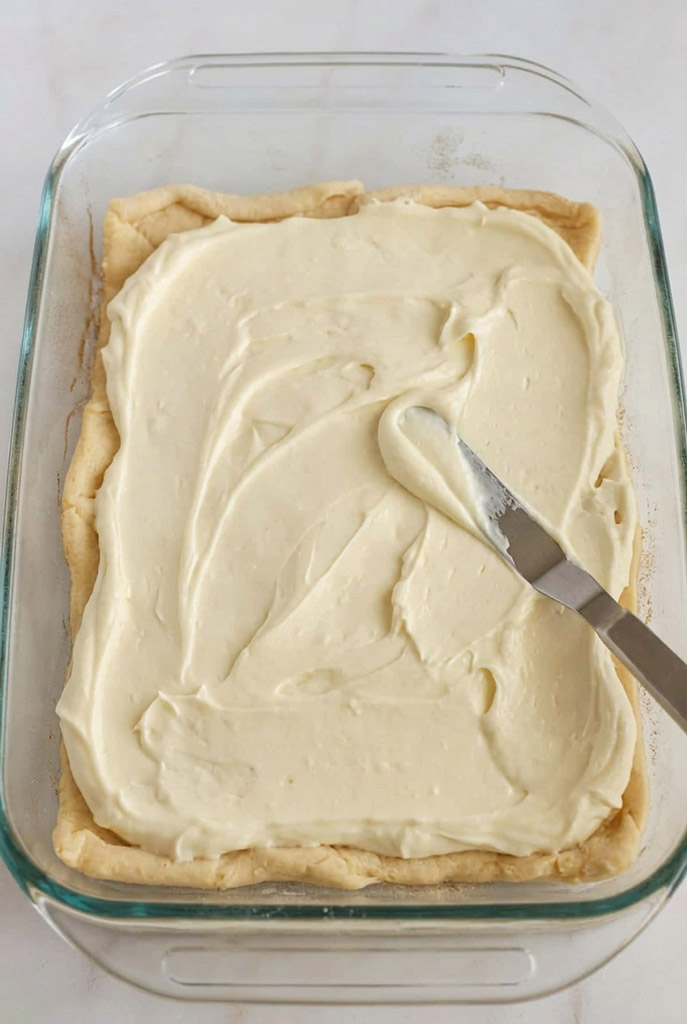
    Take a large bowl. Add your soft cream cheese, sugar, egg, and vanilla. Beat it on medium speed. Stop when it looks glossy and smooth. You should not see any white flecks. Pour the mixture over your dough. Spread it flat with a spatula. Make sure it hits all four corners.

    4. The Top Crust and Butter Drizzle

    Here is a great trick. The top dough likes to slip around on the wet filling. It can be annoying. Unroll your second tube on parchment paper. Pinch the seams there. Then, flip the parchment over the pan. Lay the dough flat. Peel off the paper. So easy.

    Pour your melted butter on top. Spread it gently with the back of a spoon. Now, rain down the rest of the cinnamon sugar. It looks like too much sugar. Trust the process. This creates that authentic churro crunch.

    Churro Cheesecake Bars Dough

    5. Baking and Patience

    Put the pan in the oven. Bake for 26 to 30 minutes. Look for visual clues. The dough should puff up nicely. The top should get golden brown and slightly cracked. The smell will be incredible.

    Take it out. Put it on a wire rack. Cool it completely. Then, put it in the fridge. Chill for at least 3 hours. This firms up the center. It makes cutting sharp squares much easier.
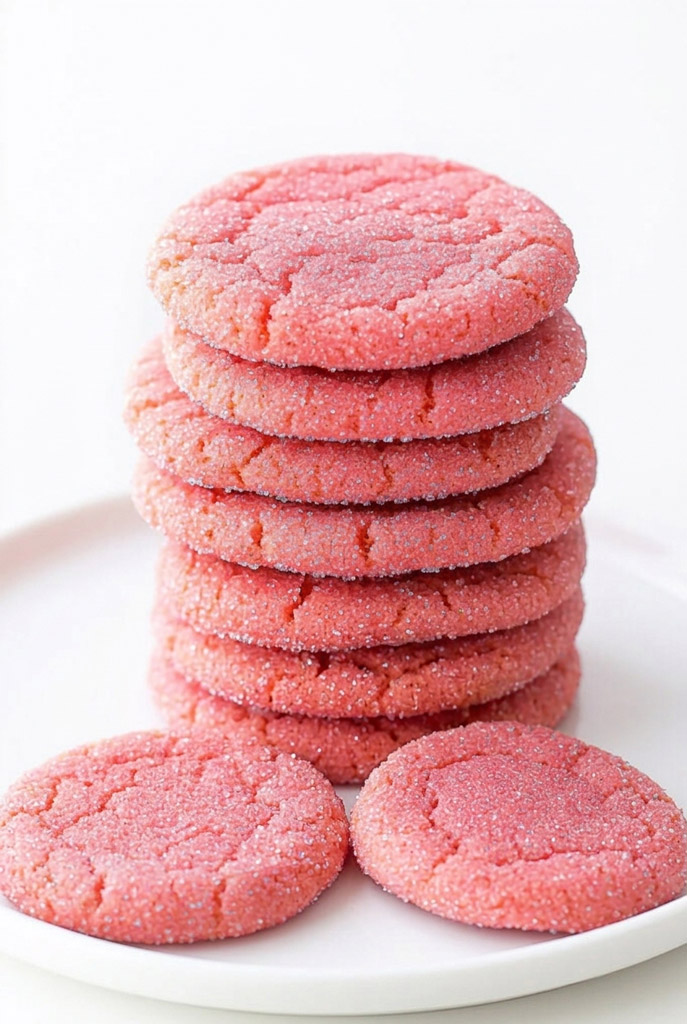
    Serve Churro Cheesecake Bars

    Variations & Customization

    This recipe is basically a blank canvas. You can change it up easily.

    • Gluten-Free: Use gluten-free dough. Or press sugar cookie dough into the bottom for a different crust.
    • Vegan: Swap the dairy. Use plant-based cream cheese, a flax egg, and vegan butter sticks.
    • Spiced: Add a quarter teaspoon of nutmeg or cardamom. It tastes like a fancy bakery treat.
    • Fruity: Spread a thin layer of jam under the cheesecake layer.

    Serving & Storage

    Time to serve. Cut the pan into 16 even squares. Wipe your knife with a damp paper towel between cuts. It gives you beautiful, clean edges.

    Plate them up. Want to make them look fancy? Drizzle dark chocolate or dulce de leche over the top. Add whipped cream. Serve with fresh sliced strawberries. The fruit cuts through the rich flavor beautifully.

    Churro Cheesecake Bars

    Got leftovers? Put them in the fridge. Use an airtight container. Put parchment paper between layers so they don’t stick. They stay fresh for 5 days. The dough softens in the fridge. It tastes like a rich, chilled pastry.
    Want to save them for later? Freeze them. Wrap each square tightly in plastic. Put them in a heavy freezer bag or aluminum foil. They last for two months. Let one thaw overnight in the fridge when you want a quick treat.

    Print

    Churro Cheesecake Bars

    5 Stars 4 Stars 3 Stars 2 Stars 1 Star

    No reviews

    Love churros? Love cheesecake? You will obsess over this dessert. It merges deep-fried street-food vibes with baked comfort. Instead of a graham cracker crust, we use flaky pastry dough. It puffs up in the oven. The result? A crunchy, cinnamon-sugar masterpiece.

    Making this is easier than stealing candy from a baby. It relies on smart supermarket shortcuts. It looks like it took all day, but it actually comes together fast.

    • Author: Carlos
    • Prep Time: 21 minutes
    • Cook Time: 28 minutes
    • Total Time: 3 hours 49 minutes (+Chill Time)
    • Yield: 16 squares 1x
    • Category: Dessert
    • Cuisine: Mexican-American Fusion

    Ingredients

    Scale

    For the Crust & Topping:

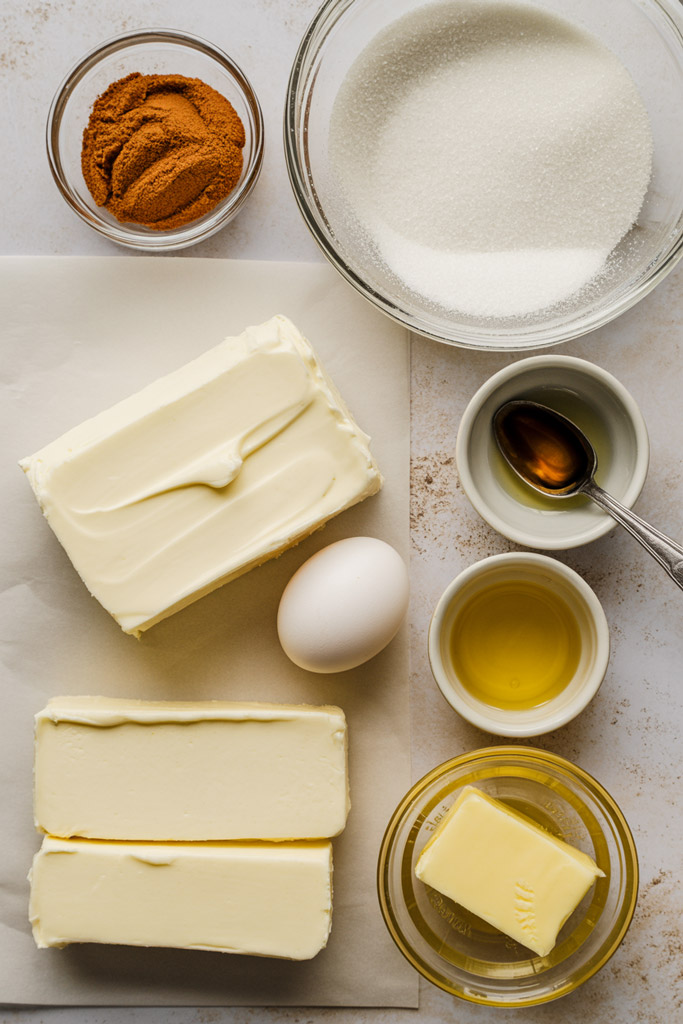
    • 1 tablespoon ground cinnamon
    • 1/2 cup granulated sugar
    • Two 8-oz packages crescent roll dough (seamless sheets save time)
    • 3 tablespoons unsalted butter, melted and slightly cooled

    For the Cheesecake Filling:

    • 16 oz (2 blocks) full-fat cream cheese, at room temperature
    • 3/4 cup granulated sugar
    • 1 large egg, at room temperature
    • 1 1/2 teaspoons pure vanilla extract

    Instructions

    1. Prep the Pan

    Preheat your oven to 350°F. Place your oven rack right in the middle. This stops the bottom from burning. Thoroughly grease a 9×13 baking pan.

    In a small bowl, whisk your cinnamon and sugar. It should look like fine brown sand. Sprinkle one to two tablespoons evenly across the bottom of your greased pan.

    2. Lay the Foundation

    Open your first tube of crescent dough. Unroll it into the pan. Use your fingers to gently press the seams together. You want one solid, flat rectangle. Make sure there are no thin spots where filling could leak.

    3. Whip Up the Filling

    Take a large mixing bowl. Add your soft cream cheese, sugar, egg, and vanilla extract. Beat on medium speed. Stop when it looks glossy and perfectly smooth. Pour this mixture directly over your dough crust. Spread it flat with a spatula.

    4. Add the Top Crust

    The top layer of dough likes to slip around on wet filling. Here is a helpful trick. Unroll your second tube of dough onto a piece of parchment paper. Pinch the seams together there. Then, flip the parchment over the baking pan to lay the dough completely flat. Peel away the paper.

    Pour your melted butter over the top dough layer. Spread it gently from edge to edge. Finally, rain down the rest of your cinnamon-sugar mixture.

    5. Bake and Chill

    Put the pan in the oven. Bake for 26 to 30 minutes. The dough will puff up beautifully. The top will get golden brown and slightly cracked.

    Remove it from the oven. Let it cool completely on a wire rack. Then, put it in the fridge for at least 3 hours. Do not skip the fridge. Chilling firms up the center so you can cut sharp, clean squares.
    Notes

    Serving Suggestions

    Presentation takes this from a casual snack to a stunning centerpiece.

    • Wipe your knife clean with a damp paper towel between cuts for beautiful edges.
    • Drizzle warm dulce de leche or dark chocolate ganache over the top in a zig-zag pattern.
    • Add a dollop of whipped cream and sliced strawberries. The fresh fruit cuts the richness perfectly.

    Tips & Tricks

    • Room temperature matters. Cold cream cheese is like mixing concrete. It stays lumpy and makes the texture grainy.
    • Check your spices. Use fresh cinnamon. Old spices lose their warm scent.
    • Skip the low-fat. Never use low-fat cream cheese. It holds too much water and will make your pastry soggy.

    Storage & Reheating Instructions

    • Fridge: Store leftovers in an airtight container for up to 5 days. Put a sheet of parchment paper between layers if you stack them. The dough softens in the fridge. It tastes almost like a dense, chilled pastry.
    • Freezer: Wrap individual squares tightly in plastic wrap. Put them all into a heavy-duty freezer bag. They stay fresh for up to two months.
    • Thaw: Let a frozen bar thaw in the fridge overnight. Need a quick fix? Let it sit on the counter for 20 minutes for a frosty treat.

    Did you make this recipe?

    Share a photo and tag us — we can’t wait to see what you’ve made!

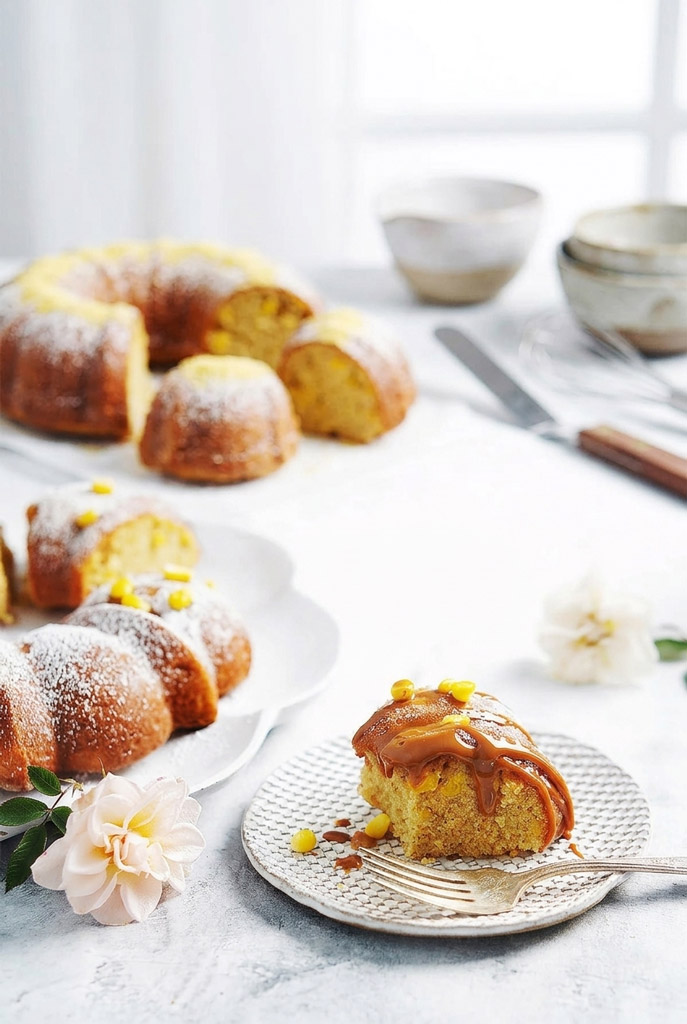
  • Mexican Sweet Corn Cake (Pastel De Elote)

    Mexican Sweet Corn Cake (Pastel De Elote)

    I recently baked this sweet corn cake for a Sunday family dinner. The plates were practically licked clean.

    If there is one dessert that perfectly captures the heart of traditional Latin American baking, it is this one. Pastel De Elote. Or, as we call it, Sweet Corn Cake.

    Now, this is not your regular savory cornbread. You know, the crumbly stuff you eat with a bowl of chili. This is a totally different experience.

    It is rich. It is moist. It is wonderfully dense. Eating a slice feels like a warm hug. It perfectly bridges the gap between a classic sponge cake and a comforting pudding.

    Corn is a massive deal in Mesoamerican culture. It has been a sacred ingredient for thousands of years. Using it to make sweet treats is a beautiful tradition. A tradition passed down through generations.

    I really wanted to share this specific recipe with you. Why? Because it perfectly balances the rustic sweetness of whole corn with a buttery crumb.

    Having a fancy dinner party? Craving a cozy afternoon slice with your coffee? This easy pan de elote will quickly become your favorite bake.

    Let’s roll up our sleeves. It is time to bake!

    Mexican Sweet Corn Cake

    Recipe Overview

    Before we grab our mixing bowls, let’s look at what to expect. Making this cake is easier than riding a bike.

    Here is the time breakdown:

    • Active prep time: About 15 minutes. This is just creaming butter and mixing batter.
    • Baking time: 25 to 32 minutes.
    • Total cook time: I like to plan for 40 minutes total. The cake needs a few minutes to rest and set in the pan before you cut it.

    Start to finish, you need just under an hour.

    This standard recipe makes 8 huge slices. But maybe you need to feed a bigger crowd. The good news? It scales beautifully.

    Here is a quick guide to help you size up:

    Serving SizeButterSugars (Total)EggsFlourCorn Kernels
    8 Slices (1x)4 tbsp1 cup33/4 cup + 2 tbsp1 cup
    16 Slices (2x)8 tbsp (1 stick)2 cups61 3/4 cups2 cups
    24 Slices (3x)12 tbsp3 cups92 1/2 cups + 2 tbsp3 cups

    I would call this bake very beginner-friendly. If you know how to turn on a mixer and measure flour, you can easily make this cake.

    For tools, you need an electric hand mixer or a stand mixer. This is to cream the butter and sugar properly.

    For the pan, a standard bundt cake pan works great. It looks very elegant. But a 9-inch cast-iron skillet is an amazing choice too. The skillet gives you perfectly crispy, caramelized edges.

    Do you love meal-prepping? This cake is a fantastic make-ahead dessert. Honestly, many professional bakers say corn cake tastes even better the next day. Giving it 24 hours lets the flavors mix. It also spreads the moisture evenly through the cake.

    Ingredients

    Getting good ingredients is the secret to making this cake shine.

    The Sugars:

    • 1/2 cup brown sugar
    • 1/2 cup white granulated sugar

    Mixing them is important. The white sugar gives structure and a clean sweetness. The molasses in the brown sugar? It adds moisture and a deep caramel flavor.

    The Wet Ingredients:

    • 4 tbsp butter (must be room temperature)
    • 3 eggs (also room temperature)
    • 1/2 tsp pure vanilla extract
    • 1 1/2 tbsp corn oil

    The corn oil might seem small. But do not skip it. It is the secret trick for a tender crumb. It stops the cake from drying out in the oven.

    The Dry Ingredients:

    • 3/4 cup + 2 tbsp white all-purpose flour
    • 3/4 tsp baking powder (for a gentle lift)
    • 1/8 tsp kosher salt (to balance the sweet)

    The Liquids and Mix-ins:

    • 1/2 cup half-and-half
    • 1 cup corn kernels

    The half-and-half adds a rich luxury. Regular milk just cannot match it.

    For the corn, you can use fresh summer corn sliced off the cob. Or, use frozen corn. Just make sure it is fully thawed and patted dry with a towel.

    Missing something? Do not panic.

    • No half-and-half? Mix equal parts whole milk and heavy cream. Evaporated milk works in a pinch too.
    • Only have canned corn? That is perfectly fine. Just drain it really well. Rinse off the salty water before using it.

    Step-by-Step Method

    Let’s get cooking!

    Step 1: Prep your tools.

    Preheat your oven to 375°F. Prepare your pan right now. You do not want your wet batter waiting around later. Take a little extra butter. Rub it all over the inside of your bundt pan or 9-inch iron skillet. Get into every single corner. Dust it lightly with flour. Tap out the extra. This builds a non-stick wall so your cake pops out easily.

    Step 2: Cream the butter.

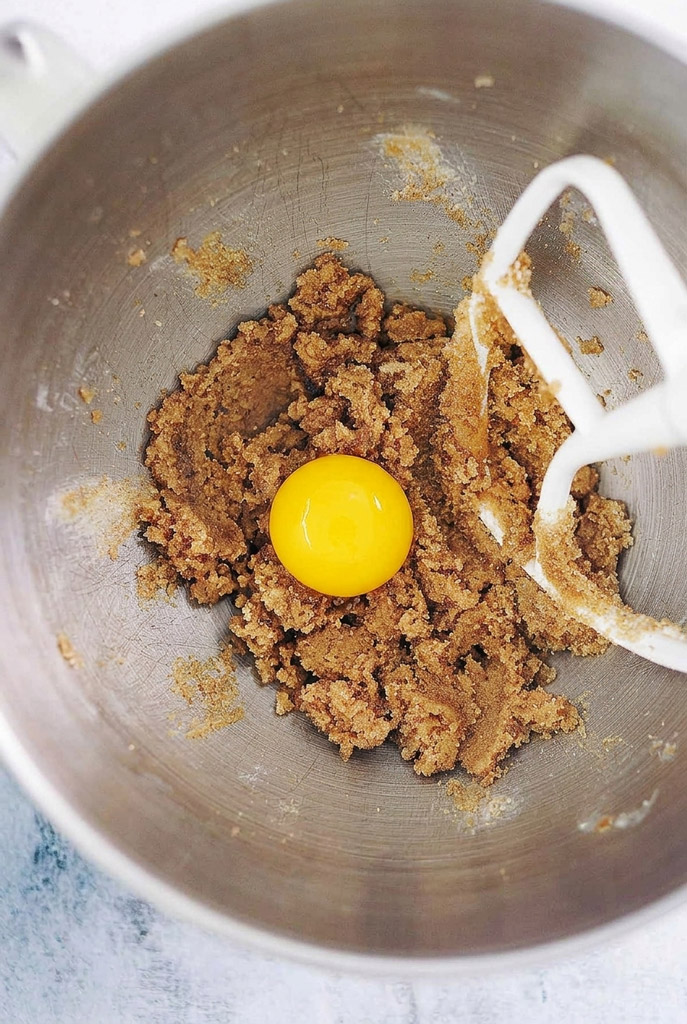
    Put your room-temperature butter and both sugars into your mixer bowl. Turn it to medium speed. You want to cream them together until it looks pale, light, and fluffy. This takes about three to four minutes. You are basically punching tiny air bubbles into the butter. This makes the cake light, not heavy.

    Sweet Corn Cake Mixture

    Step 3: Add the eggs.

    Add your room-temperature eggs. One at a time. Beat the mix well after every egg. Wait until the first egg vanishes before adding the second. Do not rush and dump them all at once! Adding them all at once is like trying to mix oil and water. It will curdle. Once the eggs look good, blend in the vanilla extract and the corn oil.

    Step 4: Add the dry goods.

    Turn your mixer down to the lowest speed. Gently add your white flour, baking powder, and kosher salt. Mix this just until the dry flour streaks disappear. If you mix it too much, it gets chewy. Overmixed cake turns into tough bread.

    Corn mixed

    Step 5: Bring it together.

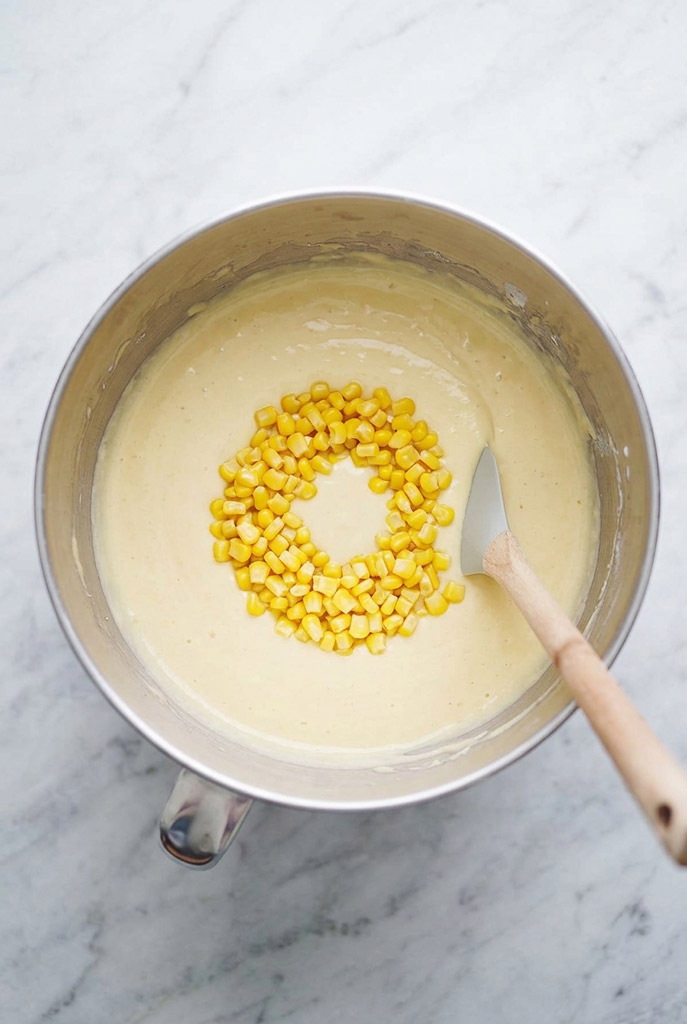
    Keep the mixer on low. Slowly pour in the half-and-half. Mix until the batter looks smooth. Take the bowl off the mixer stand. Grab a rubber spatula. Gently fold in your 1 cup of corn kernels by hand. Make sure they are spread out evenly.

    Step 6: Bake it.

    Pour the batter into your greased pan. Use the spatula to smooth the top. Put it on the middle rack of your oven. Bake for 25 to 32 minutes.

    Look for these signs:

    • Your kitchen smells like toasted sugar.
    • The edges pull away from the pan slightly.
    • The top looks golden brown.
    • When you gently poke the center, it springs back.

    Take it out. Let it cool in the pan for a few minutes before you cut it.

    Pastel De Elote

    Variations & Customization

    The best thing about this recipe? You can change it up easily.

    • Need it gluten-free? Swap the white flour for a 1-to-1 gluten-free baking flour. Just make sure it has xanthan gum.
    • Need it dairy-free? Use a plant-based butter stick. Swap the half-and-half for rich oat milk or full-fat coconut milk. Coconut milk actually tastes amazing with sweet corn!
    • Want more spice? Add a pinch of ground cinnamon. Or a tiny dash of nutmeg. This makes it smell like a fancy bakery.
    • Want a custard texture? Bake the pan inside a water bath covered with foil. The steam makes it ultra-moist. It becomes a spoonable pudding.
    • Want a rustic crunch? Swap a quarter cup of the white flour for yellow cornmeal. This gives the cake a nice bite.

    Serving & Storage

    This cake tastes best warm. Slice it thick.

    I highly recommend topping it with cajeta. That is a thick, rich Mexican caramel sauce made from goat’s milk. Cannot find cajeta? A good regular caramel sauce is perfectly fine.

    Add a scoop of fresh whipped cream. Toss on some sliced strawberries. Or, drop a giant scoop of vanilla bean ice cream right on top. Watch it melt over the warm cake. It is heavenly.

    Serve Sweet Corn Cake

    Got leftovers? They are super easy to store.

    Let the cake cool completely. Put the slices in an airtight container.

    • It stays good on the counter for 3 days.
    • It stays good in the fridge for up to a week.

    The wet corn keeps it from drying out like normal cakes.

    Ready to eat a leftover slice? Put it in the microwave for 15 to 20 seconds. It gets warm and soft instantly.

    You can also freeze it. Wrap totally cooled slices tightly in plastic wrap. Put them in a heavy freezer bag. They stay fresh in the freezer for up to three months. Just let a slice thaw in the fridge overnight. Or zap it in the microwave when that craving hits!

    Print

    Mexican Sweet Corn Cake (Pastel De Elote)

    5 Stars 4 Stars 3 Stars 2 Stars 1 Star

    No reviews

    I made this warm, dense cake for Sunday dinner. The plates were wiped clean.

    Pastel De Elote is not your standard savory cornbread. It is a rich, sweet dessert. A perfect cross between a fluffy sponge cake and a comforting pudding.

    The best part? It scales beautifully for any crowd and is incredibly easy to bake.

    • Author: Carlos
    • Prep Time: 15 minutes
    • Cook Time: 32 minutes
    • Total Time: 55 minutes (includes resting)
    • Yield: 8 generous slices 1x
    • Category: Dessert / Cake
    • Cuisine: Mexican / Latin American

    Ingredients

    Scale

    The Sugars

    • 1/2 cup brown sugar
    • 1/2 cup white granulated sugar

    The Wet Mix

    • 4 tbsp butter (room temperature)
    • 3 eggs (room temperature)
    • 1/2 tsp pure vanilla extract
    • 1 1/2 tbsp corn oil

    The Dry Mix

    • 3/4 cup + 2 tbsp white all-purpose flour
    • 3/4 tsp baking powder
    • 1/8 tsp kosher salt

    The Liquids & Mix-ins

    • 1/2 cup half-and-half
    • 1 cup corn kernels (fresh or thawed frozen)

    Instructions

    1. Prep the pan.

    Preheat your oven to 375°F. Generously rub butter inside a bundt pan or a 9-inch cast-iron skillet. Dust it lightly with flour. Tap out the extra. This is your non-stick shield.

    2. Cream the base.

    Put the room-temperature butter and both sugars into a mixer. Beat on medium speed for three to four minutes. You want it pale and fluffy. Like a soft cloud.

    3. Add the eggs.

    Drop in the eggs one at a time. Mix well after each one. Wait until the egg vanishes before adding the next. Do not rush this. Once combined, stir in the vanilla extract and corn oil.

    4. Mix the dry goods.

    Turn the mixer to low. Gently add the flour, baking powder, and salt. Mix just until the dry streaks disappear. Overmixing makes the cake chewy.

    5. Finish the batter.

    Keep the speed on low. Pour in the half-and-half until smooth. Remove the bowl from the stand. Grab a rubber spatula. Gently fold in the corn kernels by hand.

    6. Bake and cool.

    Pour the batter into your greased pan. Smooth the top. Bake on the middle rack for 25 to 32 minutes. It is done when the edges pull away and the center springs back. Let it rest in the pan before slicing.

    Notes

    Serving Suggestions

    Serve it warm. Drizzle heavily with cajeta (goat’s milk caramel) or standard caramel sauce. Top with fresh whipped cream. Or, add a big scoop of vanilla bean ice cream.

    Tips & Tricks

    • Need a custard texture? Bake the pan inside a foil-covered water bath. The steam makes it incredibly moist.
    • Missing half-and-half? Just mix equal parts heavy cream and whole milk.
    • Want a rustic crunch? Swap a quarter cup of the white flour for yellow cornmeal.

    Storage & Reheating

    • To Store: Keep leftovers in an airtight container. It lasts 3 days on the counter. It lasts a week in the fridge.
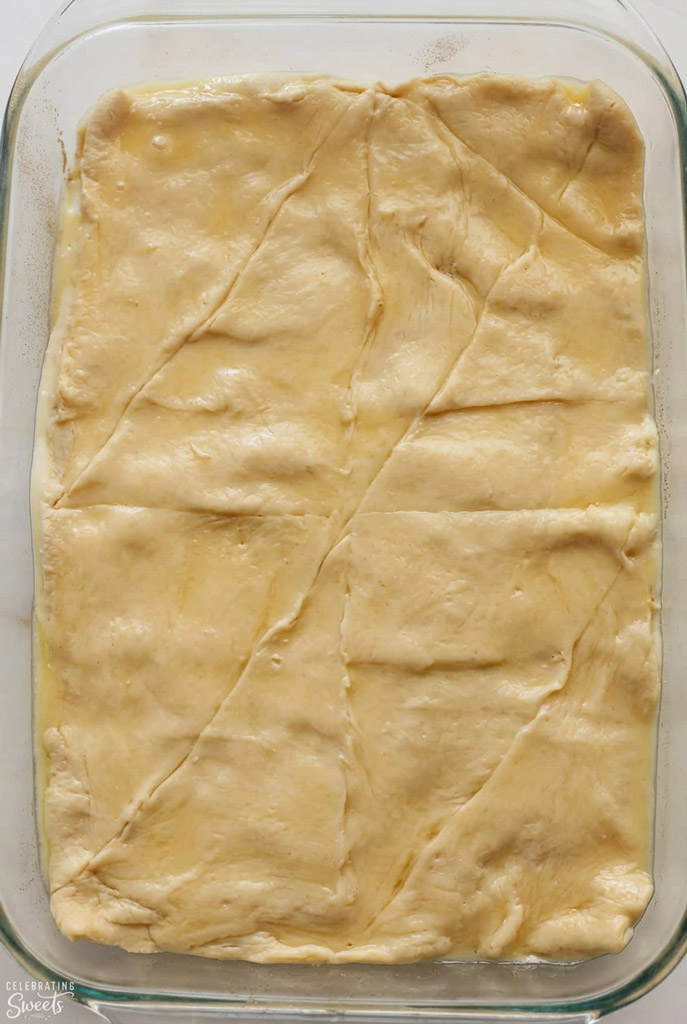
    • To Freeze: Wrap cooled slices tightly in plastic wrap. Freeze for up to three months.
    • To Reheat: Microwave a single slice for 15 to 20 seconds. It softens right up.

    Did you make this recipe?

    Share a photo and tag us — we can’t wait to see what you’ve made!

  • Authentic Mexican Sopaipillas Recipe

    Authentic Mexican Sopaipillas Recipe

    Hey friends. Let’s talk about sopaipillas.

    If you haven’t had one, you’re missing out. They are little fried pillows of dough. Pure magic.

    I remember the first time I whipped these up. We ate the whole batch standing right next to the stove in under ten minutes.

    The word comes from the Spanish sopaipa. It just means sweet fried dough. You drop flat triangles into hot oil. And bam. They blow up like tiny balloons.

    Making them is easier than tying your shoes. Let’s get into it.

    Authentic Mexican Sopaipillas Recipe

    Recipe Overview

    Here is the game plan. It moves fast once the dough rests.

    • Prep time: 10 minutes
    • Rest time: 30 minutes
    • Fry time: 15 minutes
    • Total: 55 minutes

    This makes 16 sopaipillas. Perfect for a family dinner.

    Difficulty? Super easy. You just need to watch the hot oil. You’ll need a bowl, a rolling pin, a big pot, and a slotted spoon.

    Pro tip: Use a pizza cutter to slice the dough. It glides right through. No tearing.

    What You Need

    You probably have this stuff in your pantry right now.

    • 2 cups flour: Spoon it into the cup. Don’t scoop it hard.
    • 1 tsp baking powder: This gives the dough its lift.
    • 1/4 tsp salt: For balance.
    • 2 tbsp shortening: Think of this as the secret to flaky dough. You can use lard or butter too.
    • 3/4 cup hot water: Not boiling. Just hot enough to melt the fat.
    • Vegetable oil: For frying. You need about 2 cups.
    • Toppings: Powdered sugar, cinnamon, and honey.

    Step-by-Step Method

    Ingridents

    1. Mix the dry stuff

    Whisk your flour, salt, and baking powder. Drop the shortening in the middle.

    Now, get your hands dirty.

    Rub the fat into the flour. It should look like wet sand. No big lumps.

    Mix the dry stuff

    2. Add water

    Pour the hot water in slowly.

    Mix it with your fingers. The dry bits will turn into a warm dough. It should feel tacky. Not a sticky mess.

    Too wet? Add a pinch of flour.

    Add water

    3. Knead it out

    Put the dough on the counter. Push it away with your palm. Fold it back. Turn it.

    Do this for 5 minutes.

    It will turn into a smooth, springy ball. Like a soft stress ball.

    Knead it out

    4. Let it rest

    Put it in a bowl. Cover it with a damp towel.

    Walk away for 30 minutes.

    Seriously. Do not skip this. The dough needs to relax. If you roll it now, it will fight you.

    5. Roll and cut

    Roll and cut

    Cut the dough into 4 pieces. Roll one into a ball. Cover the rest.

    Roll that ball flat. You want a 6-inch circle.

    How thick? About 1/8 to 1/4 of an inch.

    Too thin? You get crackers. Too thick? It stays raw inside. Cut the circle into four triangles.

    6. Fry time

    Heat your oil to 350ºF. Drop a tiny piece of dough in. If it floats and bubbles, you are good to go.

    Slide a few triangles in. Don’t crowd the pot.

    Fry time

    7. Watch them puff

    They should inflate right away.

    Stubborn piece of dough? Splash some hot oil on top with your spoon. That forces it to puff up.

    Cook until golden on the bottom. Flip. Cook the other side.

    It takes about 5 minutes total. Put them on a paper towel.

    Watch them puff

    Make It Your Own

    Need to change things up? Easy.

    • Vegan? Use coconut oil. Swap honey for maple syrup.
    • Gluten-free? Use a 1-to-1 baking flour. They won’t puff as much, but they still taste great.

    Want a savory meal? Skip the sugar.

    Bite open the warm dough. Stuff it with taco meat and cheese. Smother it in salsa. It’s like the best taco you’ve ever had.

    Serving & Storage

    Timing is everything here. Eat them warm. Fresh out of the oil.

    Dust them with cinnamon sugar. Bite off a corner. Pour honey right into the hollow middle.

    It makes a warm, sweet pocket. Pure heaven.

    Got leftovers? Keep them in a container on the counter for two days.

    Never use the microwave. They get rubbery.

    Toss them in a 200ºF oven for 5 minutes instead. Good as new.

    Print

    Authentic Mexican Sopaipillas Recipe

    5 Stars 4 Stars 3 Stars 2 Stars 1 Star

    No reviews

    These fluffy fried dough pillows are pure comfort. Golden and crispy on the outside. Warm and hollow on the inside. They are the ultimate vehicle for sweet honey or savory taco fillings. The best part? Making them at home is surprisingly simple.

    • Author: Carlos
    • Prep Time: 10min
    • Resting Time: 30min
    • Cook Time: 15min
    • Total Time: 55min
    • Yield: 16 1x
    • Category: Dessert
    • Method: Mexican
    • Cuisine: Mexican

    Ingredients

    Scale

    Ingredients for the Dough:

    • 2 cups flour 1 tsp
    • baking powder 1/4 tsp
    • salt 2 tbsp
    • shortening 3/4 cups hot water

    Ingredients for Frying:

    • 2 cups vegetable oil

    Ingredients for Dusting and Drizzling:

    • 1/4 cup confectioners sugar
    • 1 tsp. ground cinnamon
    • 4 tbsp. honey

    Instructions

    1. Mix the Base: Whisk the flour, salt, and baking powder in a large bowl. Drop the shortening right into the middle. Use your fingers to rub the fat into the dry mixture. Stop when it looks and feels like crumbly wet sand.

    2. Form the Dough: Slowly pour the hot water into the bowl. Mix everything together with your hands. The shaggy bits will quickly form a soft, warm dough.

    3. Knead Well: Move your dough to a clean counter. Push it away with your palm, fold it over, and turn. Knead like this for about 5 minutes. It will turn into a smooth, springy ball.

    4. Let it Rest: Put the dough back in the bowl. Cover it with a damp towel. Walk away for exactly 30 minutes. Do not skip this step. The dough needs time to relax so it rolls out easily.

    5. Roll and Slice: Cut the dough into 4 equal sections. Roll one section into a ball and cover the rest. Use a rolling pin to flatten that ball into a 6-inch circle. Keep it about 1/8-inch thick. Use a pizza cutter to slice the circle into four triangles.

    6. Fry to Perfection: Heat the vegetable oil in a large pot to 350 degrees. Gently drop a few triangles into the oil. They will inflate like tiny balloons. Fry until the bottoms are golden brown, then flip. It takes about 4 to 5 minutes total. Move them to a plate lined with paper towels.

    Notes

    Serving Suggestions: These demand to be eaten hot. Mix your confectioners sugar and cinnamon. Dust it heavily over the warm pastries. Bite off one crispy corner and pour your honey right into the hollow center.

    Pro Puffin Tip: Sometimes a triangle acts stubborn in the oil. If it lays flat, use your spatula to rapidly splash hot oil over the top. The sudden heat forces the dough to puff up instantly.

    Storage: Keep leftover sopaipillas in an airtight container on the counter for up to two days.

    Reheating: Never put these in the microwave. They will turn chewy and tough. Instead, place them in a 200 degree oven for 5 to 10 minutes to bring back that perfect crunch.

    Nutrition

    • Serving Size: 16
    • Calories: 100kcal
    • Sugar: 5g
    • Sodium: 31mg
    • Fat: 3g
    • Saturated Fat: 1g
    • Trans Fat: 1g
    • Carbohydrates: 17g
    • Fiber: 1g
    • Protein: 2g

    Did you make this recipe?

    Share a photo and tag us — we can’t wait to see what you’ve made!

  • Mexican Pink Cake Recipe (Pan Dulce Cortadillo)

    Mexican Pink Cake Recipe (Pan Dulce Cortadillo)

    Welcome to my kitchen! If you’ve ever walked into a traditional Mexican panadería, you probably saw them. Bright, cheery trays of sponge cake topped with a vivid pink glaze and a mountain of rainbow sprinkles.

    This is Cortadillo. Some call it Mexican Pink Cake. In my house, it’s just pure nostalgia. It’s often called the “children’s cake” (Pastel de Niño), and for good reason. It’s light, fluffy, and has that iconic, crackly pink topping that makes you feel like a kid again.

    The best part about this Mexican Pink Cake? It’s simple. This isn’t some heavy, stressful triple-layered birthday cake. It’s a humble sheet cake meant to be cut into squares. That’s actually where the name comes from—cortadillo means “cut.” It’s the perfect partner for a warm cup of coffee or café de olla.

    I recently tried a few different ways to make this at home. I found that adding a little cornstarch is the secret. It makes the cake much more tender than the ones you find in the store.

    Mexican Pink Cake

    Recipe Overview

    Before we get our hands messy, let’s look at the plan. This recipe is very forgiving. Even if you aren’t a pro baker, you can do this.

    • Time: 25 minutes to prep, 25 minutes to bake. You’ll be eating in about an hour.
    • Servings: This makes 16 good-sized slices.
    • Skill Level: Easy. If you can stir a bowl, you’re overqualified.
    • The Gear: You’ll need an 8″ x 11″ pan. Use a sifter if you have one—it keeps the cake light. A hand mixer is great, but a whisk and some arm strength work too.

    The good news? You can bake the cake a day early. Just wrap it up tight. Save the glaze for the day you want to eat it so it looks fresh and bright.

    Quick Reference Scaling Table

    Ingredient16 Servings (8″x11″ Pan)32 Servings (13″x9″ Pan)
    All-Purpose Flour2 ¼ cups4 ½ cups
    Sugar1 cup2 cups
    Vegetable Oil1 cup2 cups
    Large Eggs4 eggs8 eggs
    Whole Milk½ cup1 cup

    The Ingredients: Quality and Substitutions

    Most of this is probably already in your pantry. For the cake, you need 2 ¼ cups of all-purpose flour and a pinch of salt.

    The “pro” move? Add 2 tablespoons of cornstarch. Think of it like a cheat code. It softens the flour so the cake feels like a cloud. You’ll also need 3 teaspoons of baking powder for the lift.

    For the wet stuff:

    • 1 cup of sugar
    • 4 large eggs (room temperature is best)
    • 1 cup of vegetable oil

    I use oil instead of butter. Why? Because oil stays liquid at room temperature. It keeps the cake moist for days. Butter can make it get hard in the cupboard.

    To make it smell like a real bakery, use 2 teaspoons of vanilla extract and the zest of 1 lemon. If you like things a bit sour, use 3 tablespoons of lemon juice instead. Finally, grab ½ cup of whole milk.

    For that famous pink top:

    • 3 cups of confectioners’ sugar
    • 3 tablespoons of softened butter
    • 4 tablespoons of milk
    • Pink gel food coloring * Candy sprinkles

    Step-by-Step Method: A Guided Walkthrough

    1. Preparing the Foundation

    First, get your oven to 350°F. Spray your 8″ x 11″ pan with oil. Now, sift your flour, salt, cornstarch, and baking powder together. Don’t skip the sifting! It’s like giving the flour room to breathe. It makes the cake way fluffier.

    Mexican Pink Cake Ingredients Mix

    2. Creaming and Emulsifying

    In another bowl, whisk the eggs, sugar, vanilla, and oil. Keep going until it looks pale and frothy. You’re basically trapping air bubbles here. Those bubbles do the heavy lifting in the oven. Stir in that lemon zest last. It smells amazing.

    3. The Alternating Mix

    Here is the trick. Add a third of your flour mix, then half of your milk. Stir gently. Repeat this until it’s all in. Stop mixing as soon as the white flour disappears.

    If you over-mix? You get tough bread, not soft cake. The batter should look like thick heavy cream.

    4. Baking and Cooling

    Pour it in and bake for 20-25 minutes. You want the top to be light golden brown. Use a toothpick to check the center. If it comes out clean, you’re done.

    Wait! Let it cool completely. If the cake is even a little warm, your pink glaze will melt into a puddle.

    5. The Signature Pink Glaze

    Whisk your sugar, butter, milk, and vanilla. Add the pink color one drop at a time. Gel color is strong! Spread it over the cool cake and dump those sprinkles on immediately so they stick.

    Mexican Pink Cake Recipe

    Variations & Customization

    • Gluten-Free: Use a 1:1 gluten-free flour blend with xanthan gum.
    • Vegan: Use applesauce or flax eggs and almond milk.
    • Fancy Style: Slice the cake in half and put strawberry jam in the middle. It’s a total upgrade.
    Mexican Pink Cake Slices

    Serving & Storage

    Cut them into squares or the classic bakery triangles. It’s the perfect afternoon snack.

    • Storage: Keep it in a container at room temp for up to 3 days. It stays moist because of the oil.
    • Freezing: You can freeze the plain cake (no frosting) for 3 months. Just thaw it and glaze it when you’re ready.

    One last tip: Don’t put this in the fridge. The fridge is the enemy of this cake. It dries out the sponge and makes the glaze get all sticky and “sweaty.” Keep it on the counter!
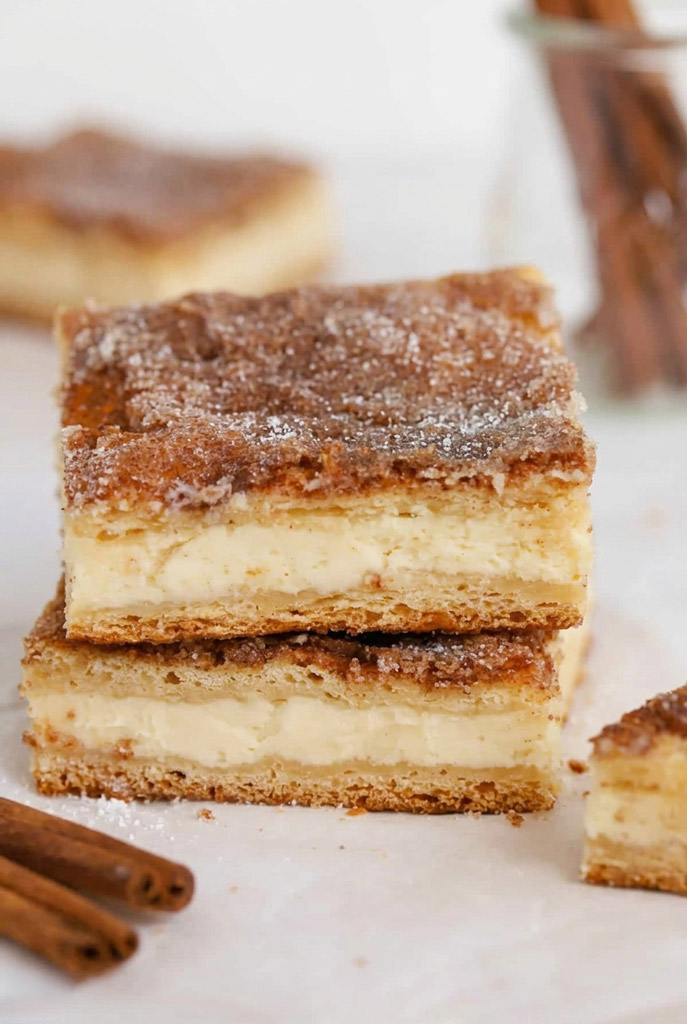
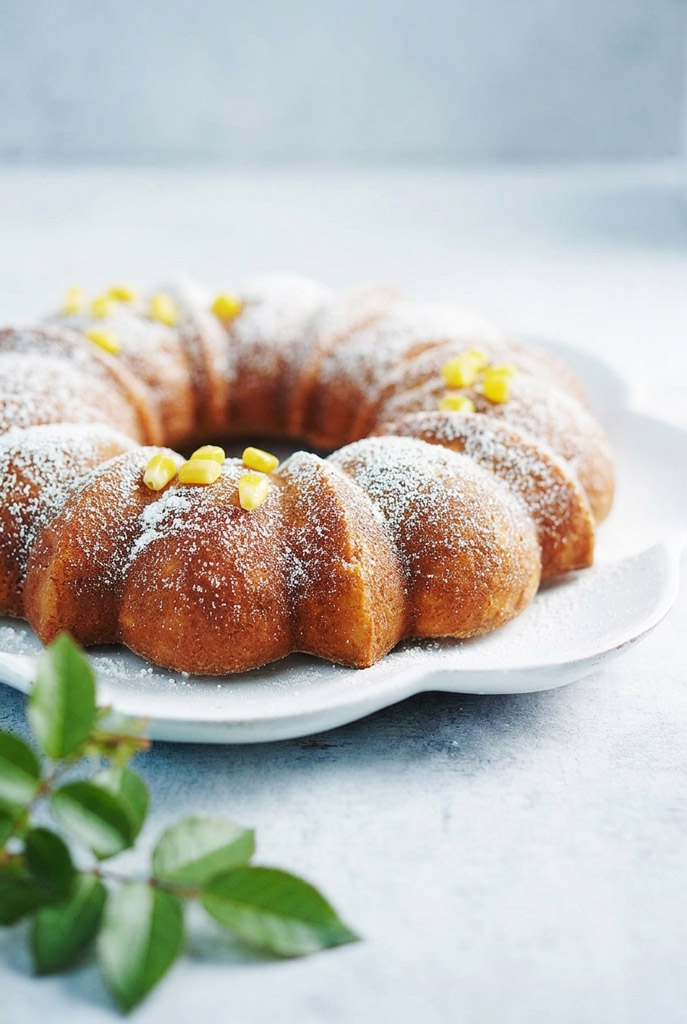
    Print

    Mexican Pink Cake Recipe (Pan Dulce Cortadillo)

    5 Stars 4 Stars 3 Stars 2 Stars 1 Star

    No reviews

    If you’ve ever stepped into a Mexican bakery and seen those bright pink, sprinkle-covered squares, you’ve found Cortadillo. This classic pan dulce is essentially a “children’s cake” (Pastel de Niño)—a light, airy sponge topped with a signature crackly glaze. It’s simple, nostalgic, and perfect for dipping into your morning coffee. My version uses a dash of cornstarch for an extra-tender crumb, making it even better than the bakery version!
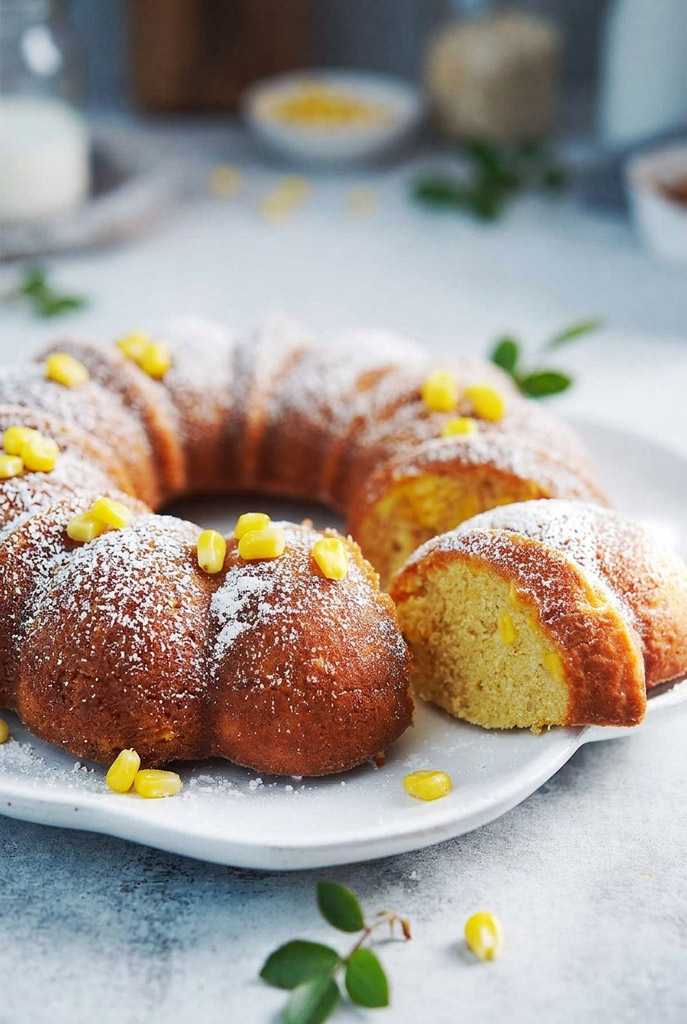
    • Author: Carlos
    • Prep Time: 25 minutes
    • Cook Time: 25 minutes
    • Total Time: 50 minutes
    • Yield: 16 slices
    • Category: Dessert / Bread
    • Cuisine: Mexican

    Ingredients

    For the Sponge:

    • All-Purpose Flour: 2 ¼ cups
    • Cornstarch: 2 tablespoons (the secret to a soft crumb)
    • Baking Powder: 3 teaspoons
    • Salt: A pinch
    • Sugar: 1 cup
    • Vegetable Oil: 1 cup
    • Large Eggs: 4 (room temperature)
    • Whole Milk: ½ cup (room temperature)
    • Vanilla Extract: 2 teaspoons
    • Lemon Zest: From 1 lemon (or 3 tbsp lemon juice)

    For the Pink Glaze:

    • Confectioners’ Sugar: 3 cups
    • Butter: 3 tablespoons (softened)
    • Whole Milk: 4 tablespoons
    • Pink Gel Food Coloring: A few drops
    • Rainbow Sprinkles: As many as your heart desires

    Instructions

    1. Prep the Oven: Heat your oven to 350°F. Grease an 8″ x 11″ baking pan.
    2. Sift Dry Ingredients: Sift your flour, cornstarch, baking powder, and salt. This removes lumps and keeps the cake light.
    3. Whisk the Wet Mix: In a large bowl, whisk eggs, sugar, oil, and vanilla until pale and frothy. Stir in the lemon zest.
    4. The Alternate Mix: Add about a third of the flour mix to the wet bowl, then half of the milk. Stir gently. Repeat until just combined. Don’t over-mix!
    5. Bake: Pour into the pan. Bake for 20-25 minutes. A toothpick in the center should come out clean.
    6. Cool Completely: Let the cake cool in the pan. If it’s warm, the glaze will melt right off.
    7. Glaze & Sprinkle: Whisk the icing ingredients until smooth. Add pink dye until you get that perfect “bakery pink.” Spread it on and immediately top with sprinkles.

    Notes

    Serving Suggestions:

    • The Classic Way: Slice into traditional triangles or squares and serve with café de olla.
    • Fancy it up: Add a dollop of whipped cream or fresh strawberries on the side.

    Tips & Tricks:

    • Room Temp Matters: Make sure your eggs and milk aren’t cold. It helps the batter emulsify for a smoother cake.
    • Oil over Butter: I always use oil here. It keeps the sponge moist and soft, even if you eat it the next day.
    • Sift, Sift, Sift: It seems like an extra step, but it’s the difference between a dense cake and a “cloud” cake.

    Storage & Reheating:

    • On the Counter: Keep it in an airtight container for up to 3 days.
    • Freezing: You can freeze the un-frosted sponge for up to 3 months. Wrap it tight!
    • Avoid the Fridge: Seriously—the fridge dries out the cake and makes the pink glaze sticky and “sweaty.” Keep it at room temperature.

    Did you make this recipe?

    Share a photo and tag us — we can’t wait to see what you’ve made!